Your data is set up — now put it to work. A first run follows this sequence (each links to a full guide):
-
Create a production run (or a single work order).
-
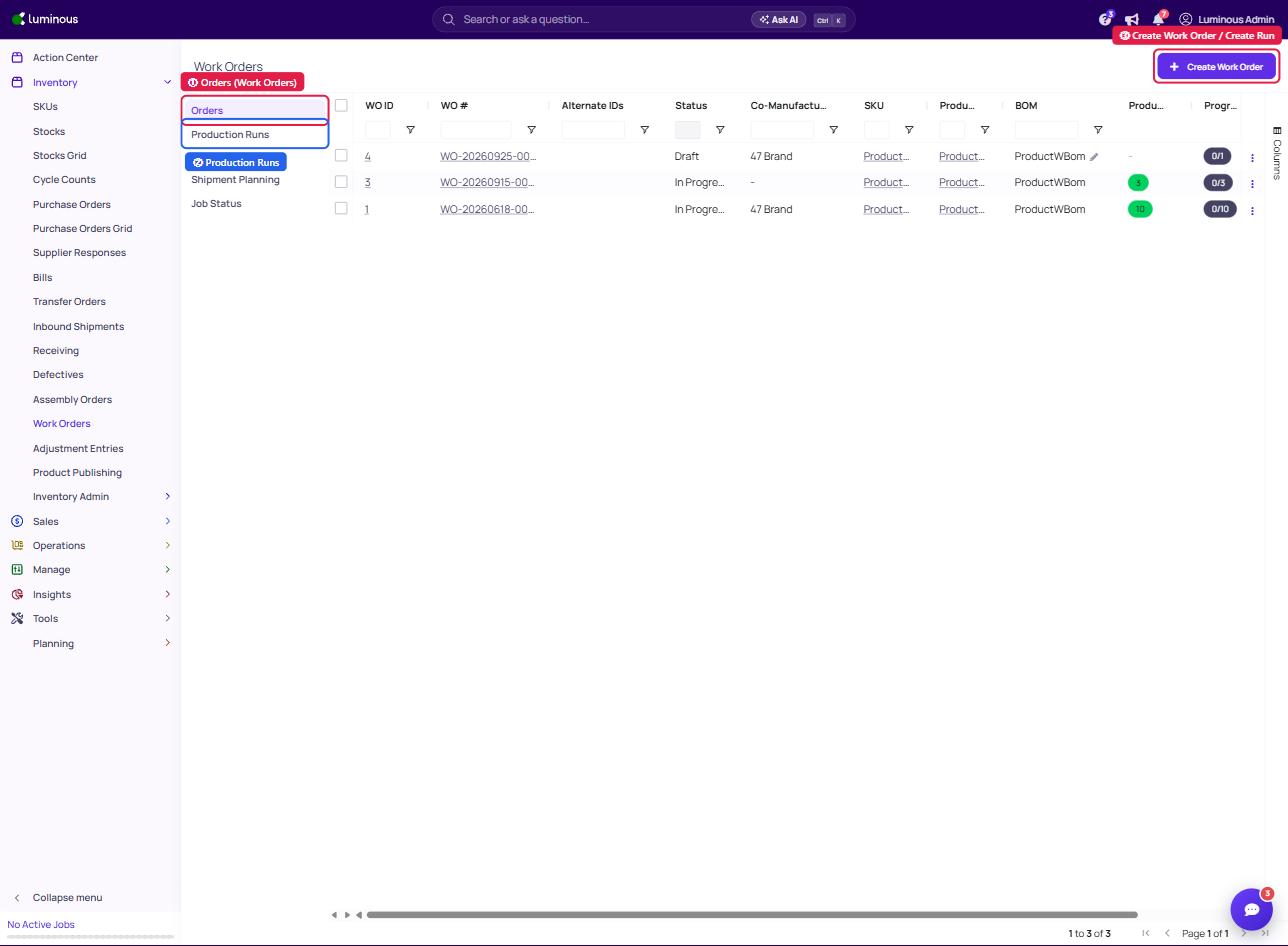
Go to Inventory → Work Orders
-
Select the Orders tab (Work Order) or the Production Runs tab (Production Run)
-
Click Create Work Order or Create Run
-
-
Review shortages and allocate incoming stock, then generate purchase orders for the rest. Background: Understand material shortages.
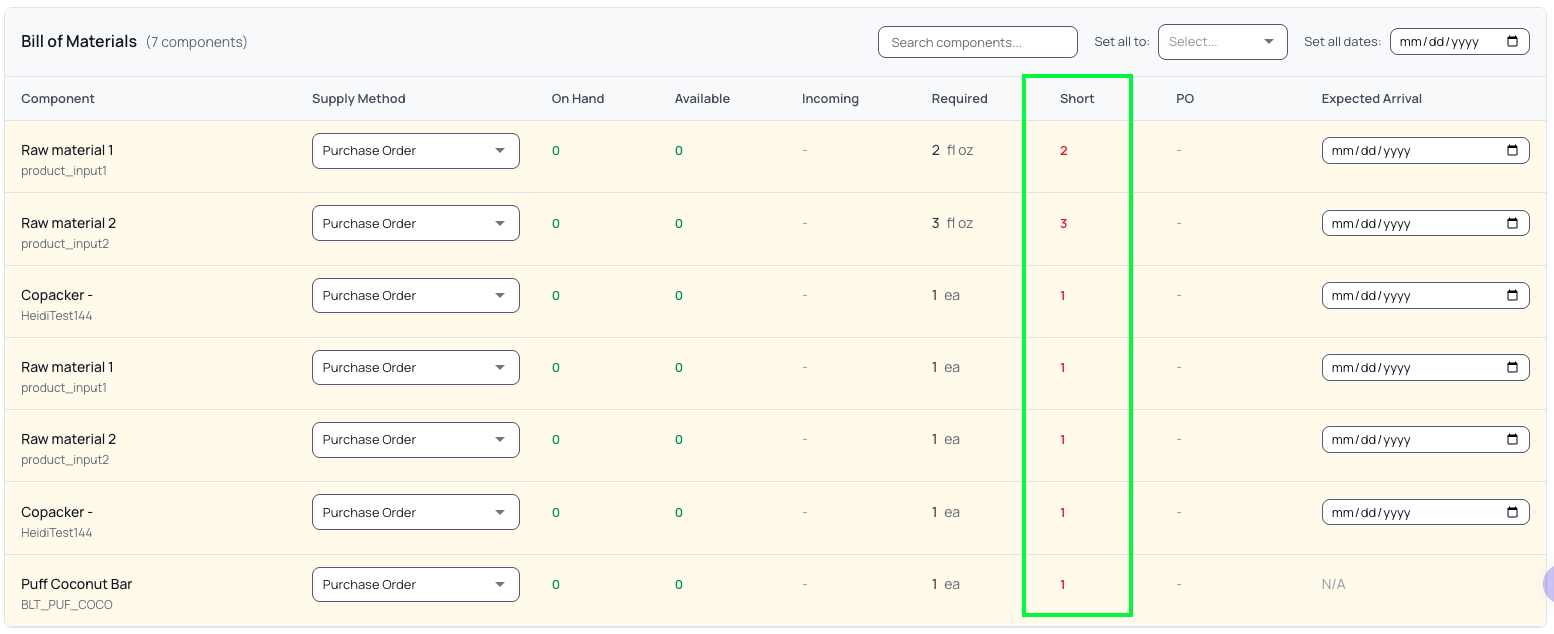
- Note: You need to Save the Work Order or Production run first before you can generate Purchase Order.
-
Receive the raw materials, then move to In Progress to commit stock. Background: Work order statuses.
-
Receiving the Purchase Raw materials - Click the Receive button.
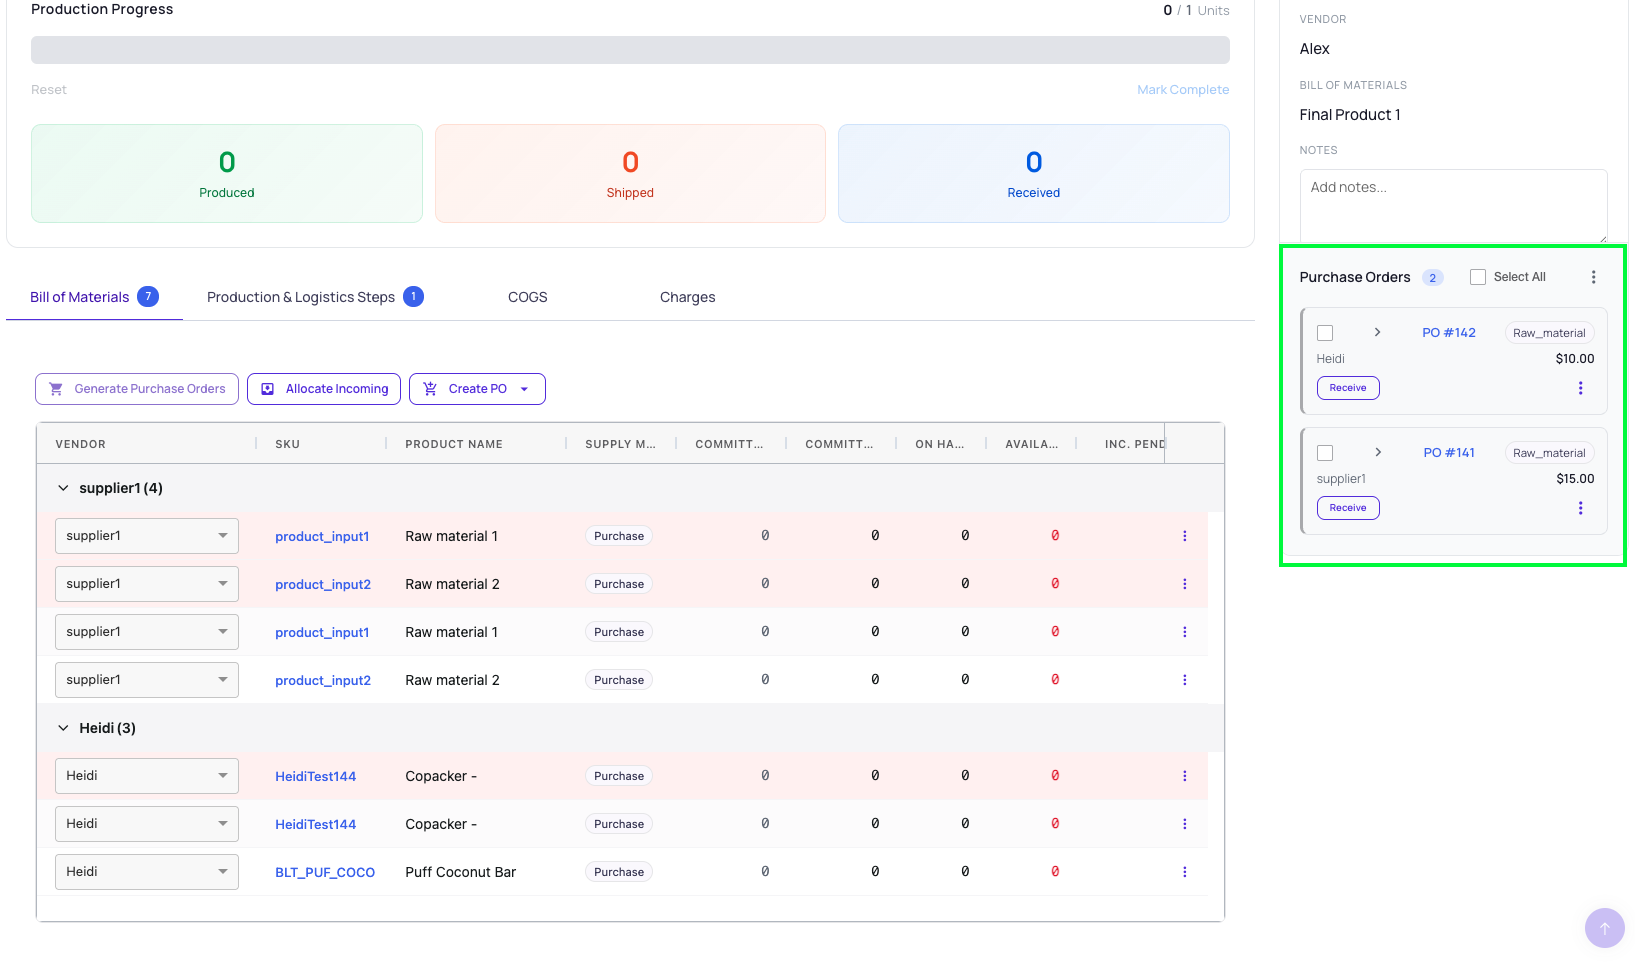
- Clicking the Receive button will automatically redirect you to Receiving Report.
-
Moving to In Progress to commit stock
-
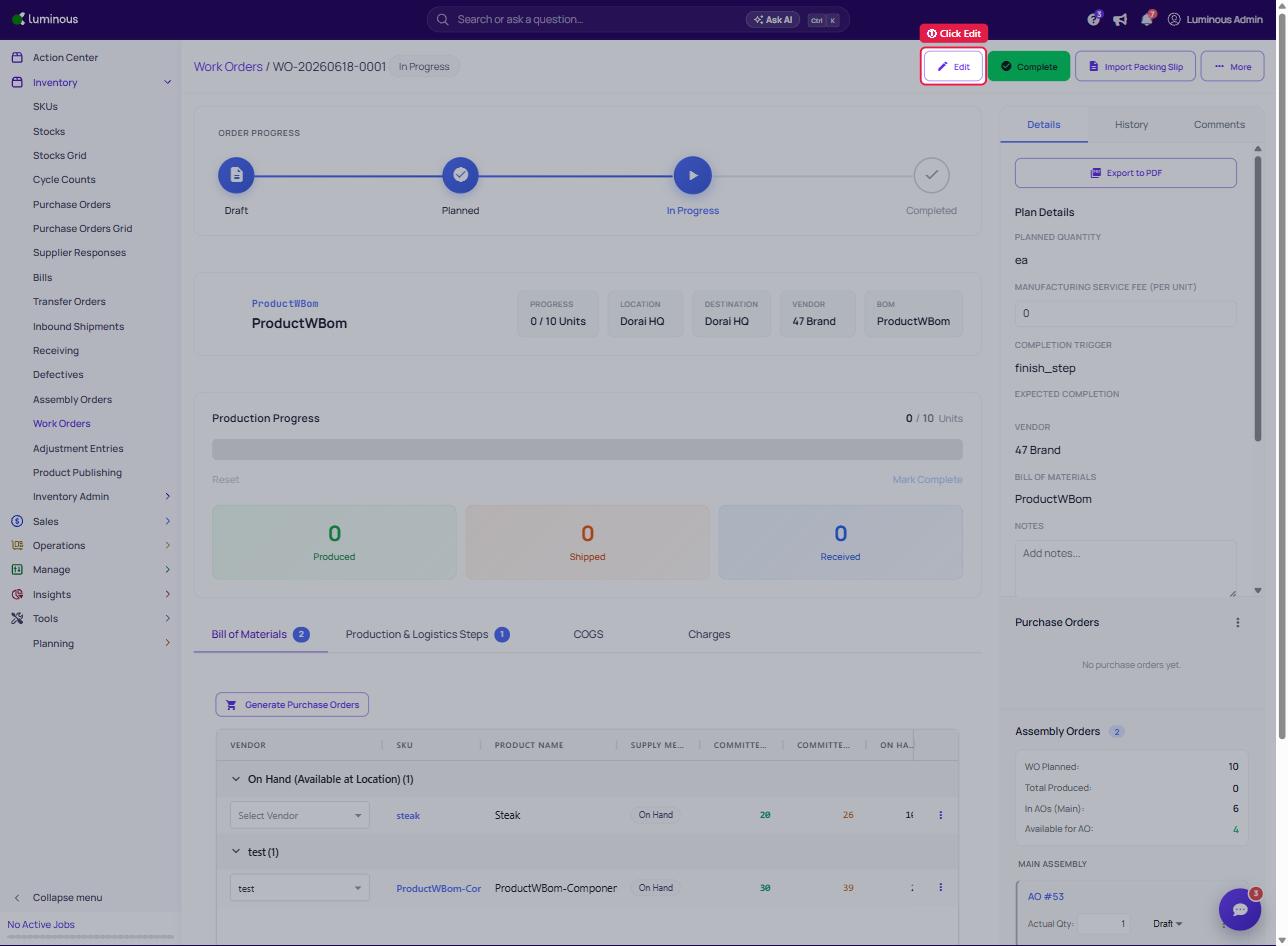
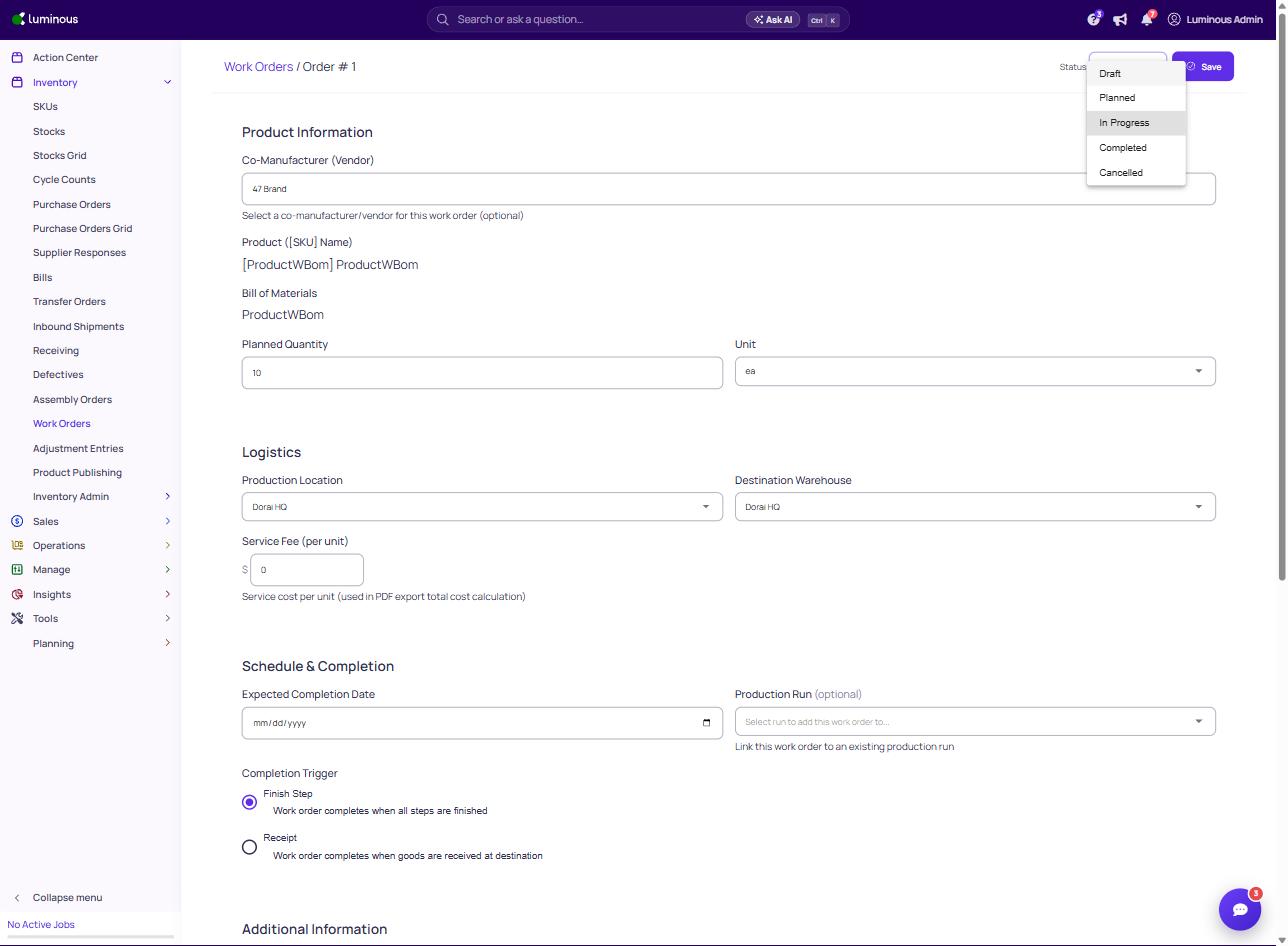
Click the Edit button
-
Click the Status - Select In Progress then save.
-
-
-
Record production with Quick Complete, then complete the assembly orders (lots & yield).
- Recording Production
-
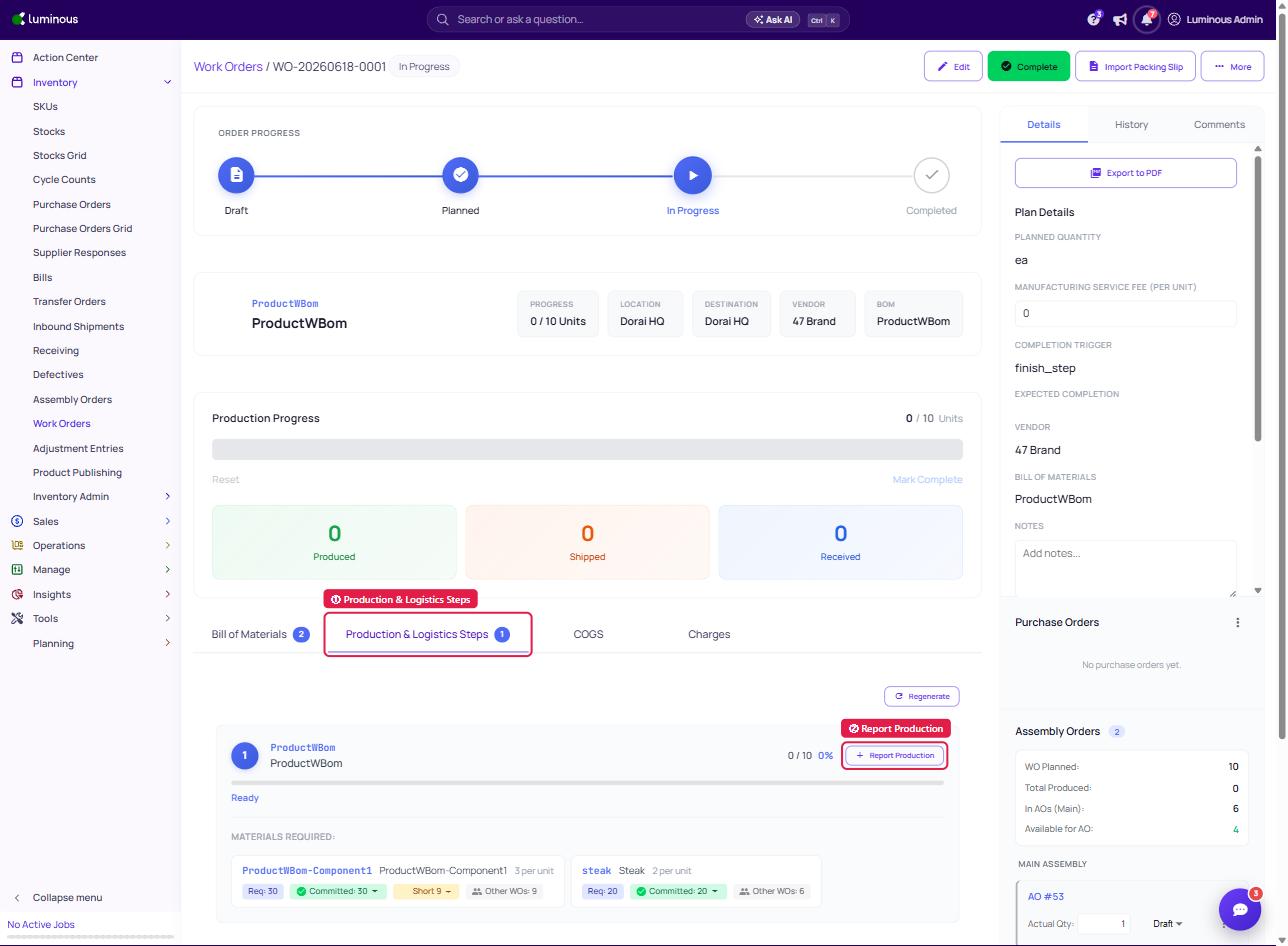
Go to the Production & Logistics Steps tab then click Report Production.
-
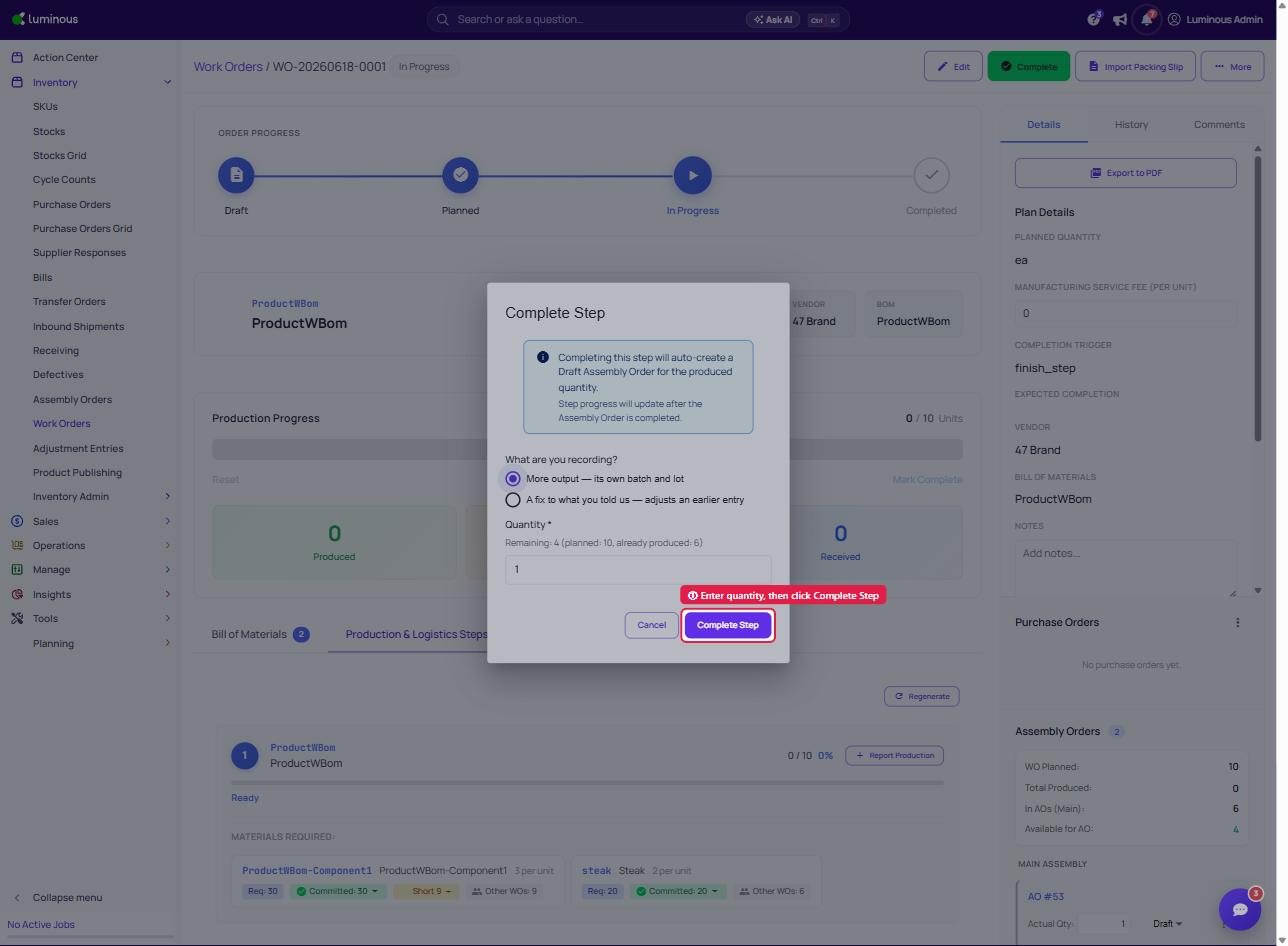
Click Complete Step to Record Production progress
-
- Completing Assembly Order
-
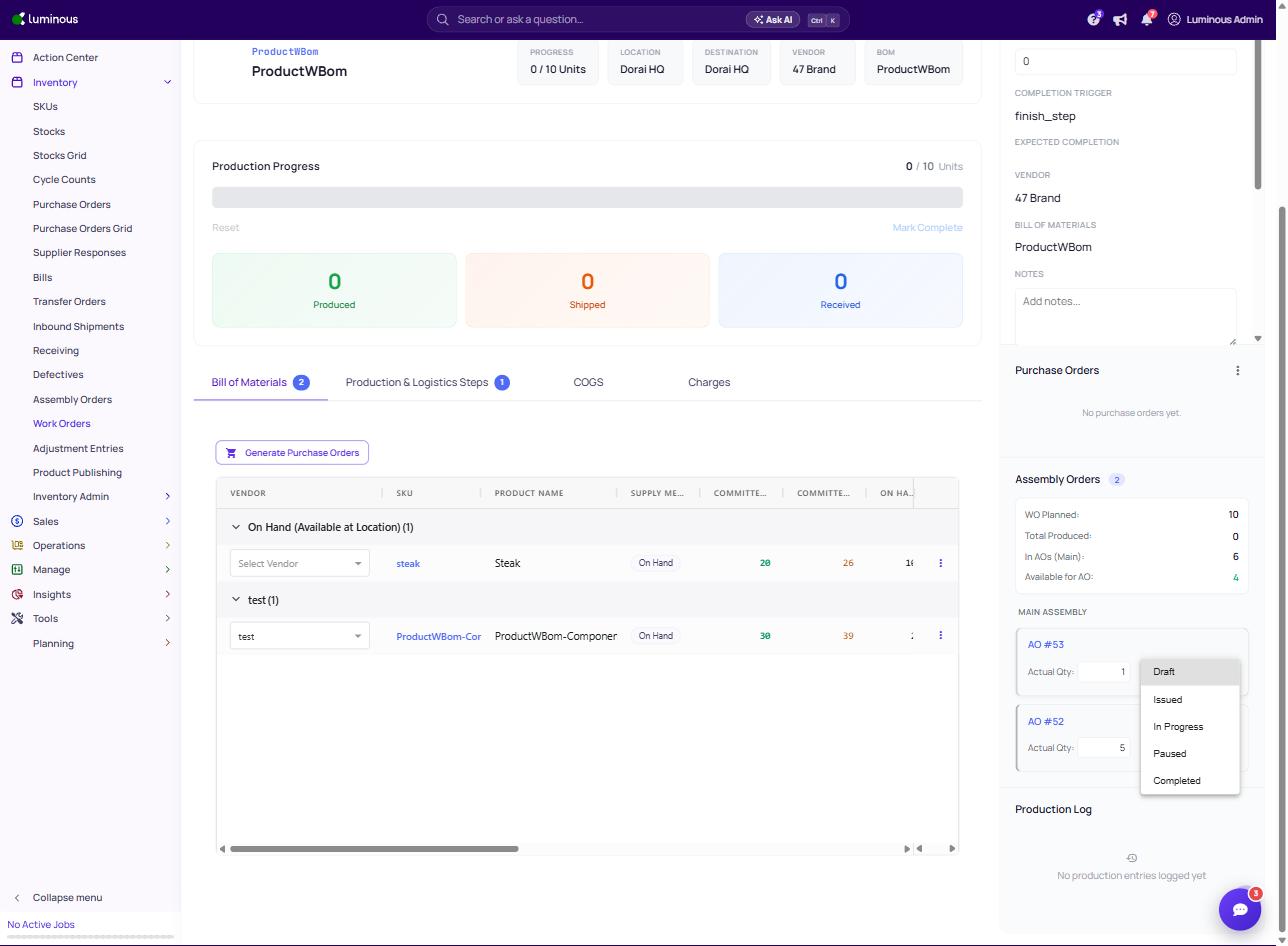
On the lower right side panel, locate the Assembly Order Section to update the Assembly Order status.
-
Click the Dropdown and change the status to completed.
-
- Recording Production
-
-
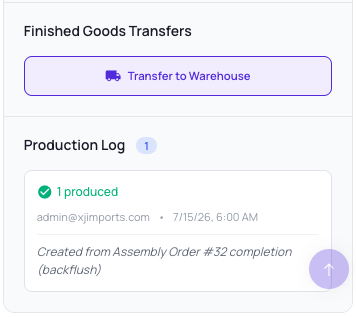
Click the Transfer to Warehouse
-
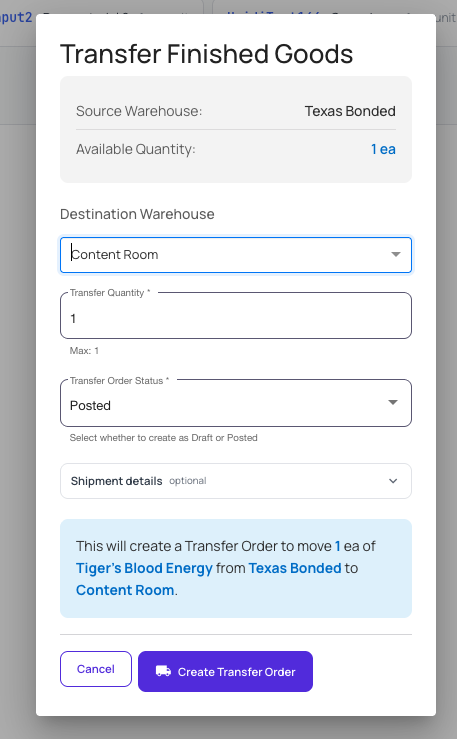
Transfer Finished Goods window will pop-up to create a Transfer Order.
-
Click Create Transfer Order.
-
-
Handy to know on your first run
- Over-production is allowed, and you can record scrap.
- The production run status is mostly informational — the work-order status carries the logic.
- You can import production from a co-manufacturer packing slip.
That's the full loop. Repeat for future runs, and use the FAQ & Troubleshooting collection when you hit a specific question.