Overview
The Fulfillment Orders grid allows custom views to better manage and track orders. Saved presets make it easy to reuse preferred filters and column layouts without needing to reconfigure the grid each time.
Presets are accessed from the left-hand panel in the same location as the Fulfillment Order status filters (e.g., All, Pending, Shipped).
This feature works similarly to the Sales Orders grid, providing a consistent experience across Luminous.
How to Save a Grid View (Preset)
-
Navigate to Operations → Fulfillment Orders
-
Apply desired filters (e.g., status, date, channel)
-
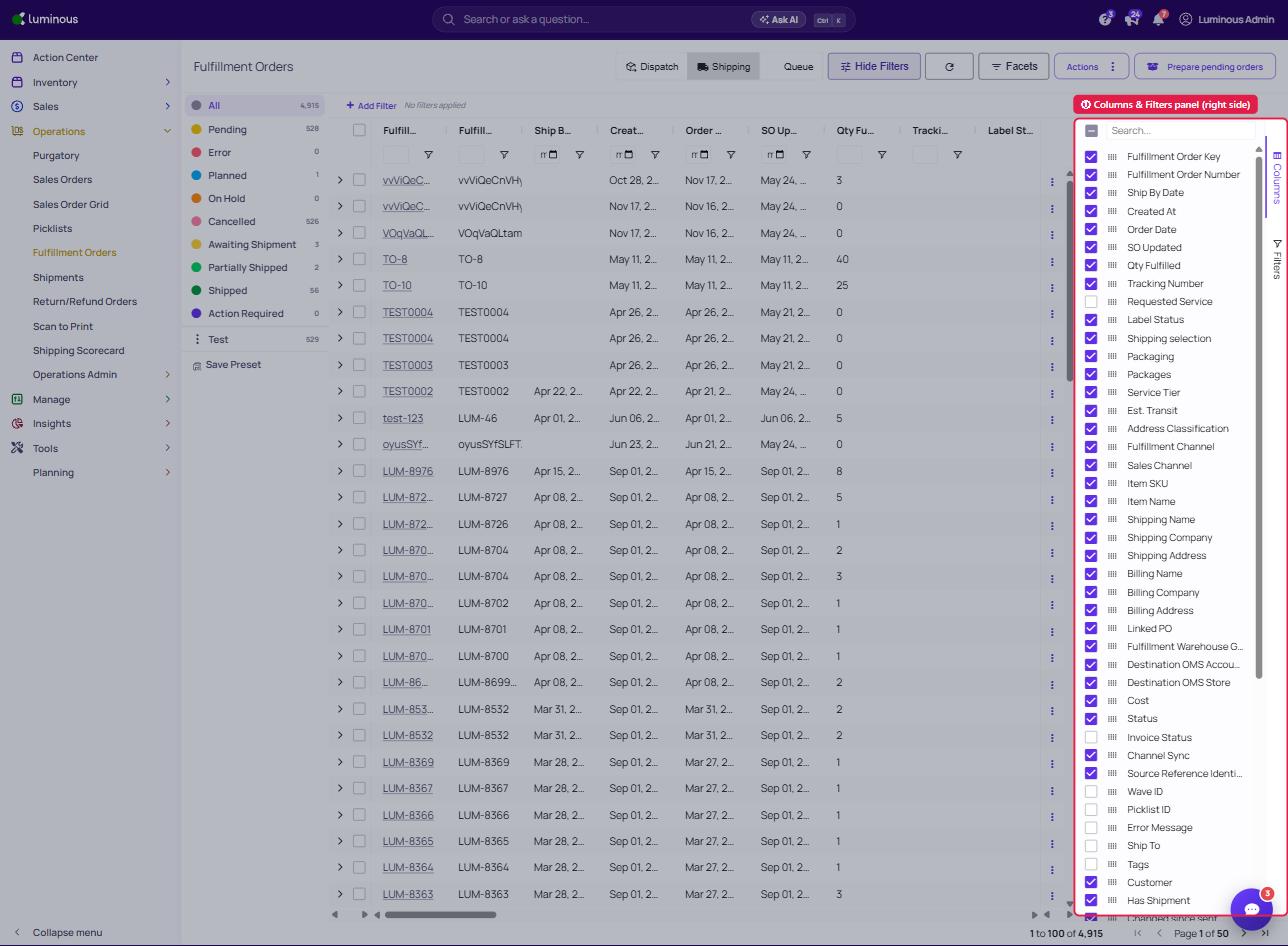
Adjust visible columns using the Columns and Filters panel
-
Located on the Right side panel
-
-
Reorder or resize columns as needed
-
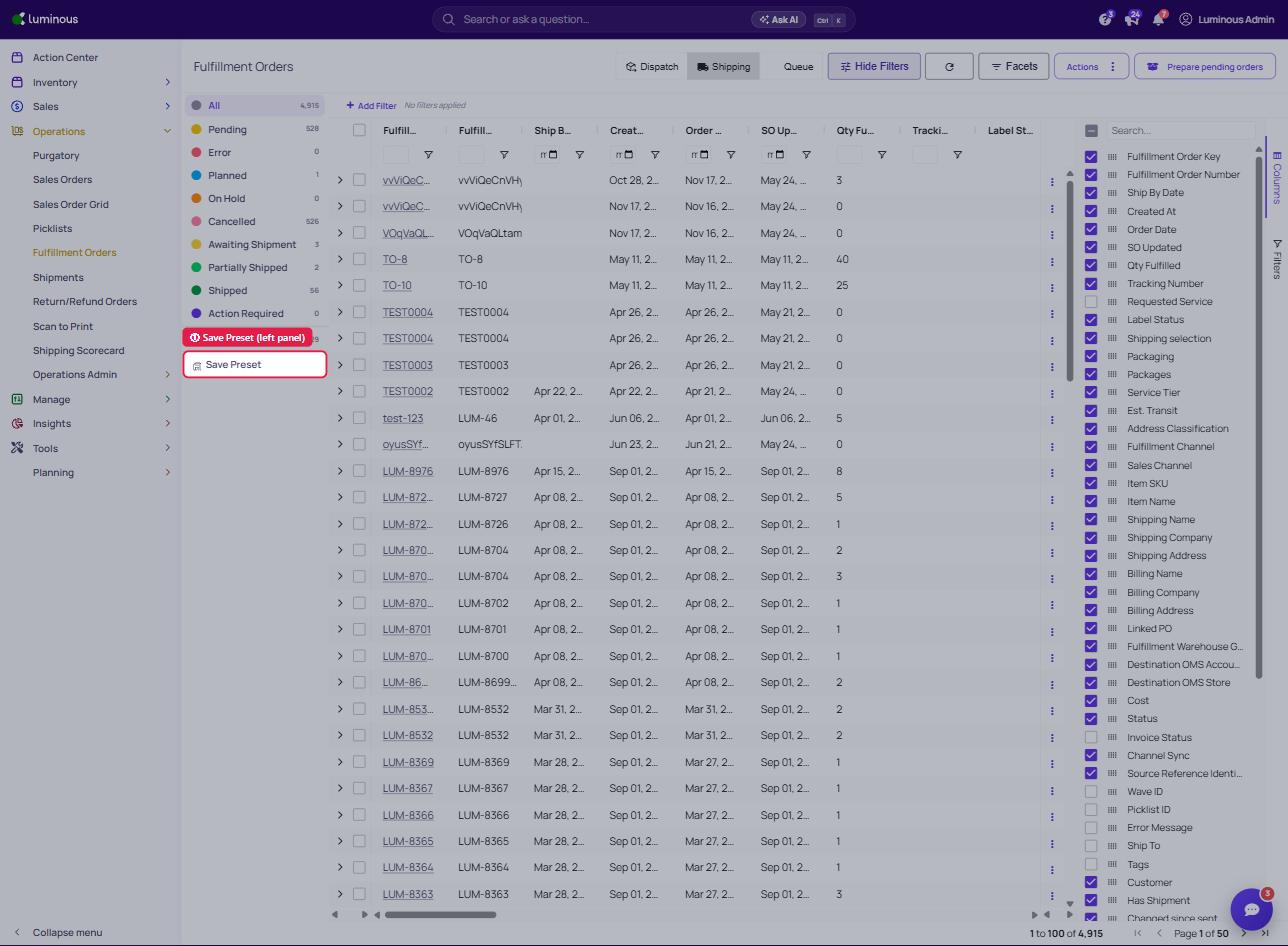
In the left-hand panel (where order statuses are listed), select Save Preset
-
Enter a name for the preset
-
Click Save
The preset will now be available in the same left-hand panel for future use.
How to Load a Saved Preset
- Open the Fulfillment Orders grid
- Navigate to Operations - Fulfillment Orders
- In the left-hand panel (same location as status filters), locate saved presets
- Select a preset from the list
The grid will update automatically with the saved filters and column configuration.
What Gets Saved in a Preset
Saved presets include:
- Applied filters
- Visible columns
- Column order
- Column widths (if adjusted)
- Sorting preferences
Tips
- Use presets to quickly switch between workflows (e.g., “Pending Orders”, “Shipped Today”)
- Keep preset names clear and descriptive for easy selection
- Align preset naming across team members for consistency
FAQs
Why don’t changes appear after selecting a preset?
Ensure the correct preset is selected. If filters were recently updated, reload the preset.
Can presets be edited or deleted?
Presets can be updated by saving over an existing name. Deletion options depend on user permissions.
Need Help?
If presets are not saving or loading correctly, contact the support team for assistance.