This guide provides a clear, step-by-step walkthrough for using the Import/Export Line Items feature when creating a shipment for a Purchase Order (PO).
When to Use This Feature
Use import/export when:
- A PO has many line items
- Creating a partial shipment
- Bulk entering or adjusting quantities
- Manual entry would be time-consuming or error-prone
Step-by-Step Walkthrough
Step 1: Create a Shipment from a PO
- Navigate to Inventory > Purchase Orders from the main menu.
- Locate and open the relevant Purchase Order.
- In the PO window, click Actions > Create Shipment.
- The Shipment Creation screen will load, displaying all available PO line items for allocation.
- Confirm the PO and continue with shipment details as needed.
Step 2: Export Line Items
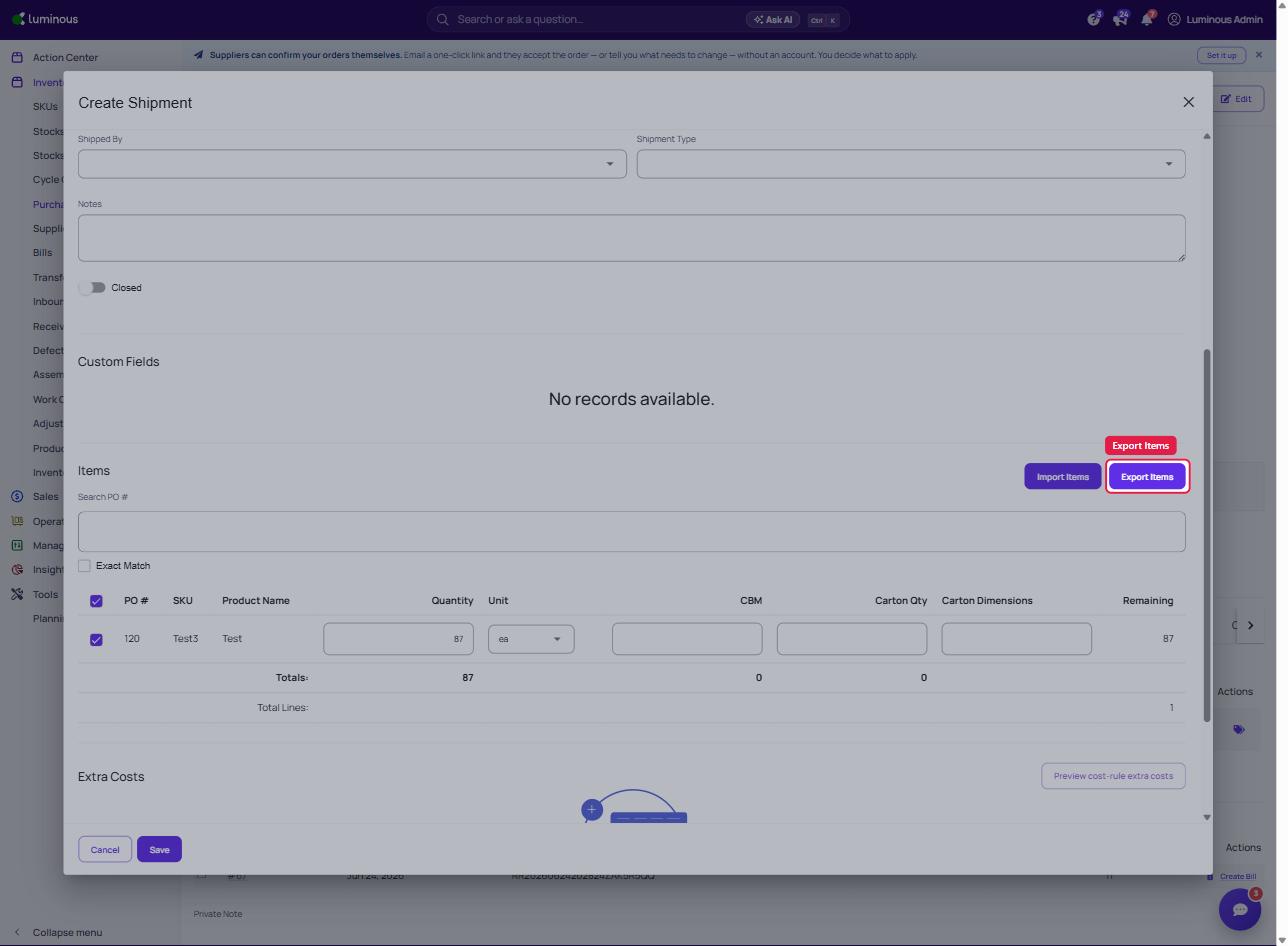
- Click Export Items.
- The file will automatically download.
Use this file to:
-
Review PO line items
-
Enter shipment quantities
-
Prepare data for bulk upload
Step 3: Update the File
- Open the exported file.
- Enter the quantities to be shipped for each line item.
- Save the file.
Step 4: Import Line Items
- Return to the Shipment Creation screen.
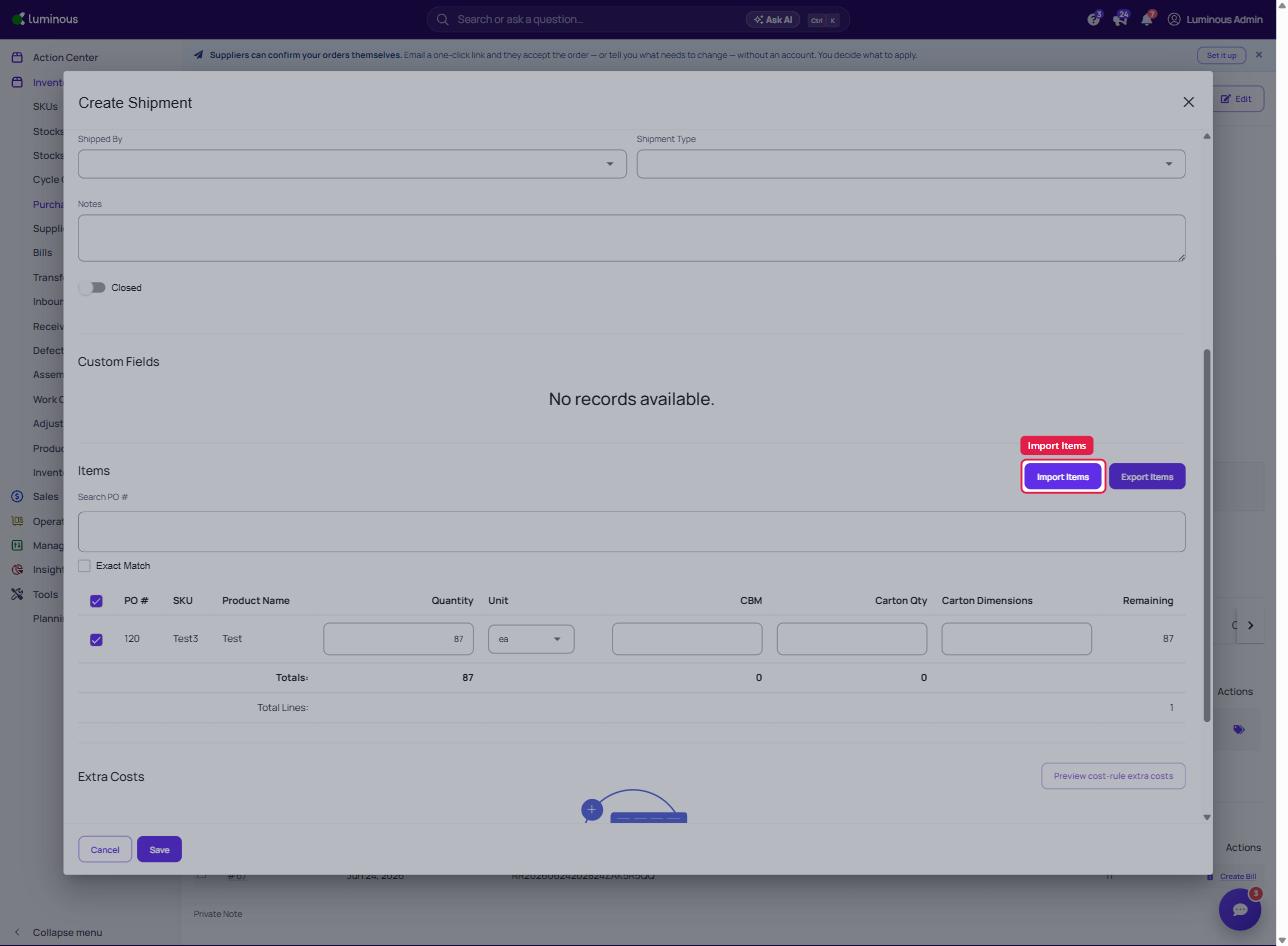
- Click Import Items.
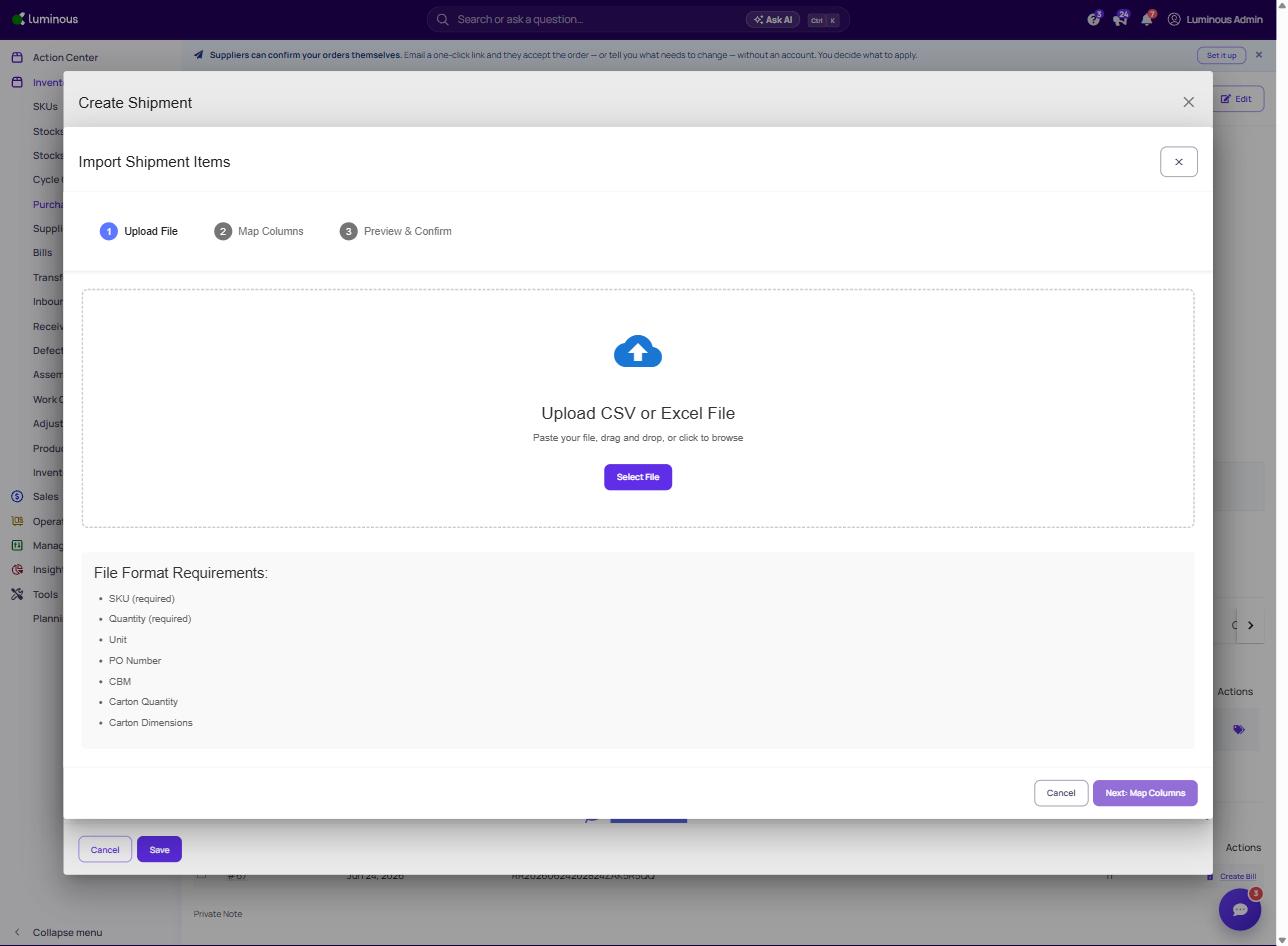
- Upload the completed file.
The system will:
- Map line items to the PO
- Allocate shipment quantities
- Validate quantities automatically
The system will:
- Map line items to the PO
- Allocate shipment quantities
- Validate quantities automatically
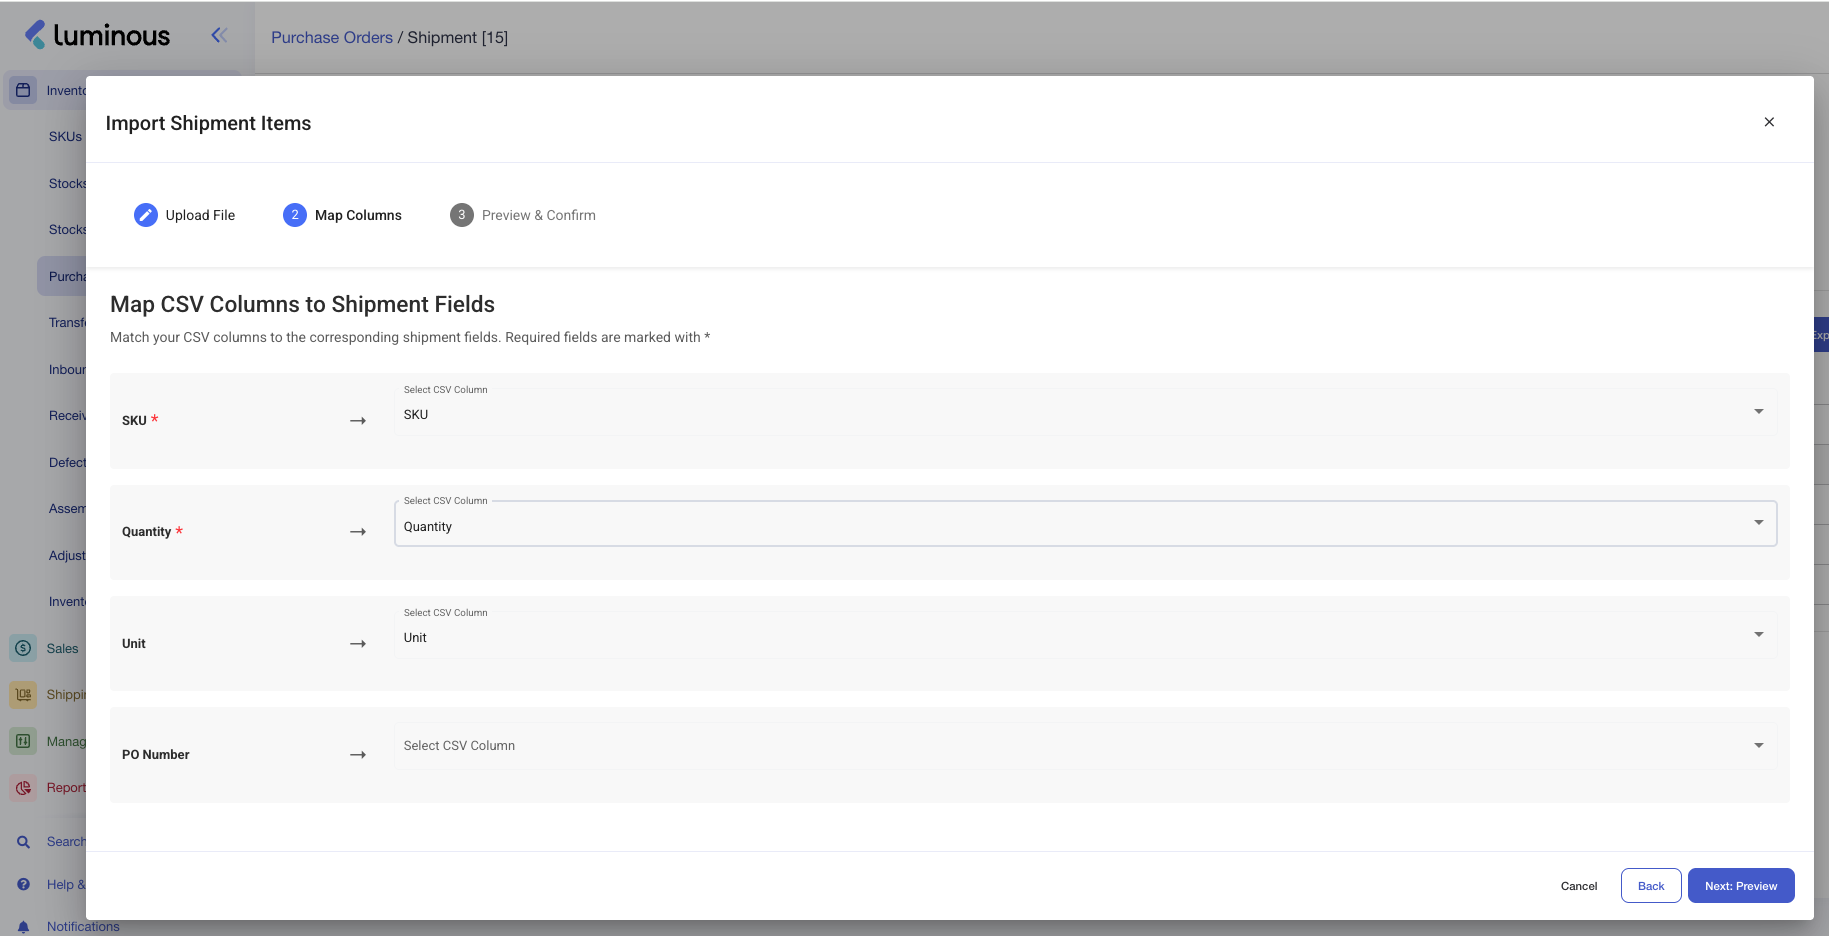
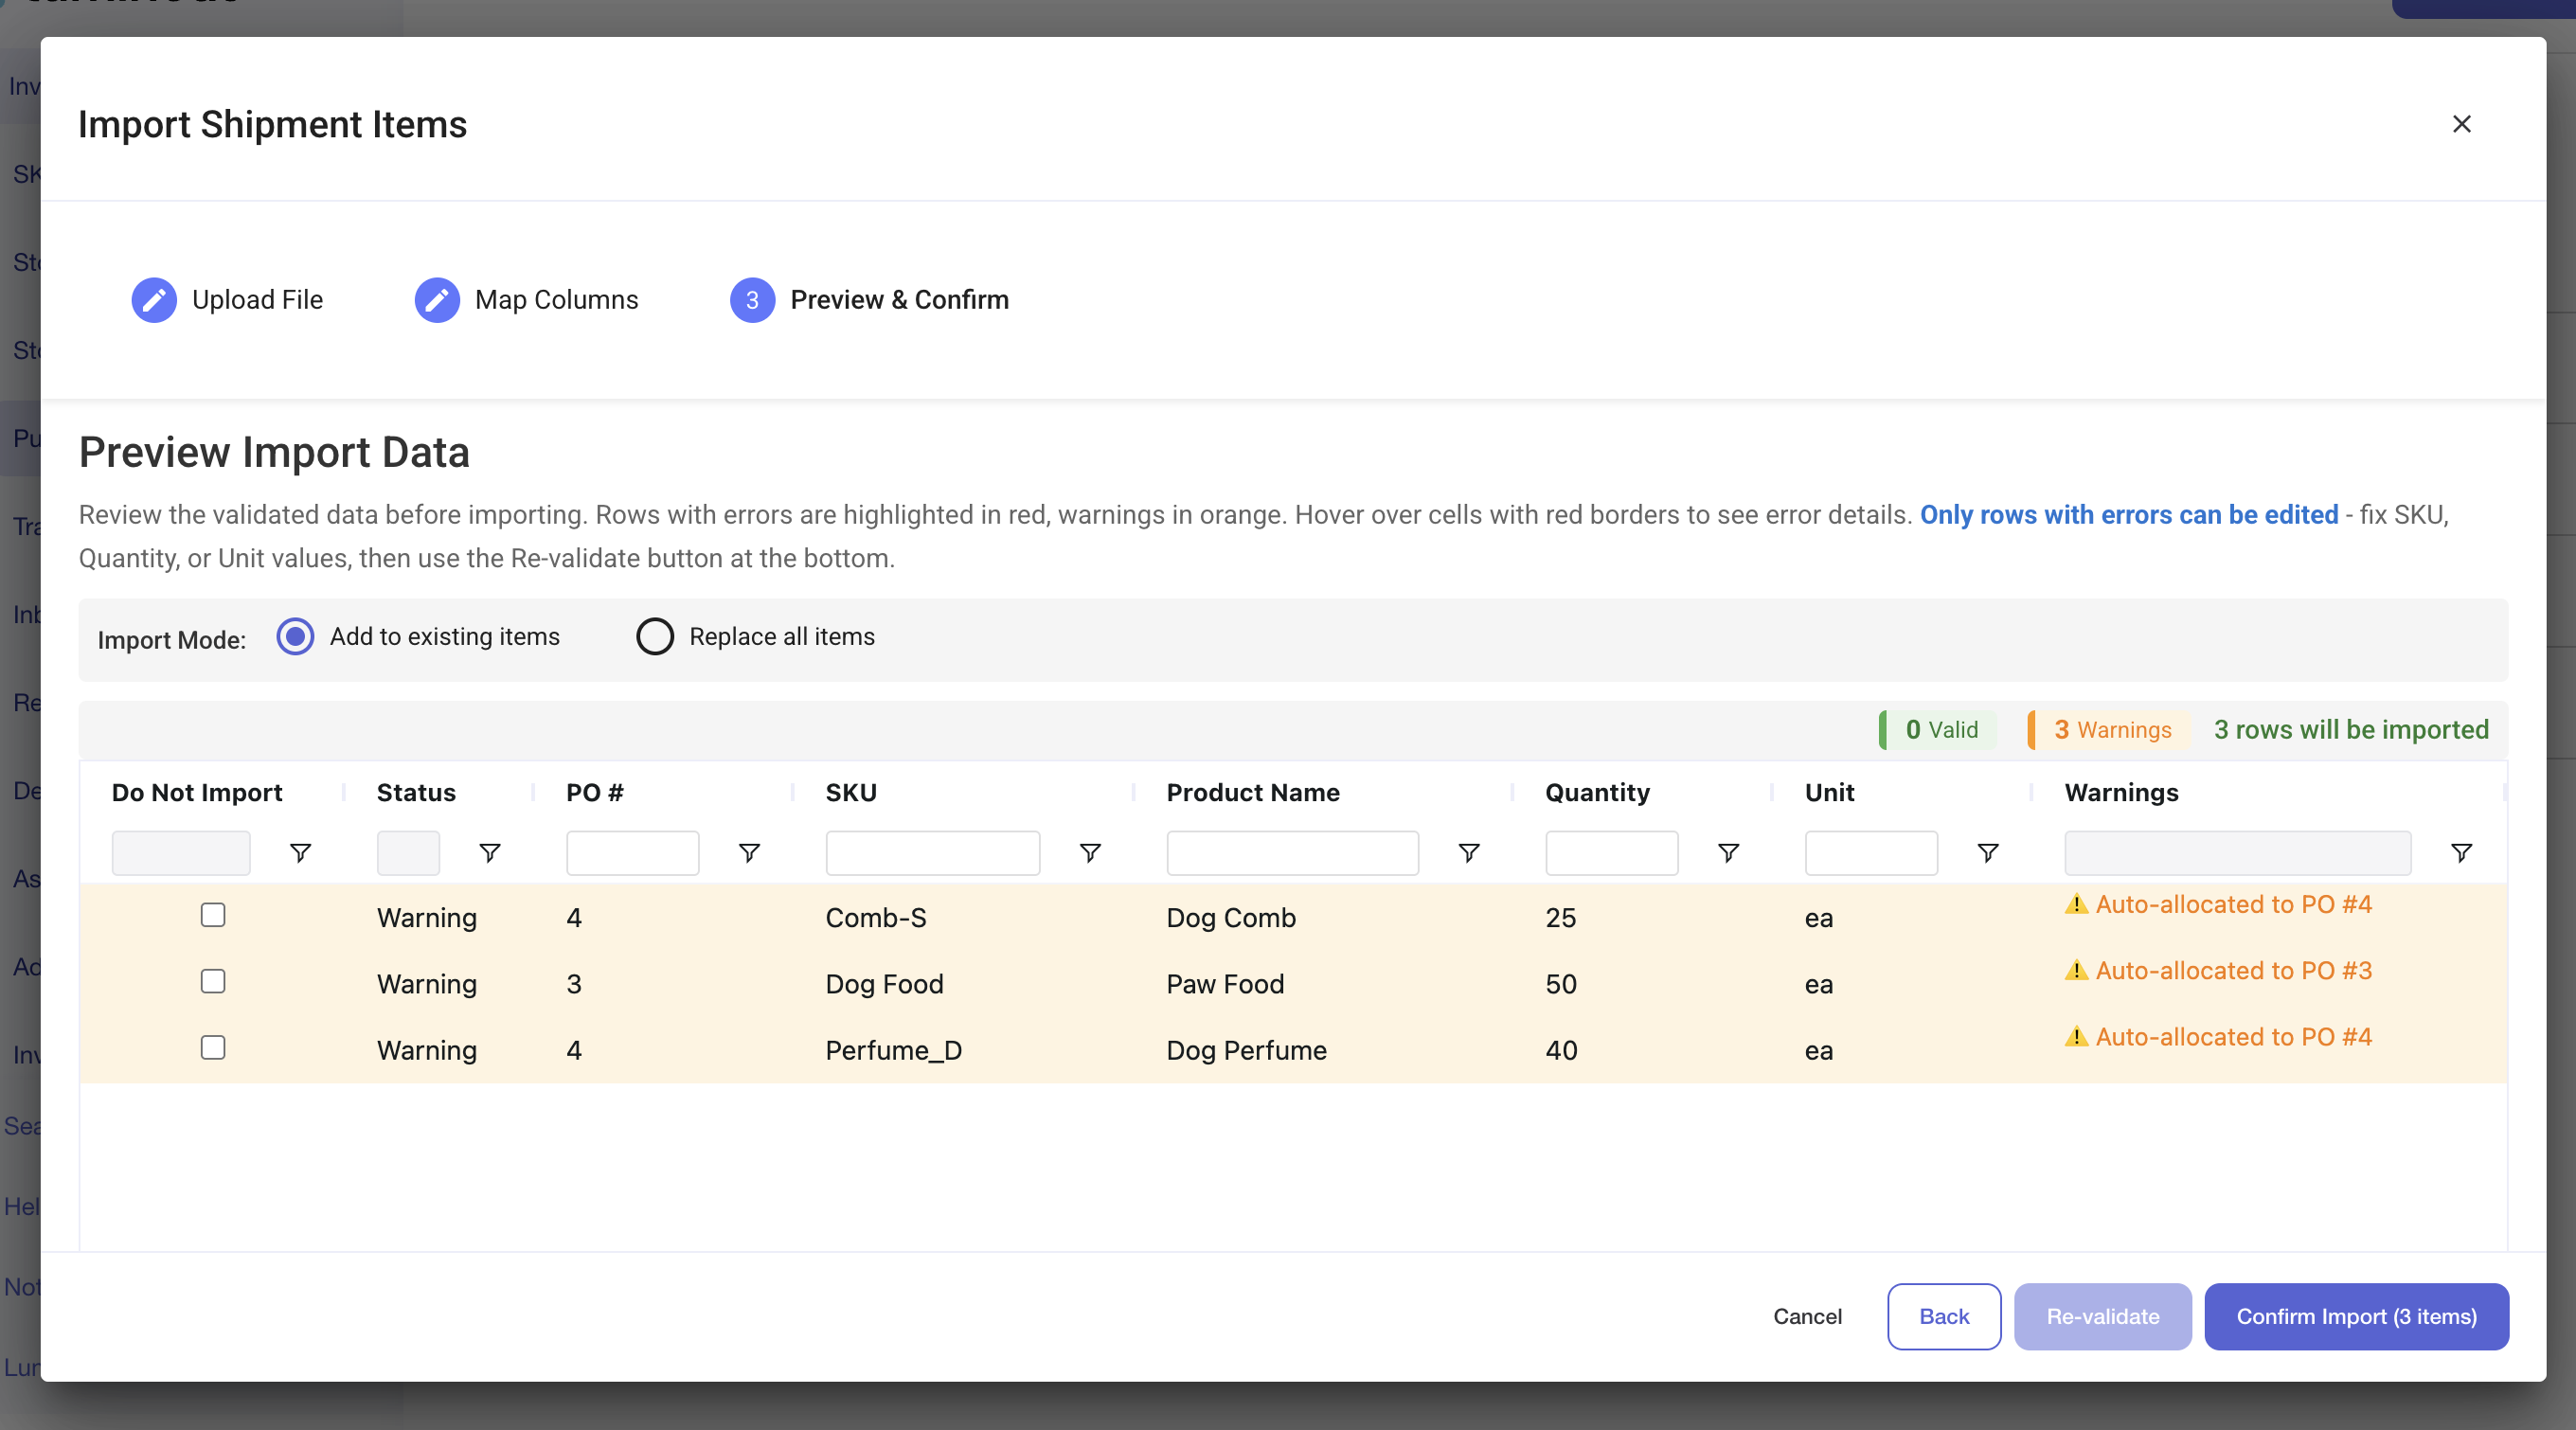
If you did not select any PO when mapping the system will Auto-allocate. Below is the detailed explanation:
How Import Auto-Allocation Works
Allocation behavior depends on whether a PO was selected before importing.
Scenario 1: Importing After Selecting a PO
If a PO is selected before importing:
- Quantities are allocated directly to that specific PO.
- The system validates that quantities do not exceed what remains to be shipped.
- If quantities exceed available amounts, validation errors will appear.
Scenario 2: Importing Without Selecting a PO
If items are imported without selecting a PO, the system automatically allocates quantities using an oldest-first method.
Step 1: Finding Eligible POs
The system looks for POs that:
- Include the imported SKU
- Are active
- Still have remaining quantities to be shipped
Step 2: Sorting by Age
Eligible POs are sorted by creation date (oldest first).
Step 3: Filling Orders
- The system starts with the oldest PO.
- It allocates the quantity needed to complete that PO.
- If additional quantity remains, it moves to the next oldest PO.
- This continues until:
- The imported quantity is fully allocated, or
- No additional eligible POs remain.
Example: How Allocation Is Split
200 units of “Widget A” are imported without selecting a PO.
Existing Purchase Orders:
- Order #5 (oldest): needs 50 units
- Order #8: needs 80 units
- Order #9: needs 100 units
Allocation result:
- 50 units → Order #5 (fully filled)
- 80 units → Order #8 (fully filled)
- 70 units → Order #9 (partially filled)
The 200 units are automatically split across three POs, oldest first.
Step 5: Review Validation Results
After importing:
- Valid rows will populate the shipment.
- Invalid rows will display error messages.
If errors appear:
- Correct the file
- Re-import until all validations pass
Step 6: Review Shipment Allocation
Before saving the shipment:
- Confirm all intended line items are included.
- Verify quantities are correct.
- Ensure allocations align with PO expectations.