Overview
This guide explains how to set up revenue accounts and map them to QuickBooks Online (QBO) so invoices sync correctly.
QuickBooks requires each invoice line to use a product or item tied to a General Ledger (GL) account. Luminous uses revenue account mapping to ensure invoices post to the correct account automatically.
Why This Setup Is Important
- Ensures revenue is recorded in the correct General Ledger account
- Reduces manual corrections after sync
- Keeps financial reporting consistent
- Allows flexible defaults (global, channel, invoice-level)
Step 1: Create Revenue Accounts (Chart of Accounts)
Navigate to:
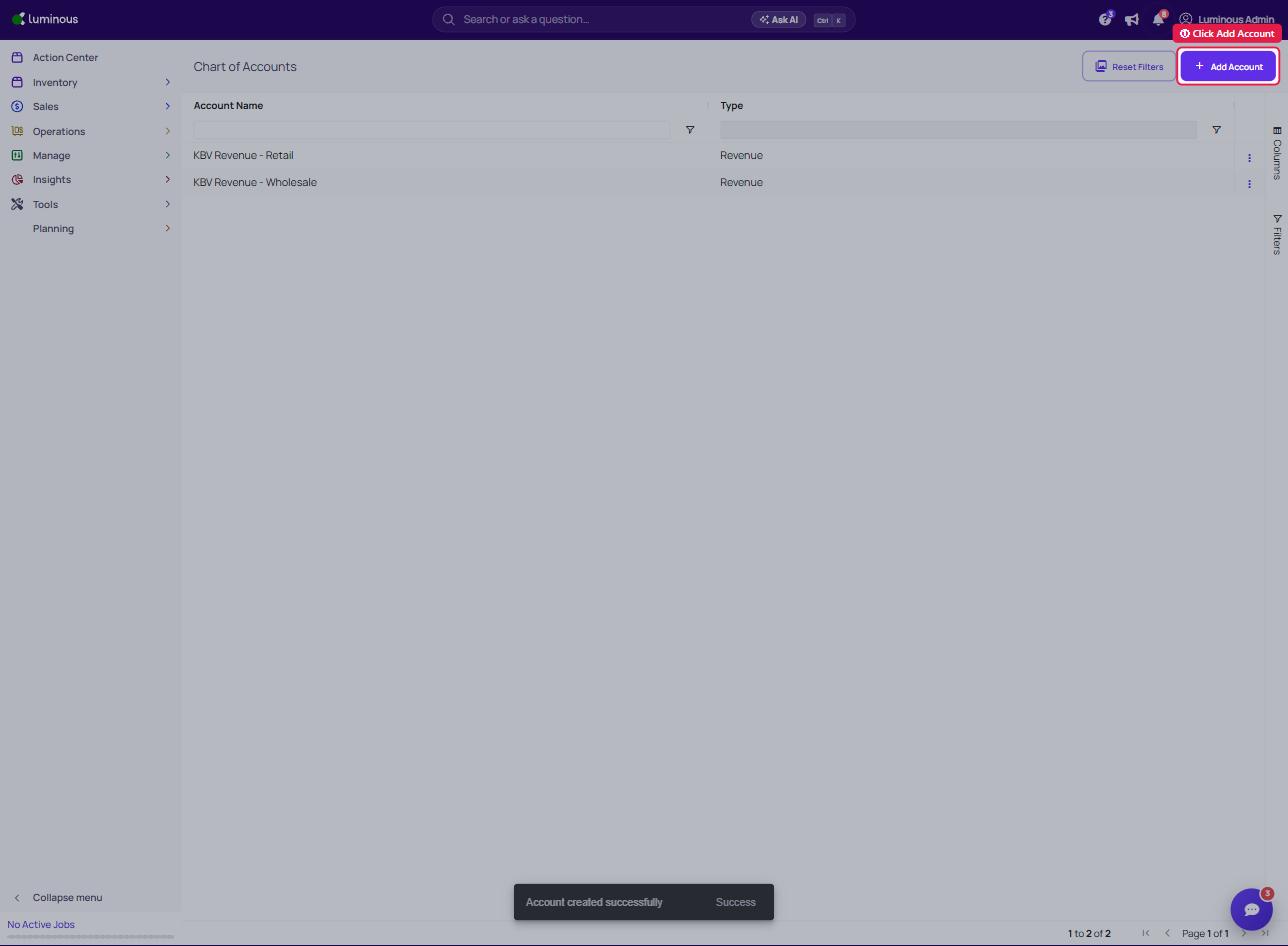
Go to Manage → Chart of Accounts
Steps:
- Click Add Account
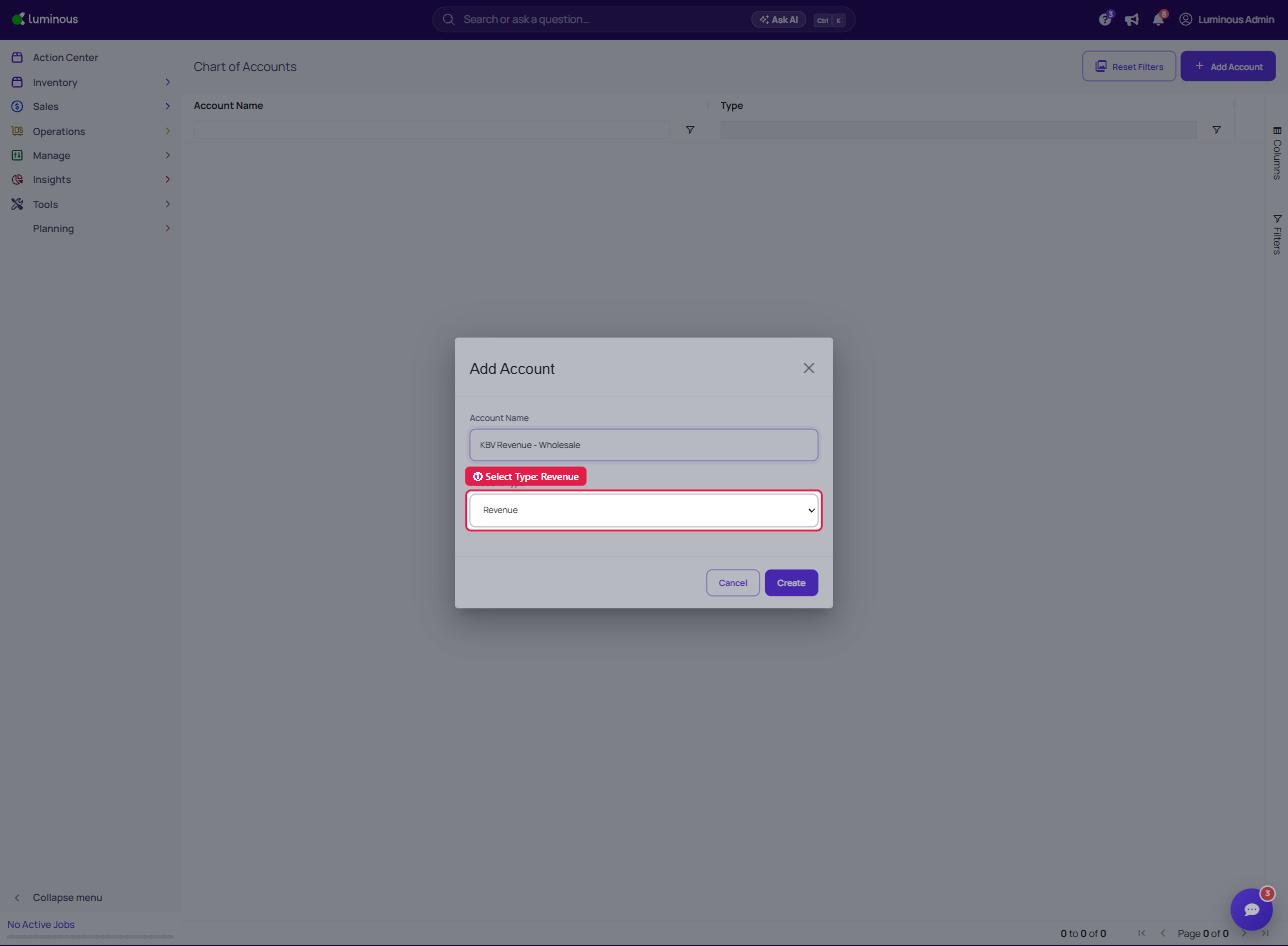
- Enter an Account Name
- Select Type:
- From the dropdown select Revenue
- Click Create
Step 2: Set a Global Default Revenue Account
Navigate to:
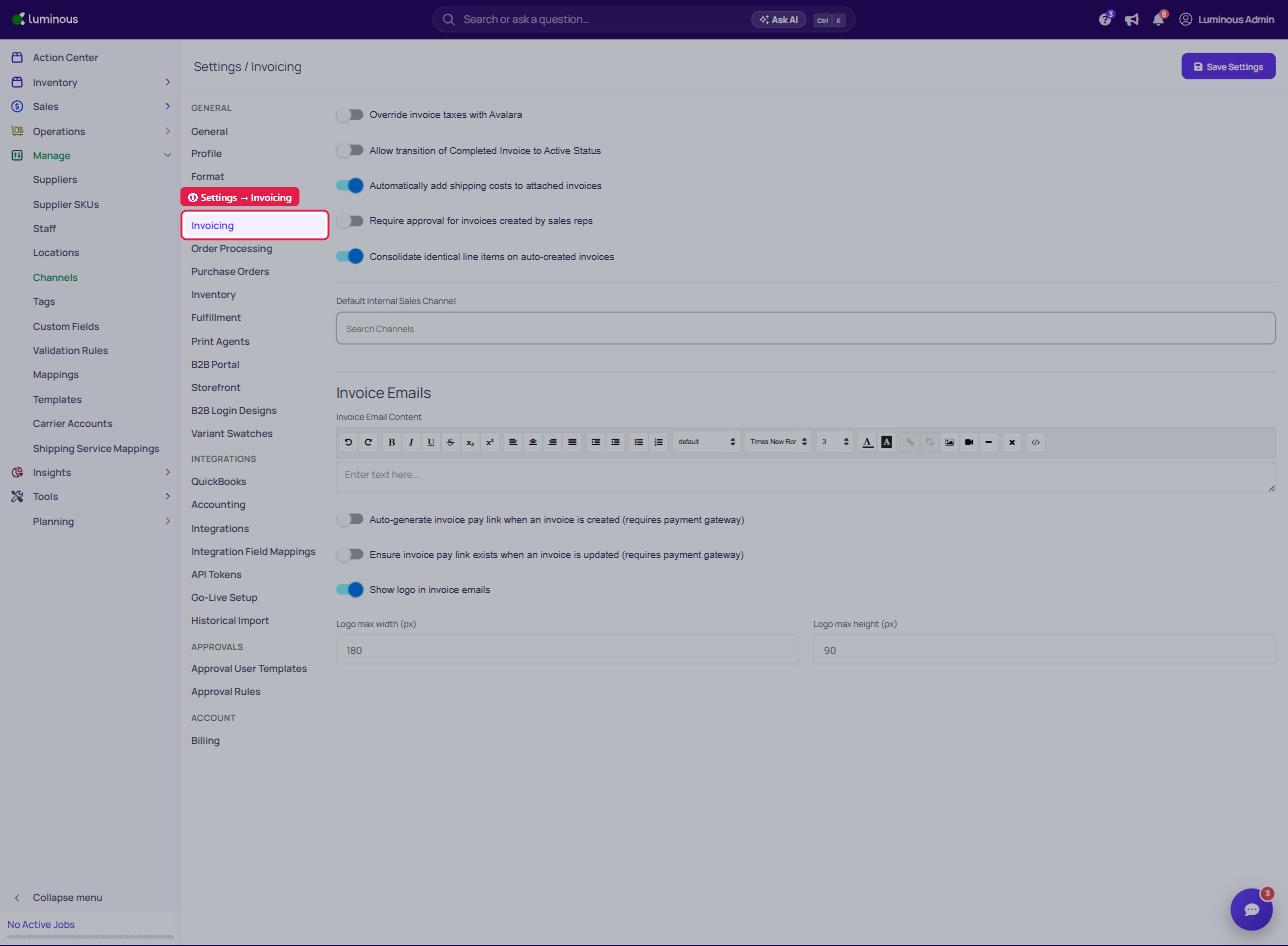
Go to Settings → Invoicing (open Settings from the user menu at the top right)
Steps:
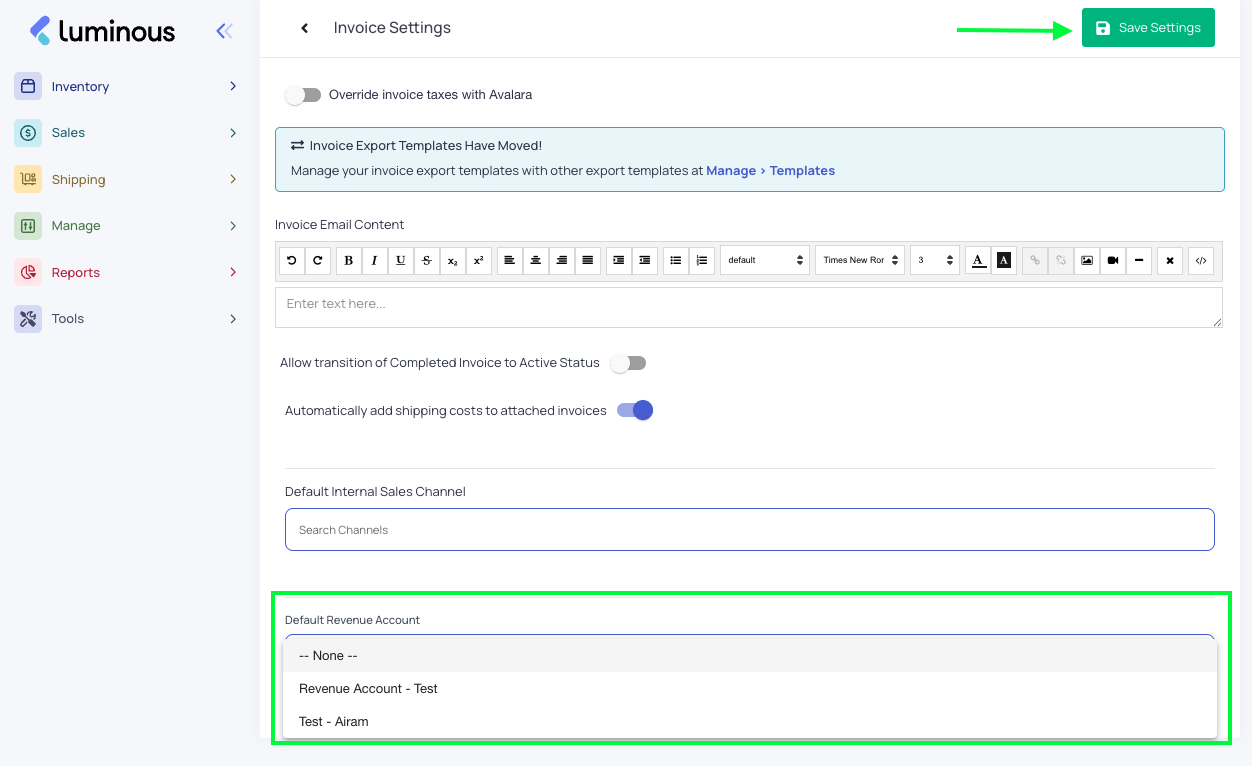
- Locate Default Revenue Account
- Select a revenue account
- Note: Ensure you add account on "Chart of Accounts" first.
- Click Save Settings
Note:
Used as a fallback when no other account is set.
Step 3: Configure Revenue by Sales Channel (Optional)
Navigate to:
Go to Manage → Channels
Steps:
-
Select a sales channel to configure
- Click three dots to edit or
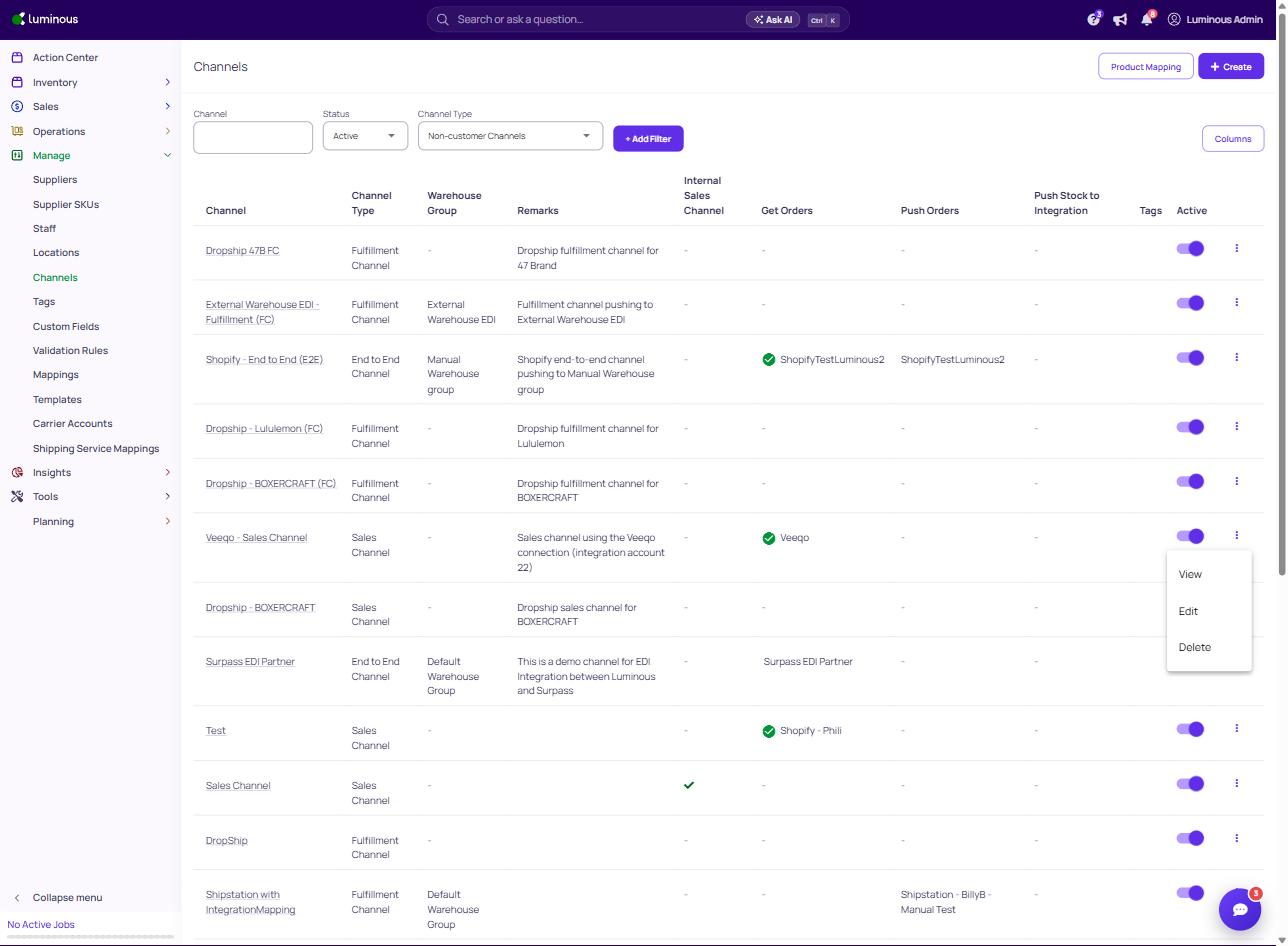
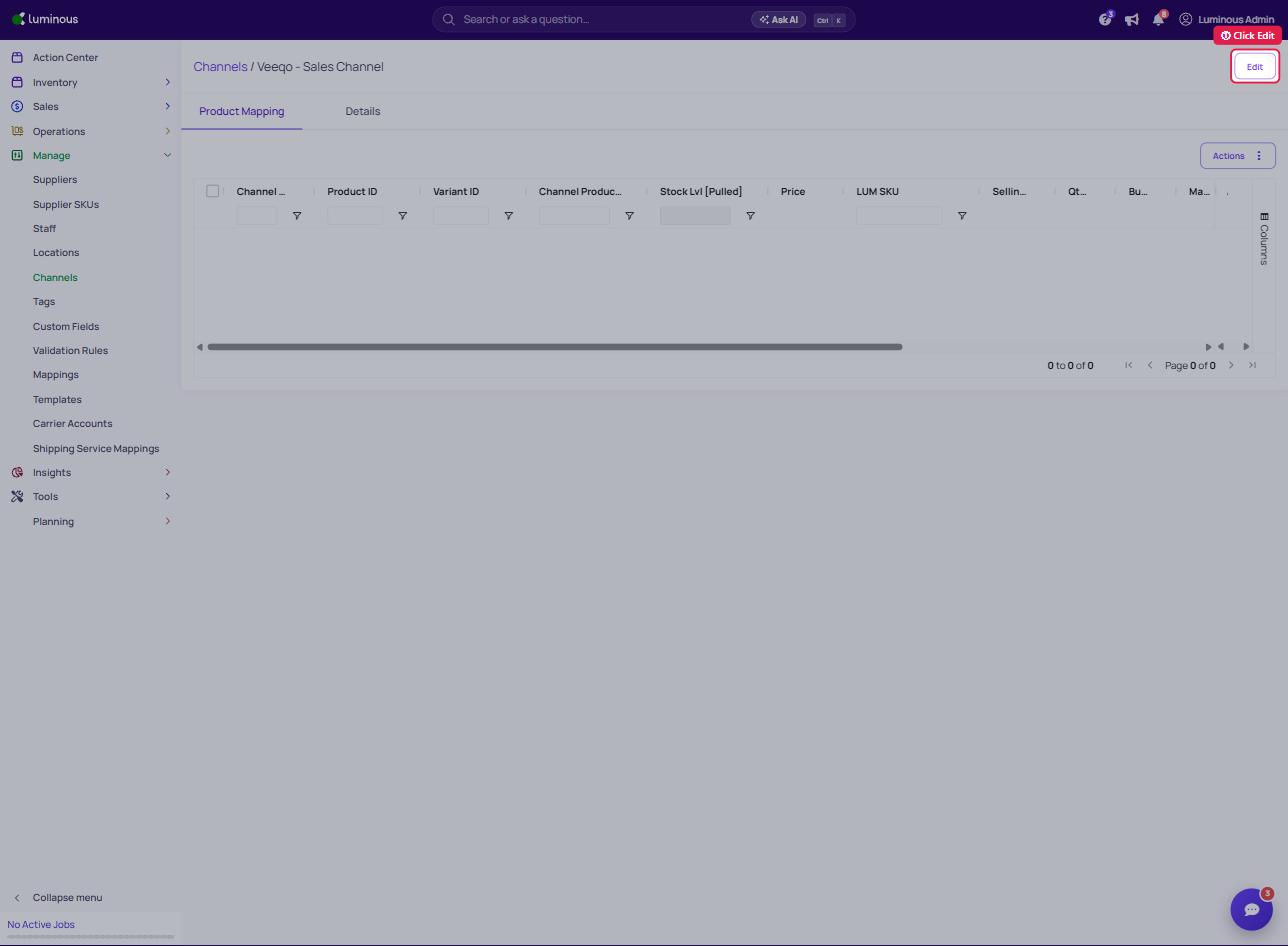
b. Select and open the Sales channel and click the Edit button
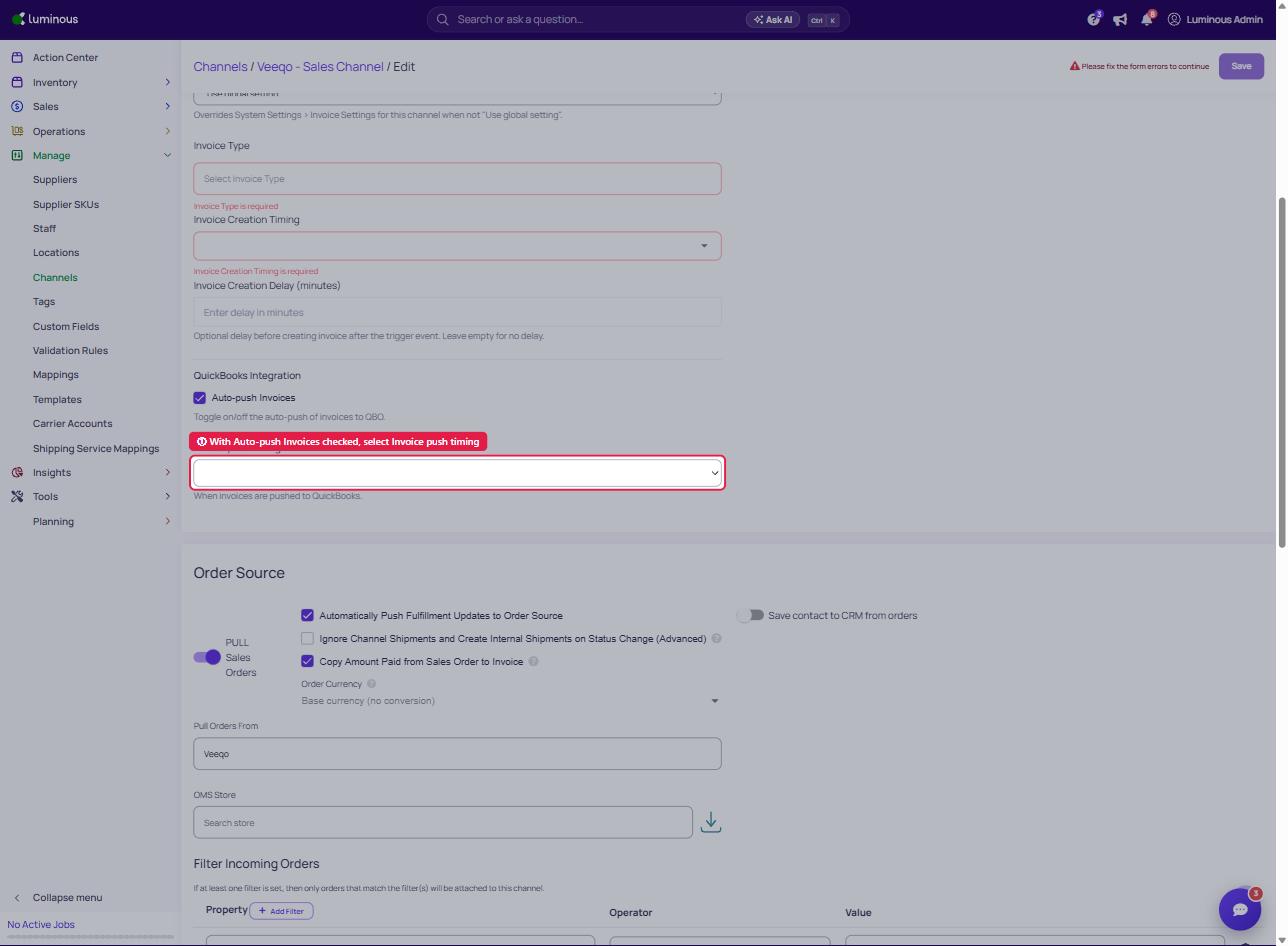
- Enable first(toggle) the Create Invoice Automatically settings to show the Invoice setting
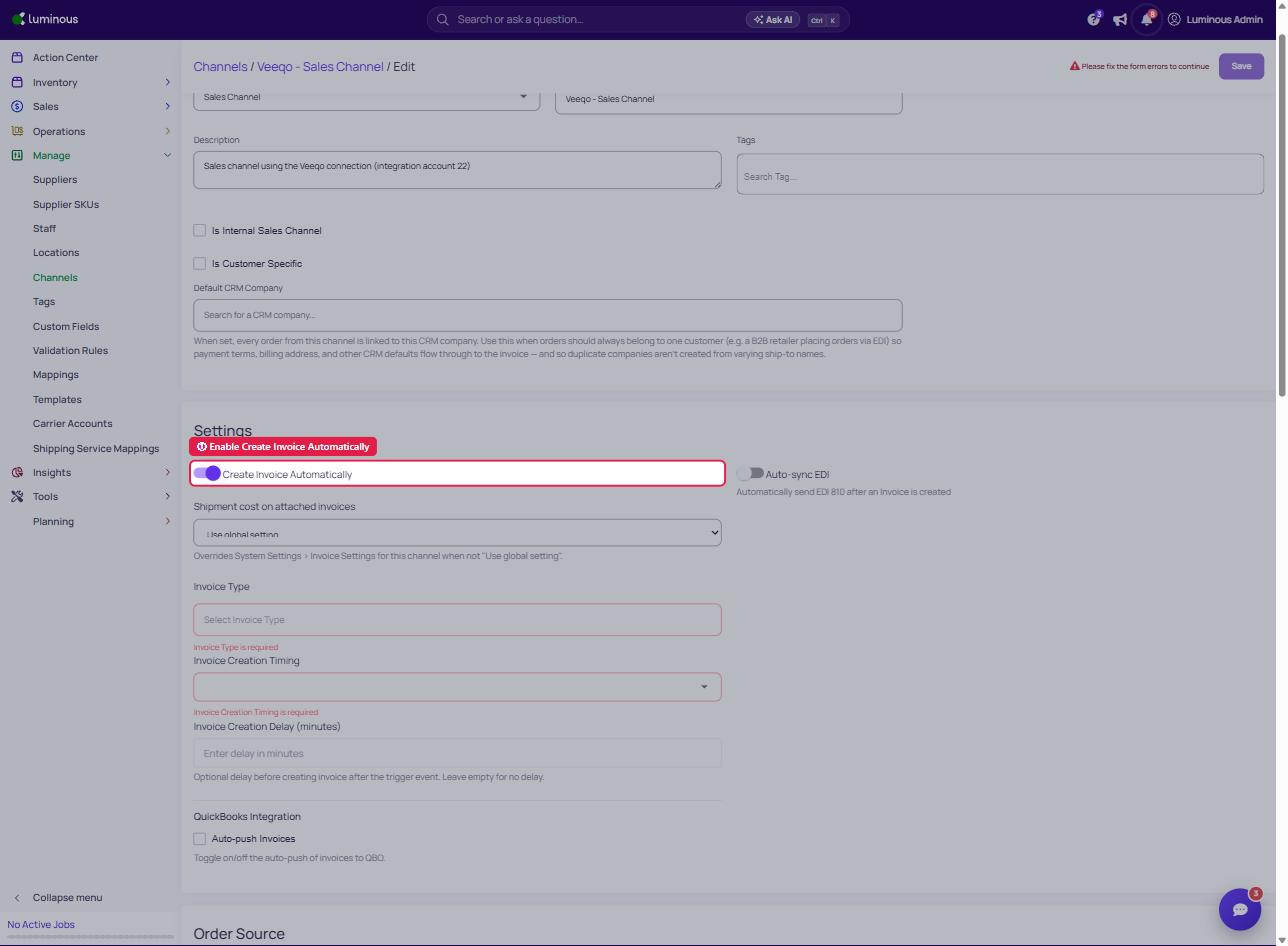
- Scroll to Invoice Settings
Set Default Revenue Account
- Select a revenue account
- Overrides global default
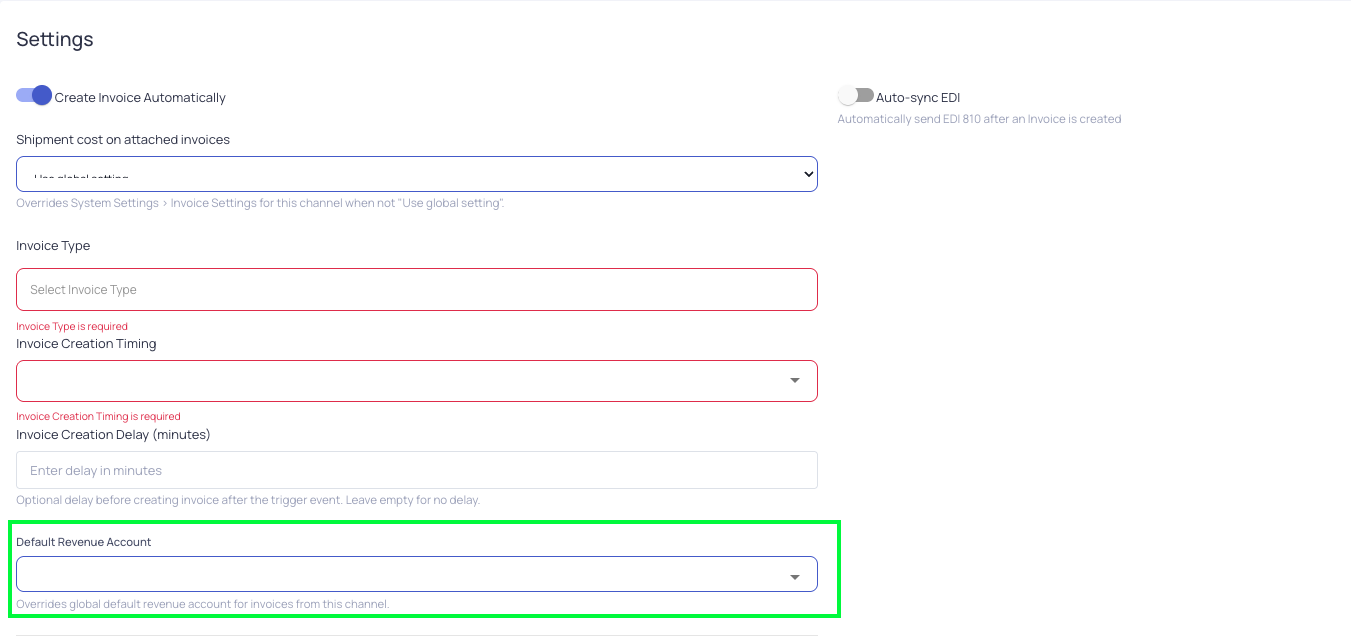
Set Invoice Sync Timing
- Enable Auto-push Invoices (under Quickbooks Integration)
- Select timing:
- When marked active (creation)
- When marked paid
- When order is marked shipped
Step 4: Map Revenue Accounts to QuickBooks Items
Navigate to:
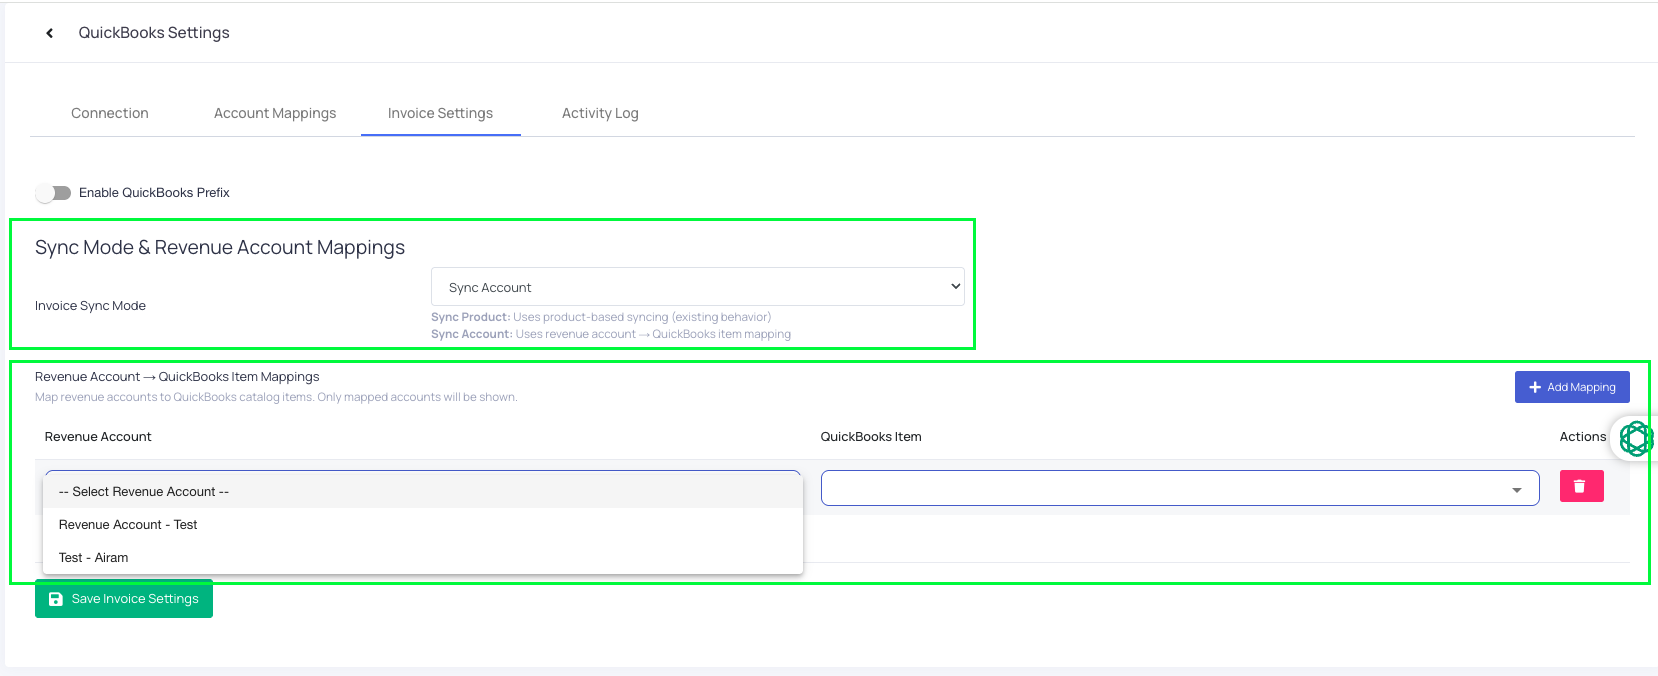
Go to Settings → QuickBooks → Invoice Settings
- Click the drop down for Sync Mode and Revenue Account Mappings
-
Invoice Sync Mode
Sync Product
- Sends individual products
- Best for detailed reporting
Sync Account
- Uses revenue account mapping
- Sends a generic product tied to a General Ledger account
- SKU details appear in the description field
-
Select Sync Account in order to configure the Account Mapping Section
-
- Locate Revenue Account - Quickbook Item Mappings section
- For each revenue account:
- Select a Luminous Revenue Account
- Enter the exact QuickBooks Product/Item name
- Save changes
Important:
- Names must match exactly
- Each QBO item must already exist
- Each item should be tied to a General Ledger account in QuickBooks
How Invoice Sync Works
When invoices sync:
- The mapped QuickBooks item is used
- SKU + product name appear in the description
- Revenue account is applied in this order:
- Invoice-level
- Channel default
- Global default
Tips & Best Practices
- Create generic QuickBooks products per revenue account
- Keep naming consistent
- Use channel defaults to reduce manual work
- Test with one invoice before enabling auto-sync
FAQs / Troubleshooting
Invoices syncing to the wrong account
- Check invoice-level selection
- Verify channel default
- Confirm global default
- Review QBO mapping
QuickBooks item not recognized
- Ensure exact name match
- Confirm item exists in QuickBooks
Revenue Account dropdown not visible
- Appears only when multiple revenue accounts exist
Need Help?
If assistance is needed, contact the support team.