Overview
Integration Mappings let you define exactly how data in Luminous gets translated into the format an external system expects — and vice versa. Use this feature when syncing orders, products, inventory, or cost data between Luminous and external platforms like Shopify, Trackstar, or ShipStation.
How It Works (Step-by-Step)
1. Navigate to Integration Mappings
- Go to Manage > Mappings and click Create Mapping.
2. Enter a Name Give your mapping a clear, descriptive label (e.g., Shopify Product Push – Default or Trackstar Order Export). This is for your own reference. Maximum 255 characters.
3. Add a Description (optional) Add a note explaining what this mapping is for (e.g., Used for all DTC Shopify channels. Includes custom field mappings.).
4. Select a Destination Integration Account Choose the external account that will receive the data — your connected Shopify store, Trackstar account, or ShipStation account. This tells the system what field structure the external platform expects.
5. Choose an Action Select the type of data operation this mapping covers:
| Action | What it does |
|---|---|
| PUSH_ORDERS | Send orders out to an external system |
| PUSH_PRODUCTS | Send products out (e.g., to Shopify) |
| PUSH_INBOUND SHIPMENT | Send inbound shipment out to an external system |
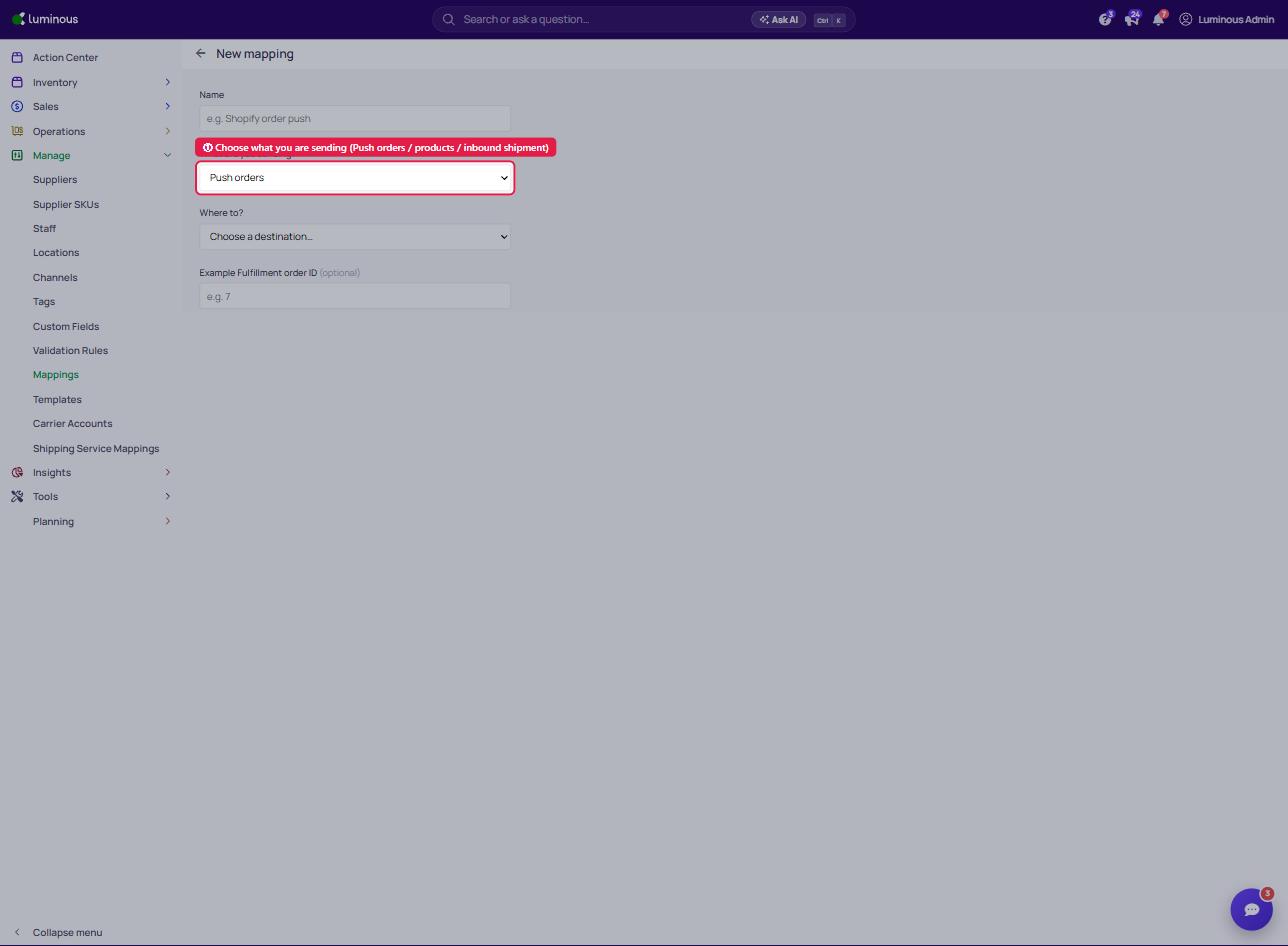
6. Load a Sample Record Enter an example record ID (the optional Example Fulfillment order ID on the New mapping page, or the Example product ID under Details on the mapping page), then click Load a different one. The ID is shown in the URL (e.g. .../products/2622) or in the product/order details panel.
The system will:
- Pull the real data for that record
- Auto-generate the source schema (all available Luminous fields)
- Auto-generate the destination schema (all fields the external system accepts)
The status indicator will move from Not Loaded → Loading → Ready. If it shows Error, see Troubleshooting below.
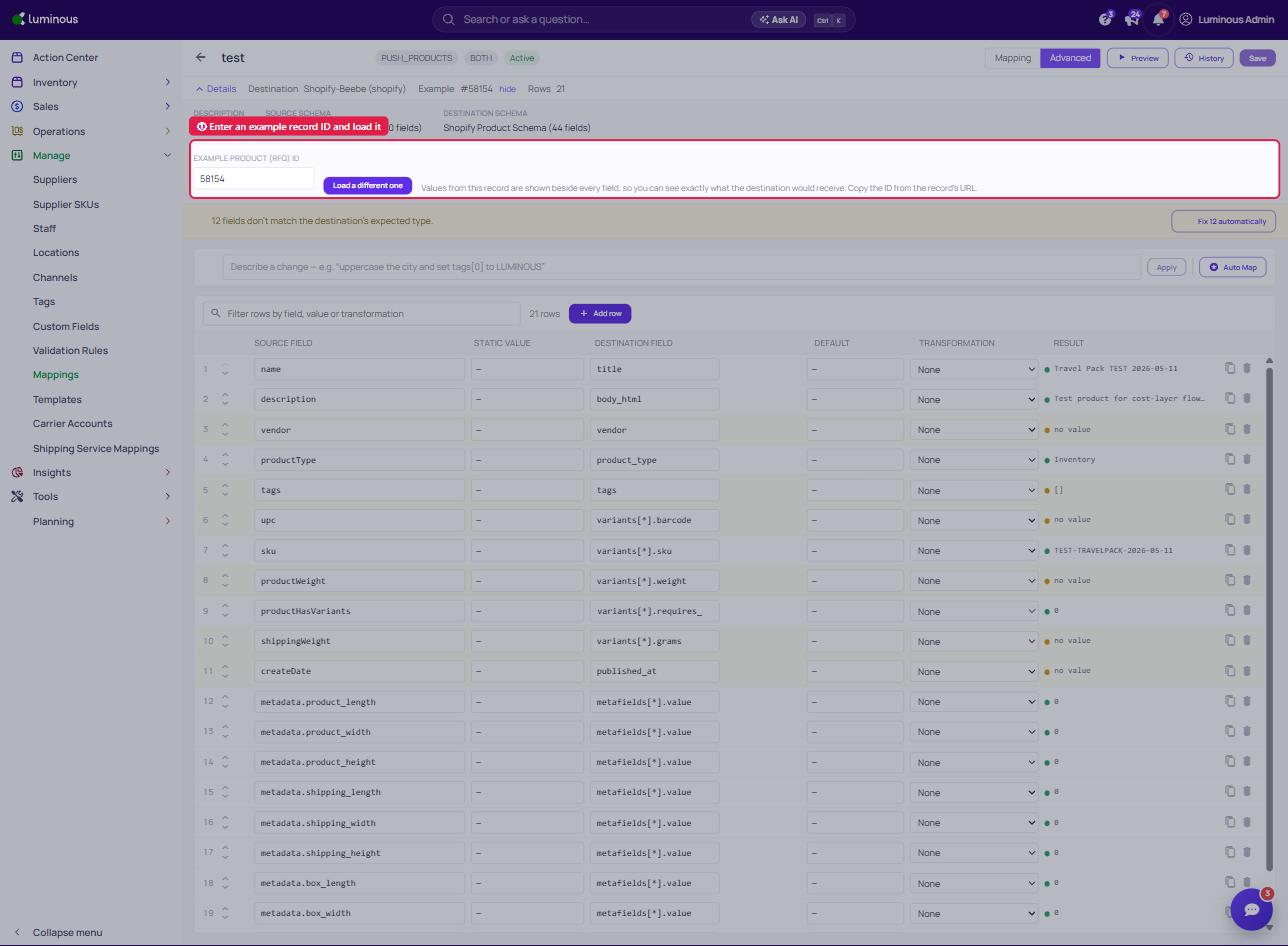
7. Map Your Fields Once schemas are loaded, use the mapping table to connect Luminous fields to their corresponding external fields — each row has a Source field, Static value, Destination field, Default and Transformation, with a live Result preview. Use Add row or Auto Map to build rows. For example: productName → title (Shopify).
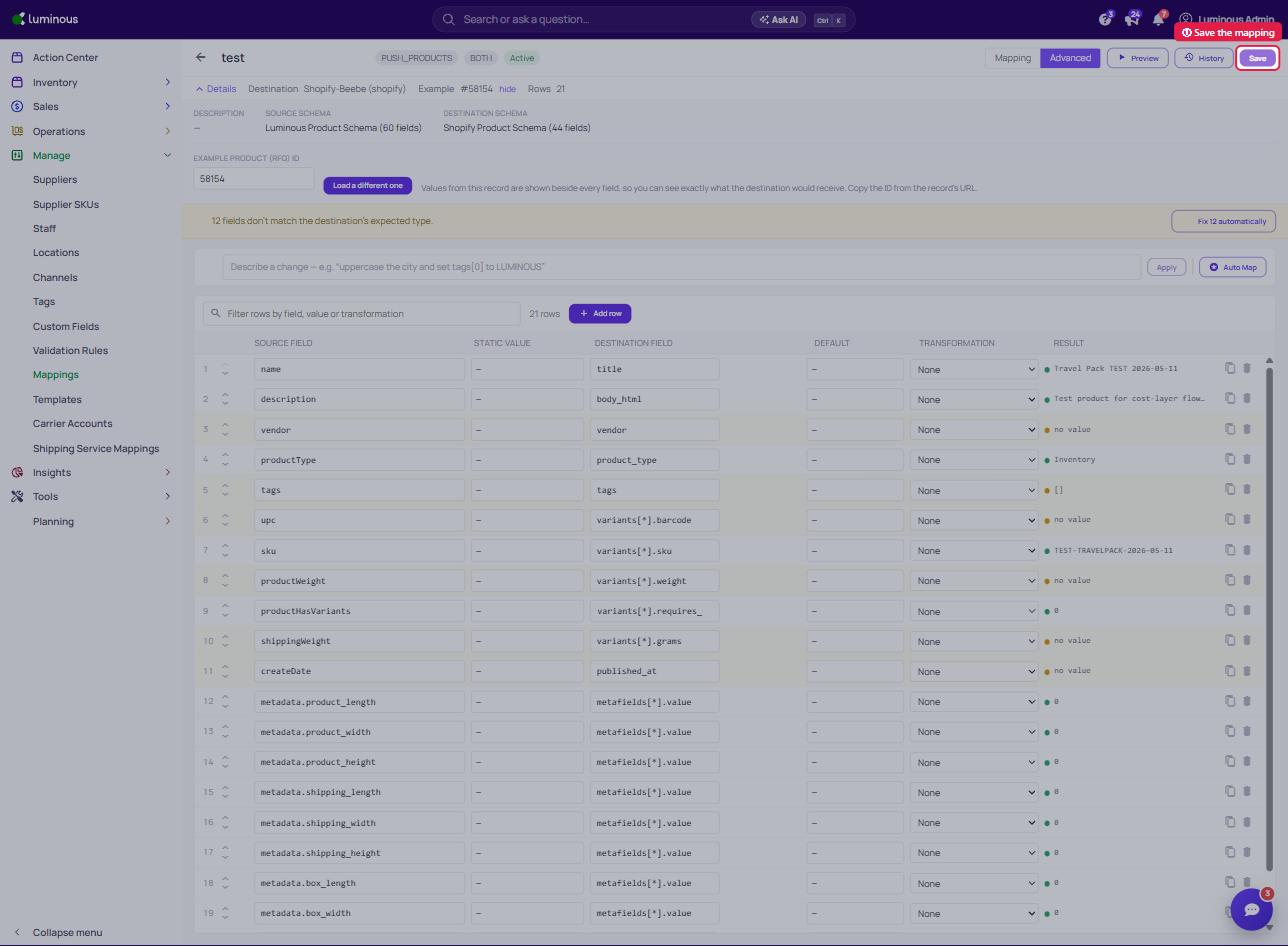
8. Save and Activate Click Save (top-right of the mapping page); the Active badge next to the mapping name shows it is live. An inactive mapping will be ignored by the channel — it will fall back to any existing inline configuration instead.
9. Link the Mapping to a Sales Channel A mapping does nothing on its own — it must be attached to a Sales Channel to take effect.
- Go to Manage > Channels
- Open your Fulfillment Channel or End-to-End Channel (whichever applies)
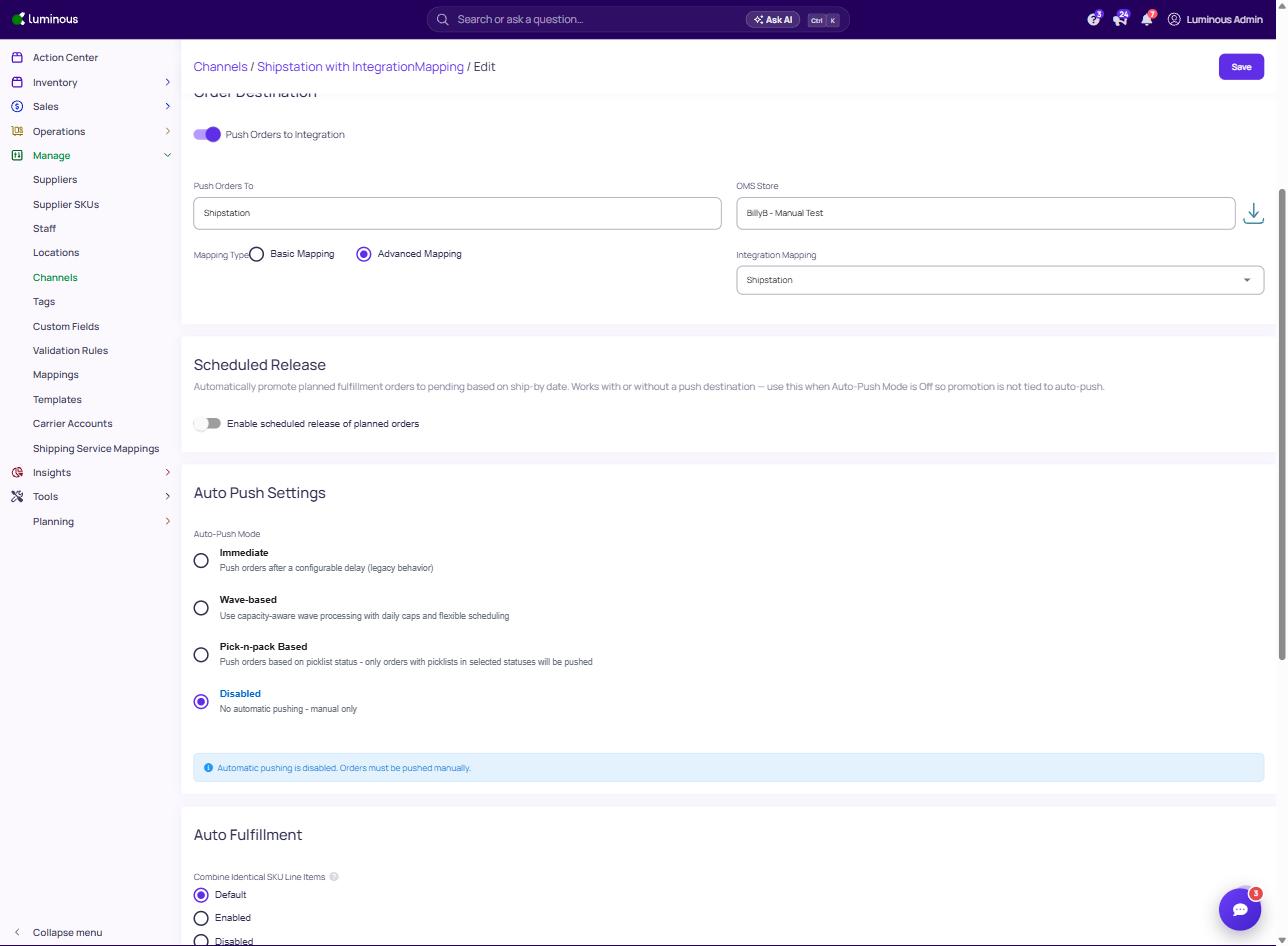
- Find the Order Destination section on the form
- Toggle on "Push Orders to Integration"
- Select your integration account from the dropdown
- Under Mapping Type, select "Advanced Mapping"
- The Integration Mapping dropdown will then appear — select your mapping there
From that point forward, every sync through that channel will apply your mapping rules automatically.
Key Features / Options
Use Destination Schema From Account When checked, the system automatically pulls the destination field structure directly from the integration account's configuration, rather than requiring you to define it manually. Recommended for Shopify PUSH_PRODUCTS setups — it fetches the full Shopify product schema automatically, including all standard fields like title, vendor, tags, variants, images, and metafields.
Mapping Config The underlying field translation rules are stored as a JSON object. In most cases you won't need to edit this directly — the Field Mapper handles it visually. Advanced users can edit this manually if needed.
Is Active toggle Controls whether the mapping is live. Turning this off does not delete the mapping — the channel simply won't use it until it's re-enabled.
Tips & Best Practices
- Name mappings clearly — include the platform and action type so you can tell them apart at a glance (e.g., Shopify – PUSH_PRODUCTS – DTC).
- Always load a real sample record — schemas auto-generate from actual data, so using a representative order or product gives you the most complete field list to work with.
- Don't set both Source Order ID and Source Product ID — the system will reject it. Use one or the other depending on your action type.
- Link to a channel before testing — the mapping only runs when it's attached to an active Sales Channel.
- Avoid creating duplicate mappings with the same name and action — duplicates are technically allowed but can cause confusion when troubleshooting channel behavior.
- Check Is Active before saving — new mappings default to active, but it's worth confirming before linking to a live channel.
FAQs & Troubleshooting
"Load Data" shows an Error status — what do I do? The mapping was saved, but the schemas were not generated. This usually means the Source Order ID or Source Product ID you entered doesn't exist or isn't accessible. Double-check the ID, then click Load Data again.
My mapping was saved but the channel isn't using it. Two things to check: (1) Is the mapping linked to the correct Sales Channel? (2) Is the Is Active toggle turned on? If both are confirmed, verify that the Mapping Config has field rules — a mapping with no field translations won't transform data.
I can't find my integration account in the dropdown. The Where to? dropdown lists your connected integration accounts (e.g. Shopify, ShipStation, ShipBob, Veeqo, Trackstar). If yours is missing, confirm it is connected under Settings > Integrations, or contact support.
I accidentally entered both a Source Order ID and Source Product ID. The system will return a validation error and not save. Clear one of the two fields and try again.
What happens if I delete the integration account linked to a mapping? The mapping itself is preserved, but it will lose its account link. You'll need to reassign a destination integration account before the mapping can be used again.
Can I have more than one mapping per channel? A channel links to one integration mapping at a time. If you need different rules for different scenarios, create separate mappings and swap them at the channel level as needed.
What's the difference between Integration Mappings and Integration Field Mappings? They're related but different. Integration Field Mappings handle simple value-level translations (e.g., normalizing carrier codes like "UPS" → "United Parcel Service"). Integration Mappings handle full object transformations — translating an entire Luminous order or product into the format an external system expects. Both are accessible from the same menu area.
Additional Help
If you run into an issue not covered here, or if a mapping isn't behaving as expected after following these steps, reach out to the Luminous support team with the mapping name, the Sales Channel it's linked to, and a description of the behavior you're seeing.