Prerequisites
- Admin access to your Shopify store
- Admin access to Luminous
Step 1: Create a Custom App in Shopify
- Log into your Shopify Admin.
- Click Settings (bottom-left).
- Go to Apps and sales channels.
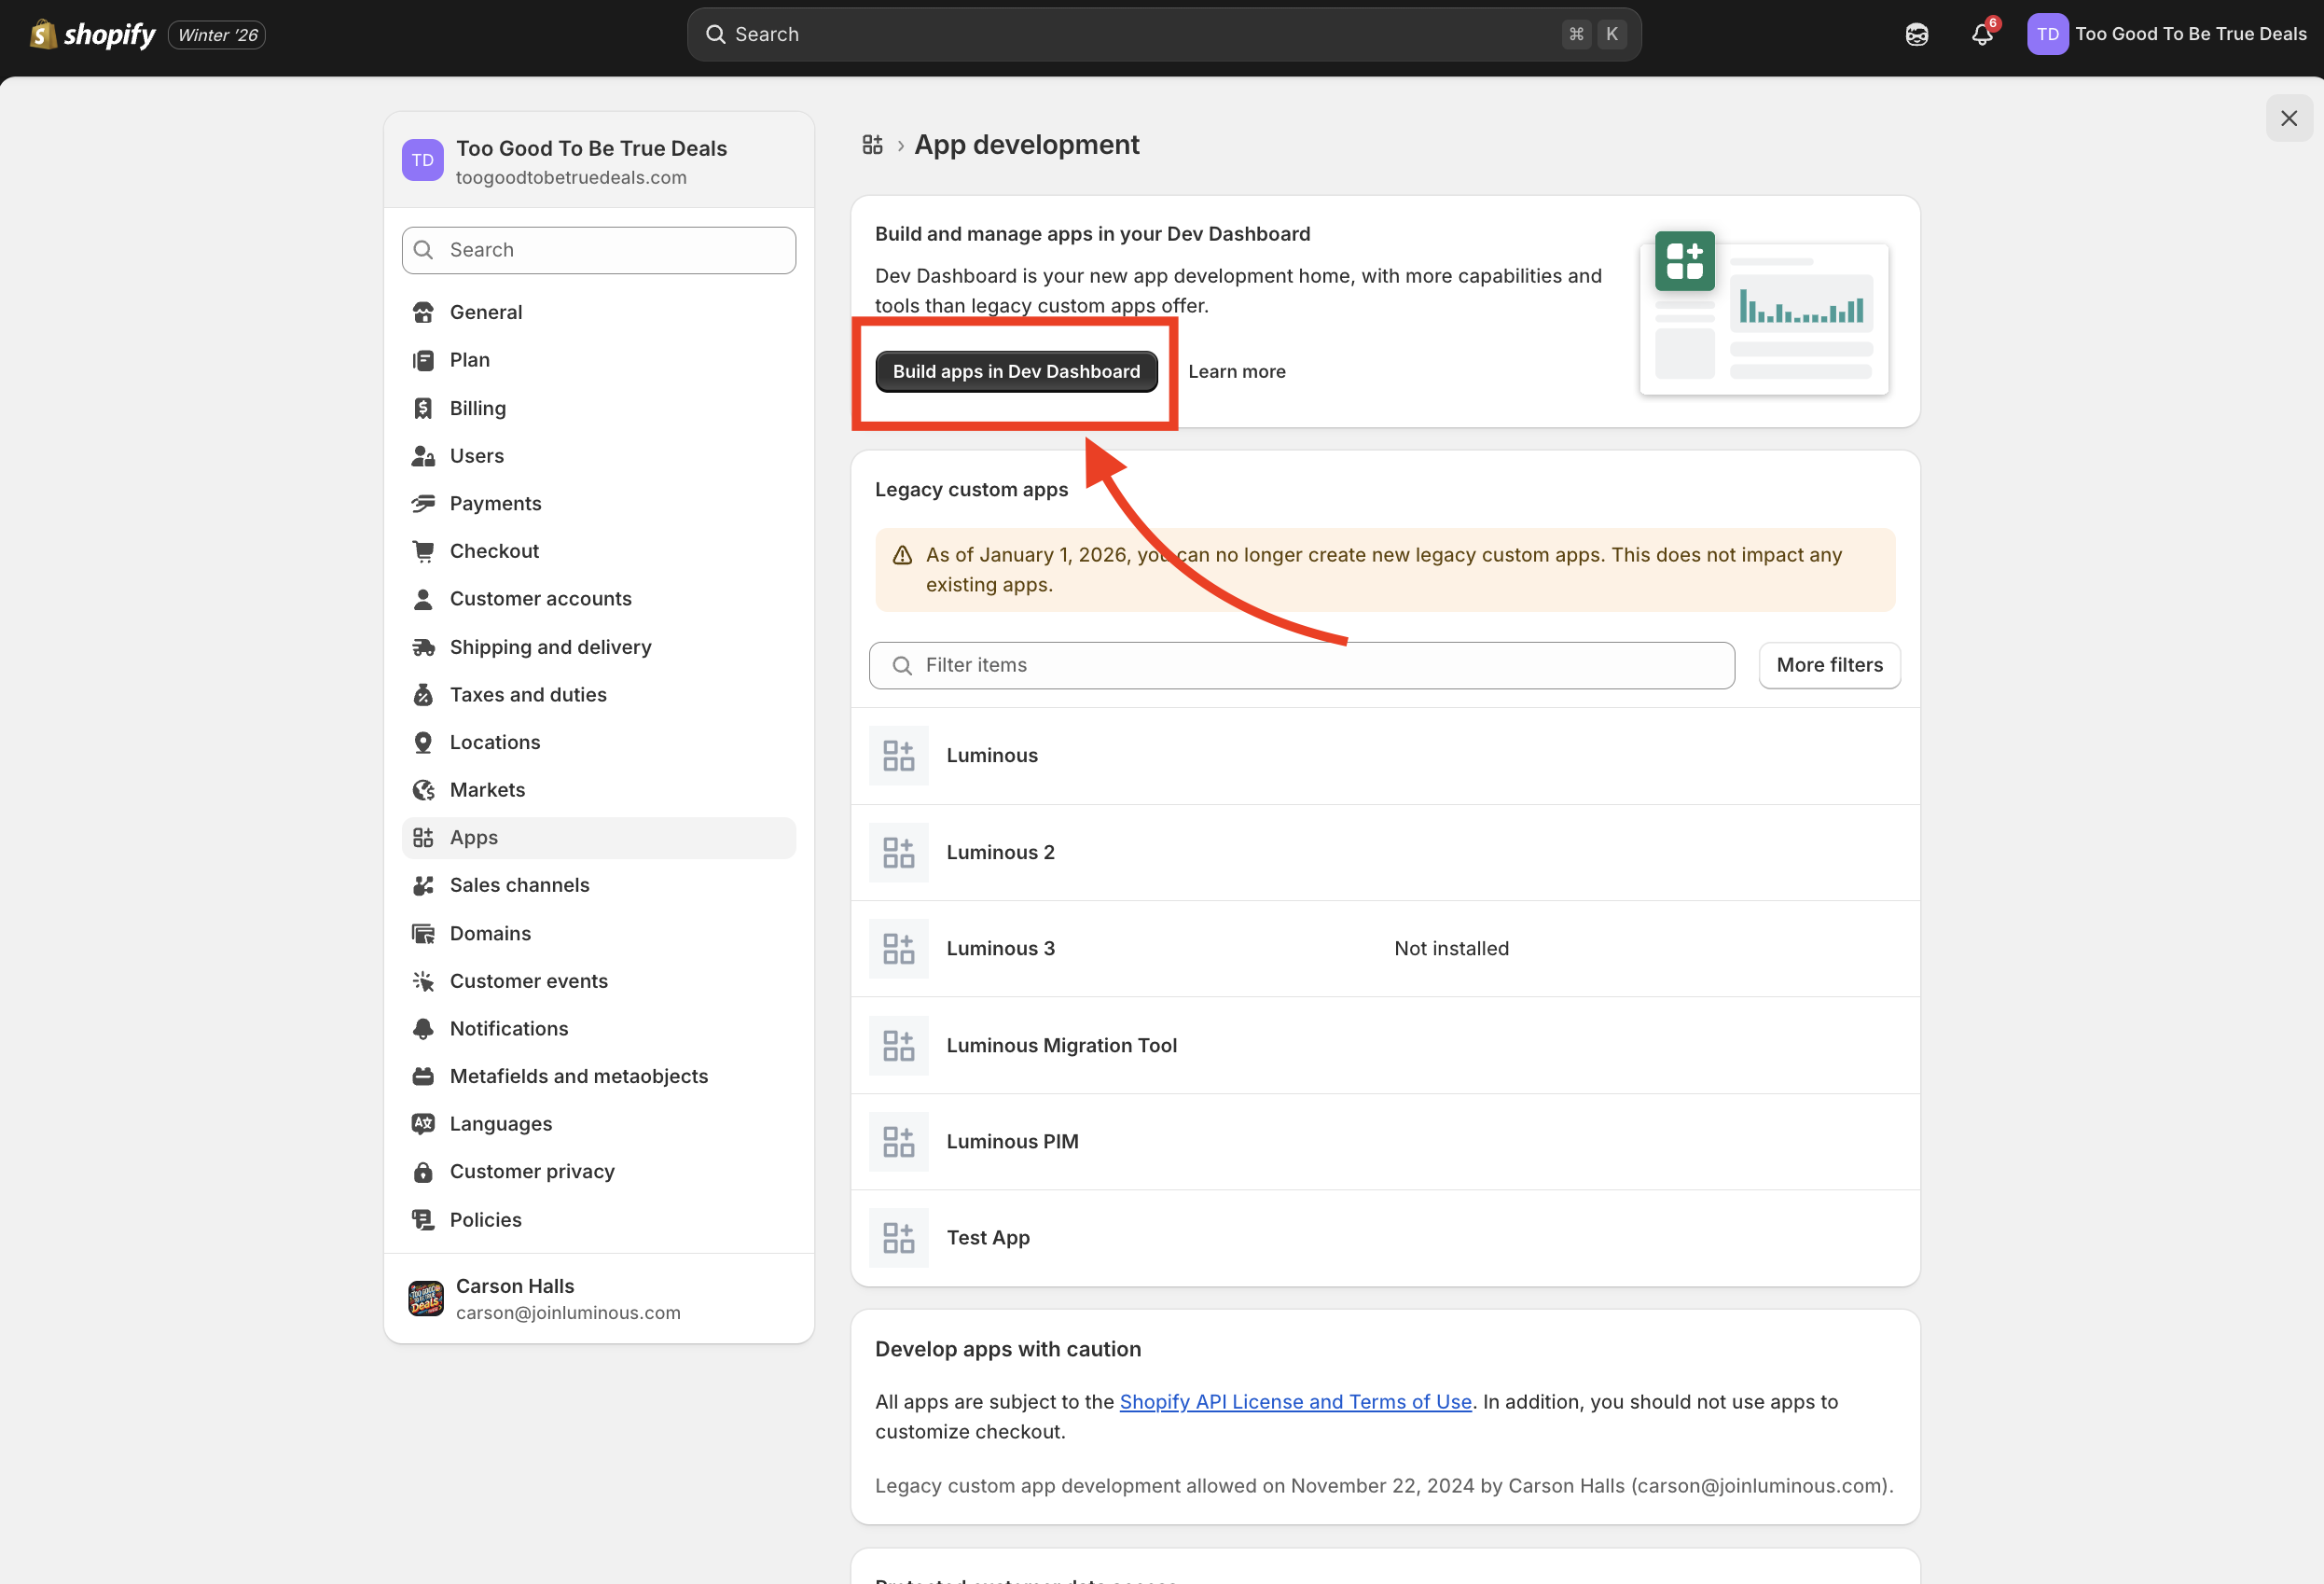
- Click Develop apps.
- Click Build apps in Dev Dashboard.
- This will take you to a new tab with the Dev Dashboard.
You’ll now see a list of apps you’ve created (or an empty list if this is your first one).
Step 2: Create the App
- Click Create app.
- Name the app (example:
Luminous IntegrationorLuminous). - Click Create app.
Once created, you’ll be taken to the app configuration screen.
Step 3: Configure API Scopes
- Scroll to the Access section.
- Find the section here labeled scopes.
- Paste a comma-separated list here (provided in this documentation below).
⚠ Make sure the scopes are comma-separated.
Required Scopes
Add all of the following scopes to your Shopify app. These permissions allow Luminous to sync products, inventory, orders, fulfillments, and tracking updates correctly.
Easy-to-Read Scope List
Inventory
read_inventorywrite_inventory
Locations
read_locationswrite_locations
Products
read_productswrite_productsread_product_feedswrite_product_feedsread_product_listingswrite_product_listings
Orders
read_ordersread_all_orderswrite_ordersread_draft_orderswrite_draft_ordersread_order_editswrite_order_edits
Fulfillments
read_fulfillmentswrite_fulfillmentsread_assigned_fulfillment_orderswrite_assigned_fulfillment_ordersread_merchant_managed_fulfillment_orderswrite_merchant_managed_fulfillment_orderswrite_metaobjects, read_metaobjects
Copy‑Paste (Comma‑Separated) Scope List
Paste the following exactly as-is into Shopify’s Admin API access scopes field:
read_assigned_fulfillment_orders,write_assigned_fulfillment_orders,write_draft_orders,read_draft_orders,read_fulfillments,write_fulfillments,write_inventory,read_inventory,write_locations,read_locations,read_merchant_managed_fulfillment_orders,write_merchant_managed_fulfillment_orders,write_order_edits,read_order_edits,read_orders,read_all_orders,write_orders,read_product_feeds,write_product_feeds,read_product_listings,write_product_listings,read_products,write_products,write_metaobjects,read_metaobjects
Step 4: Disable Embedded App Setting
- Scroll to the URLs section.
- Untoggle:
Embed app in Shopify admin.
Step 5: Release the App
- Click Release (top-right corner).
- Ignore the optional rename prompt.
- Wait for the app to finish releasing.
You may see version numbers appear—these can be ignored.
Step 6: Install the App on Your Store
- From the app’s home page, find the Install app box on the right.
- Click Install app.
- Select the correct Shopify store.
- Review the permissions list to confirm the scopes.
- Click Install.
You can close out of the confirmation page afterward.
✅ To verify installation, the install count should change from 0 to 1.
Step 7: Copy Shopify API Credentials
-
Open the app you just installed in the dev dashboard (this can be found by clicking Build Apps in dev dashboard.
-
Go to Settings
-
Copy the following:
- Client ID
- Client Secret
Keep these handy—you’ll paste them into Luminous next.
Step 8: Add Shopify Integration in Luminous
- Log into Luminous.
- Click your name (top-right).
- Go to Settings / Integrations.
- Click + Add Integration (top-right).
- Select Shopify, then choose Direct connection.
Fill in the Fields
- API Key / Client ID → paste from Shopify
- Client Secret (Optional - New Method) → paste from Shopify (click Show 10 settings you can adjust after connecting to reveal it)
- Admin Access Token (Legacy) → leave blank (auto-fills later)
Step 9: Find Your Store Slug
-
Go to your Shopify store admin (not the Dev Dashboard).
-
Look at the URL:
Example: https://admin.shopify.com/store/{store-slug}/settings
-
Copy everything between
/store/and/settings. -
Paste this into the Store Slug field in Luminous.
Add a label if desired (example: Main Shopify Store).
Step 10: Configure Integration Settings
In the expanded settings (Show 10 settings you can adjust after connecting):
- Toggle Get Products ✅
- Toggle Show Inventory Location ✅
Click Test connection.
Expected Result
✅ Credentials are valid and all required scopes are available
Step 11: Save & Verify
- Click Save to complete setup.
- Refresh the integration.
- Click the pencil icon (edit).
You should now see:
- Admin Access Token auto-filled
- Credentials still passing when re-tested
✅ Setup Complete
Your Shopify store is now successfully connected to Luminous.
- Orders will sync
- Tracking numbers will update
- Inventory locations are available
If you run into issues or have questions, reach out to the Luminous team for support.