Overview
Cycle counts let you physically reconcile a subset of your inventory — by SKU or by specific bin location — against what Luminous shows on hand, without shutting down warehouse operations. Use bin location mode when you want to walk a specific shelf or zone and post any variances back to the exact bin where the discrepancy occurred.
How It Works (Step-by-Step)
Step 1 — Create a New Cycle Count
Navigate to Inventory → Cycle Counts and click New Cycle Count.
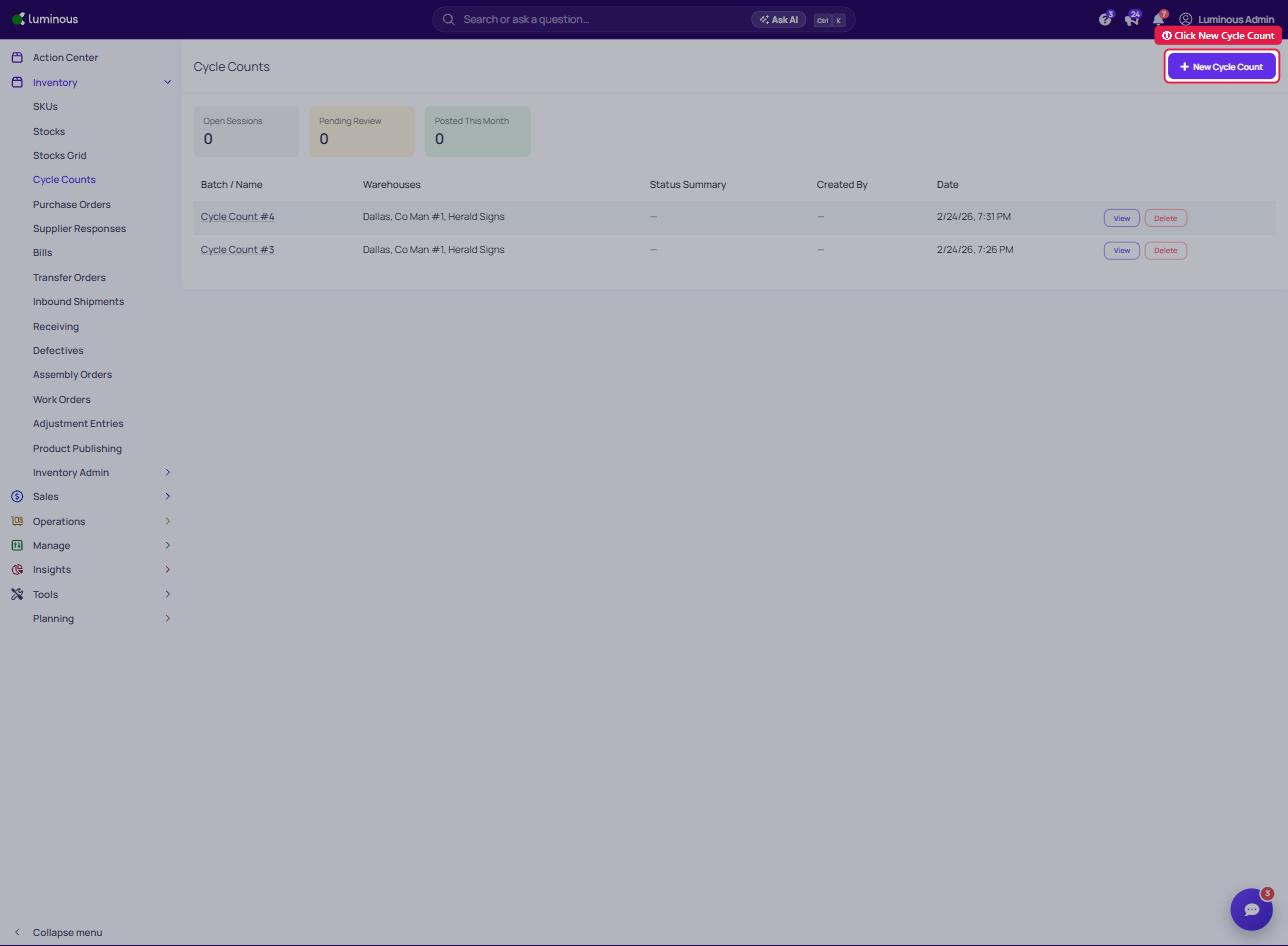
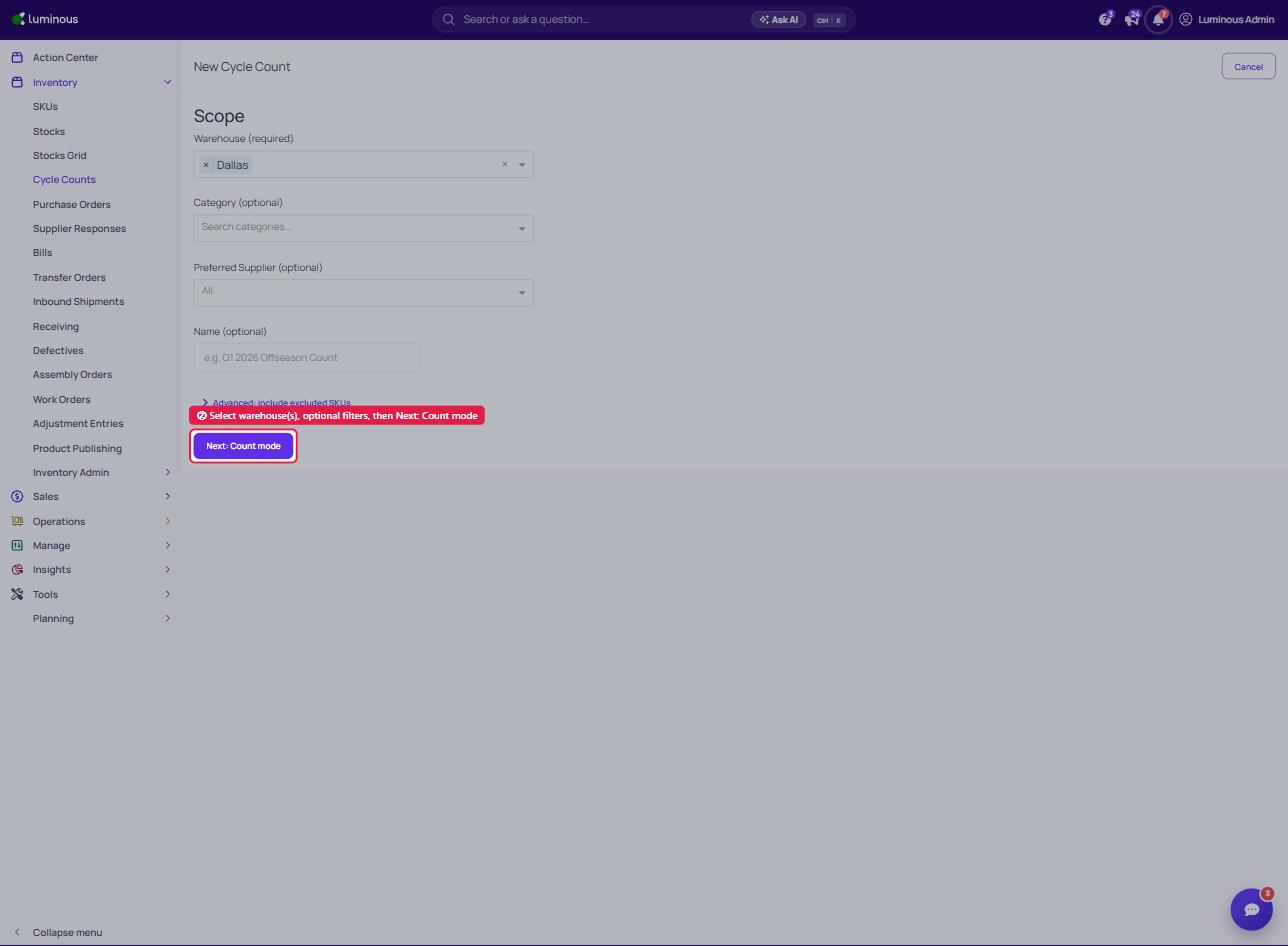
Step 2 — Set the Scope
On the Scope step:
- Select one or more warehouses to include in the count.
- Optionally apply category or vendor filters to narrow which SKUs are included.
- Click Next: Count mode.
Step 3 — Choose a Count Mode
On the Count mode step, you will see a Count by radio group with two options:
| Option | What it does |
|---|---|
| SKU (default) | Creates one count row per SKU per warehouse. This is the existing behavior — no change required if this is what you need. |
| Bin location | Creates one count row per SKU × bin combination. If a SKU lives in three bins, it appears as three separate rows. |
To count by bin location:
- Select Bin location.
- A Bin locations multi-select field appears beneath the radio group.
- Leave it set to All bins to include every bin in the selected warehouse(s) that currently holds stock.
- Or click the field and select one or more specific bins to limit the count to those locations only.
Note: The bin dropdown shows only bins belonging to the warehouse(s) you selected in Step 2. If you go back and change your warehouse selection, the bin list refreshes automatically.
- Click Next: Confirm.
Step 4 — Confirm and Start the Count
On the Confirm step:
- In SKU mode, the summary reads: "This will include N SKUs across X warehouse(s)."
- In Bin location mode, the summary reads: "This will include N bin-location items across X warehouse(s)."
Optionally add a Remarks note for internal reference, then click Start count.
Luminous creates the batch and opens the batch detail page. The batch contains one counting session per warehouse.
Step 5 — Complete the Counting Session
- Open the batch, then open the session for your warehouse and click Start counting.
- You will see one row for each item to count:
- In SKU mode: one row per SKU.
- In Bin location mode: one row per SKU × bin combination. Count each row independently — variances post to the specific bin on that row, not warehouse-wide.
- Enter your physical counts and submit the session.
Key Features / Options
| Feature | Detail |
|---|---|
| Count by SKU | Default mode. One row per SKU per warehouse. Existing in-progress counts are unaffected. |
| Count by Bin location | New mode. One row per SKU × bin. Variances post to the exact bin. |
| All bins vs. specific bins | In bin mode, you can count all stocked bins or select a subset. |
| Bin dropdown scope | Bins shown are filtered to the warehouse(s) selected in the Scope step. |
| KIT products | KIT products are excluded from bin location counts. KIT stock is tracked at the assembly level, not at the bin level. |
| Inventory adjustments | Adjustments from a bin location count are scoped to the specific bin — the system updates that bin's on-hand quantity, not the warehouse total. |
| Remarks | Optional note added at the Confirm step. Useful for audits or flagging unusual counts. |
Tips and Best Practices
- Start with a targeted bin, not all bins. If you're validating a single aisle or zone, select only those bins. Scoping tightly makes the count faster and easier to manage.
- Resolve bin setup before you start. If bins aren't configured for a warehouse, the Bin locations dropdown will be empty and the estimate will return 0. Set up your locations first in Manage → Locations before launching a bin count.
- One session per warehouse. Each batch creates a separate counting session per warehouse. If your count spans multiple warehouses, complete each session independently.
- KIT products don't appear in bin counts. If you notice a KIT is missing from your count session, this is expected — count the component SKUs instead.
- Don't change the warehouse selection mid-setup. If you go back to Step 2 and change warehouses, the bin list refreshes and any specific bin selections you made will reset.
- Use Remarks to document context. Adding a note at the Confirm step helps explain unusual variances if the count is reviewed later.
FAQs and Troubleshooting
Q: The Bin locations dropdown is empty — what's wrong?
Your warehouse doesn't have any bins configured, or no bins in that warehouse currently hold stock. Navigate to Manage → Locations to set up bins, or verify that inventory has been received into a bin location first.
Q: I selected Bin location mode but my estimate shows 0 items.
This means either no bins are configured for the selected warehouse, or the bins currently hold no stock. Check your bin setup and confirm that inventory is assigned to specific locations.
Q: I don't see a KIT product in my bin location count session. Is that a bug?
No — KIT products are intentionally excluded from bin location counts because their stock is tracked at the assembly level. Count the individual component SKUs instead.
Q: Will switching to Bin location mode affect any in-progress SKU counts?
No. SKU mode and Bin location mode are selected per new count. Existing saved counts or in-progress SKU sessions are not affected.
Q: Do inventory adjustments from a bin count update the entire warehouse or just that bin?
Just that bin. Adjustments are scoped to the specific bin on each count row, so only the individual bin's on-hand quantity is updated.
Q: Who can access Cycle Counts?
Access is governed by your role's existing inventory permissions. No additional permission is required to use bin location mode beyond what was already needed to create cycle counts. Bin location counting also requires the warehouse to have bin-level inventory tracking configured.
Q: Can I use the Warehouse Mobile App for bin location counts?
Confirm this with your Luminous account team, as mobile app support for bin location mode may vary.
Additional Help
If you run into issues not covered here, contact the Luminous support team through the help center chat or at support@joinluminous.com.