Overview
Label Printing lets you generate and pay for shipping labels directly inside Luminous instead of routing through a separate OMS like ShipStation. It covers connecting a carrier account, mapping shipping services, and printing labels in bulk from your Fulfillment Orders — plus a scan-based printing mode for high-volume packing stations.
Coming soon: This feature is rolling out behind a feature flag. If you'd like early access, contact your Luminous account manager to have it enabled.
How It Works (Step-by-Step)
Part 1: Connect a Carrier Account
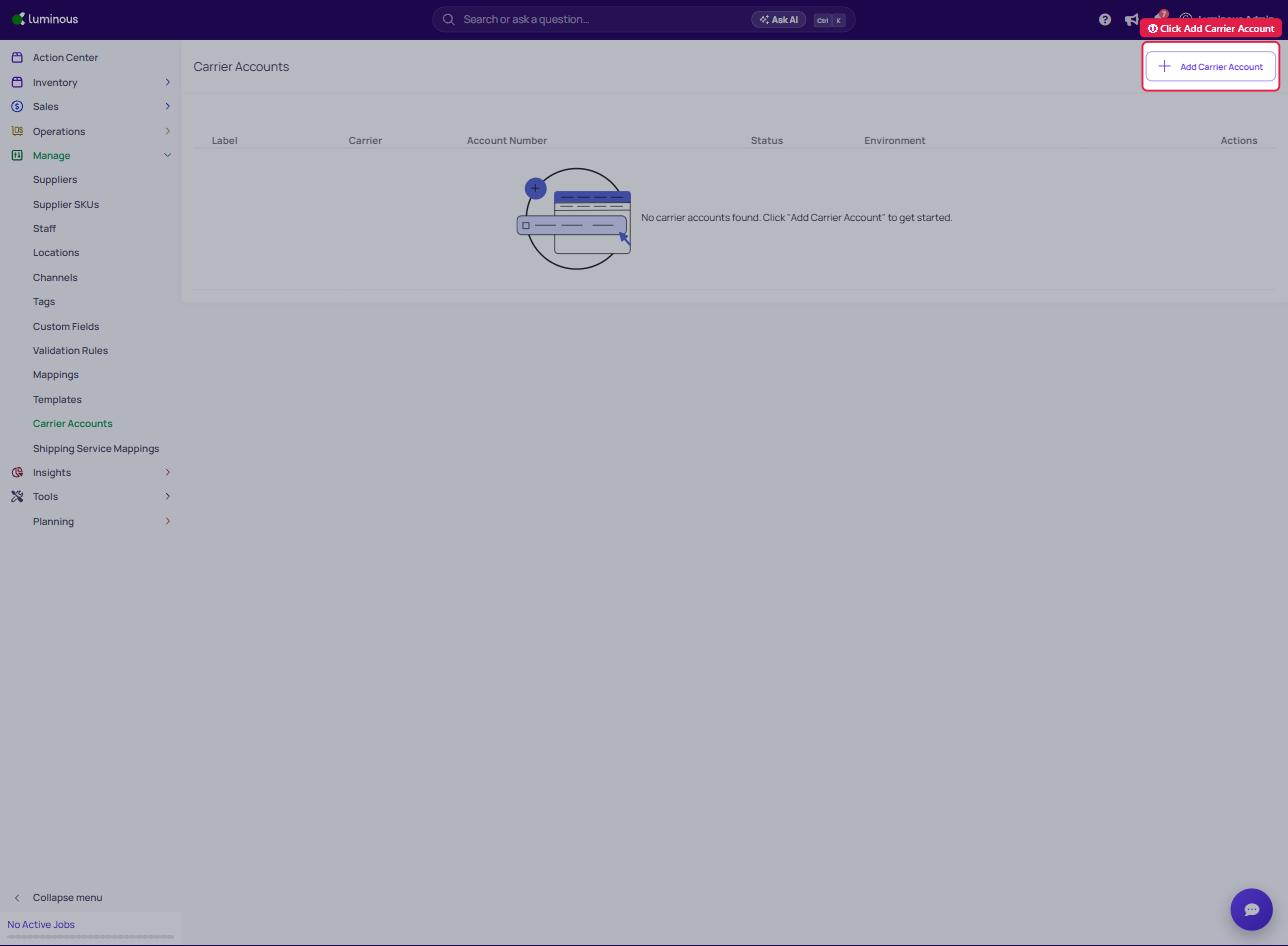
- Go to Manage > Carrier Accounts.
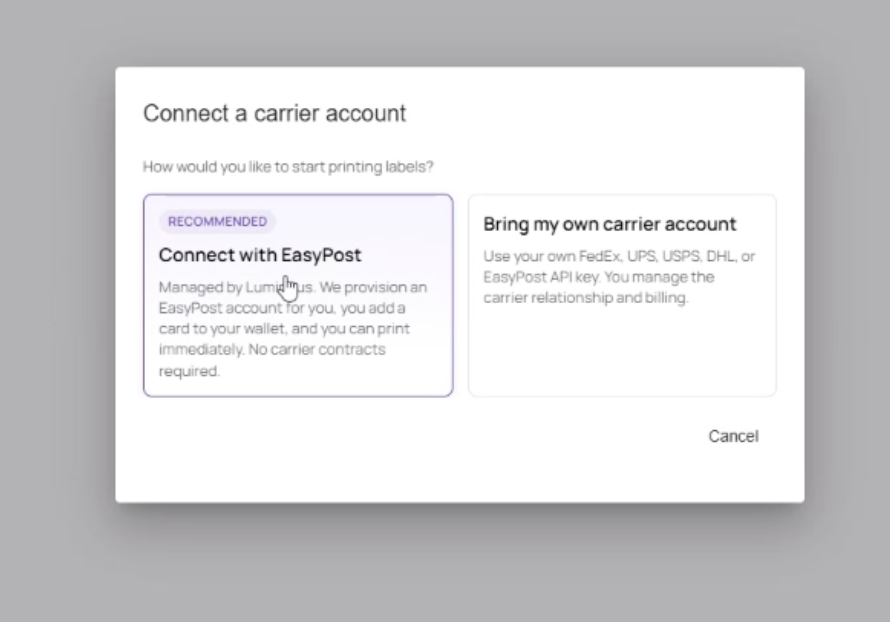
- Click Add Carrier Account to choose how you want to ship:
-
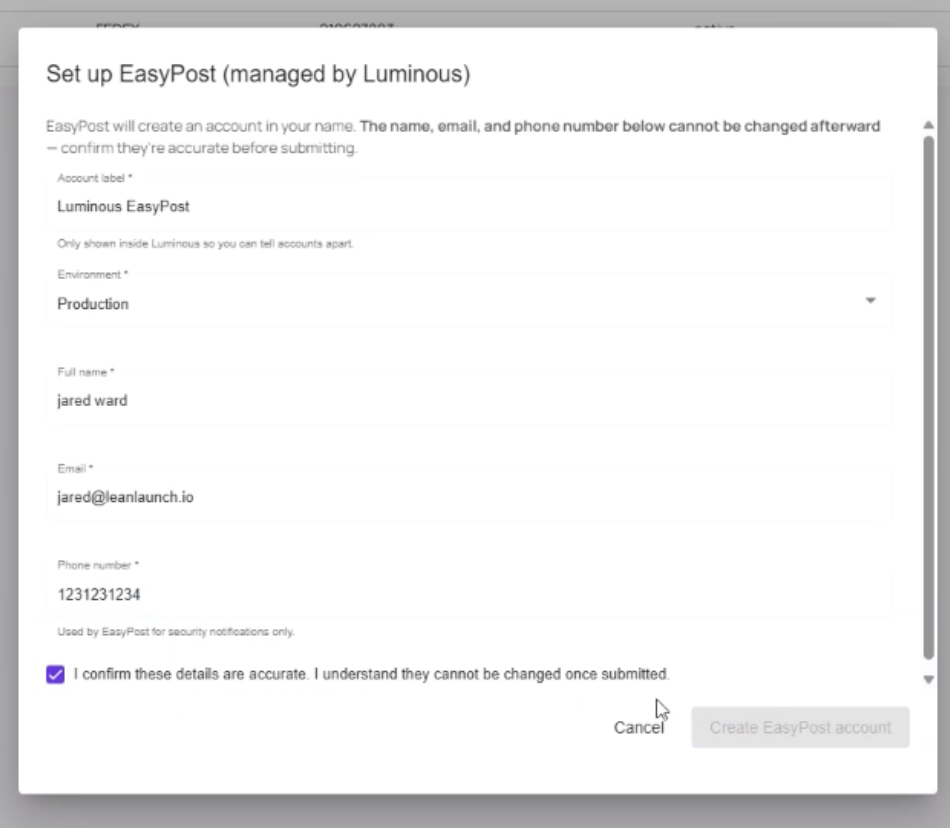
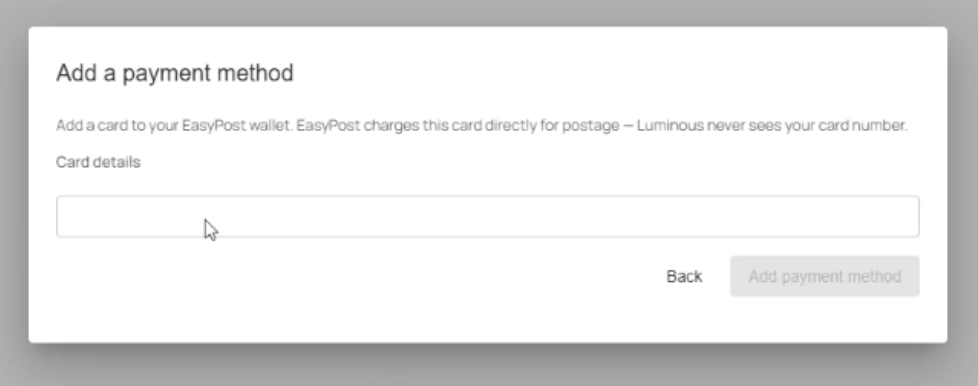
a. Connect with EasyPost — walks you through creating a linked EasyPost account and adding payment details. Your card is automatically charged/topped up as labels are purchased.
-
Connect with Easypost Account and Add Payment Method
-
-
b. Add your own carrier account — connect a carrier account you already own directly.
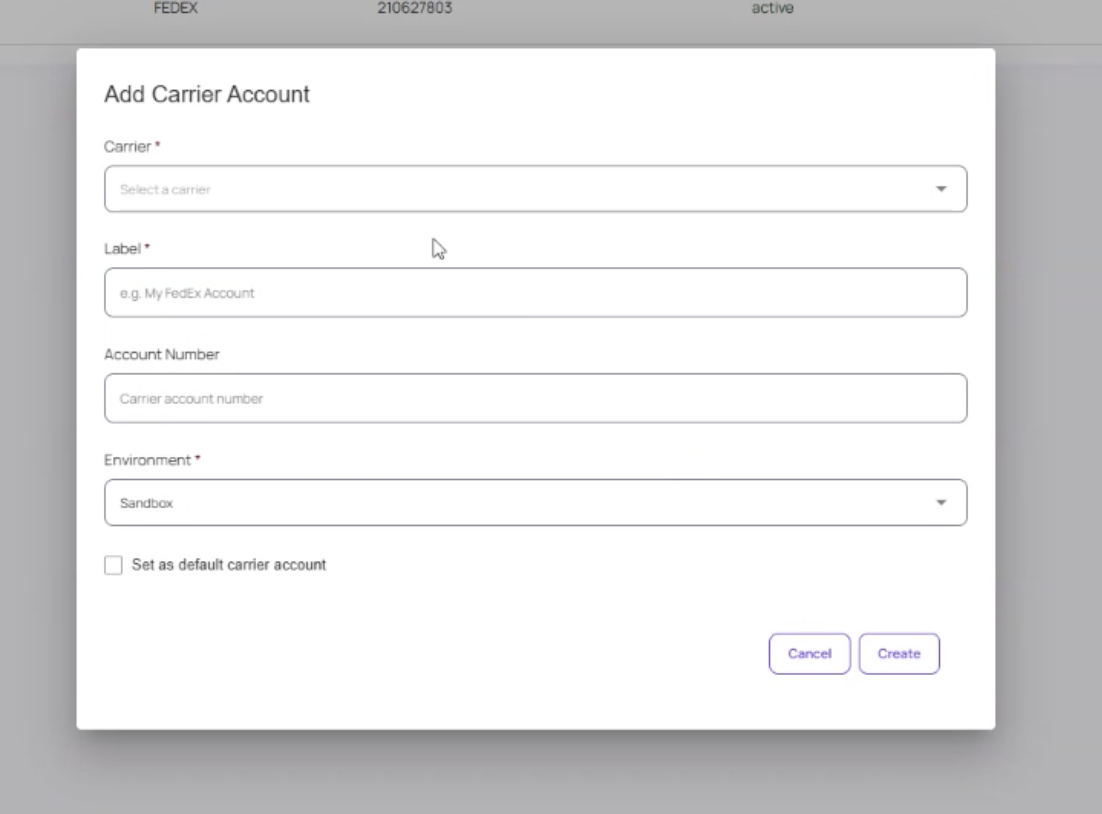
-
- Complete the connection steps and save.
Part 2: Map Shipping Service
4. Go to Manage > Shipping Service Mappings.
a. Click Add Mapping to map requested shipping service
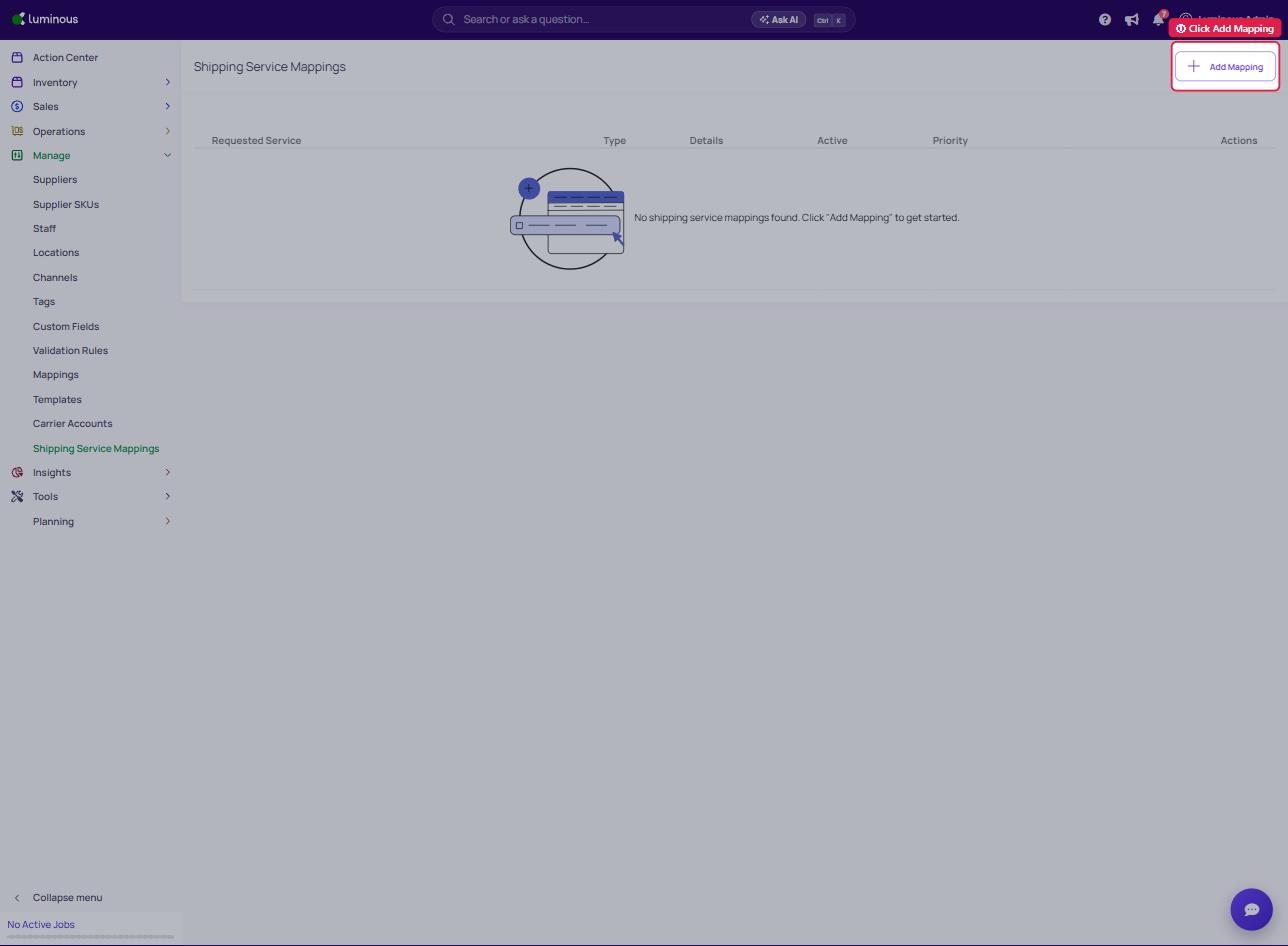
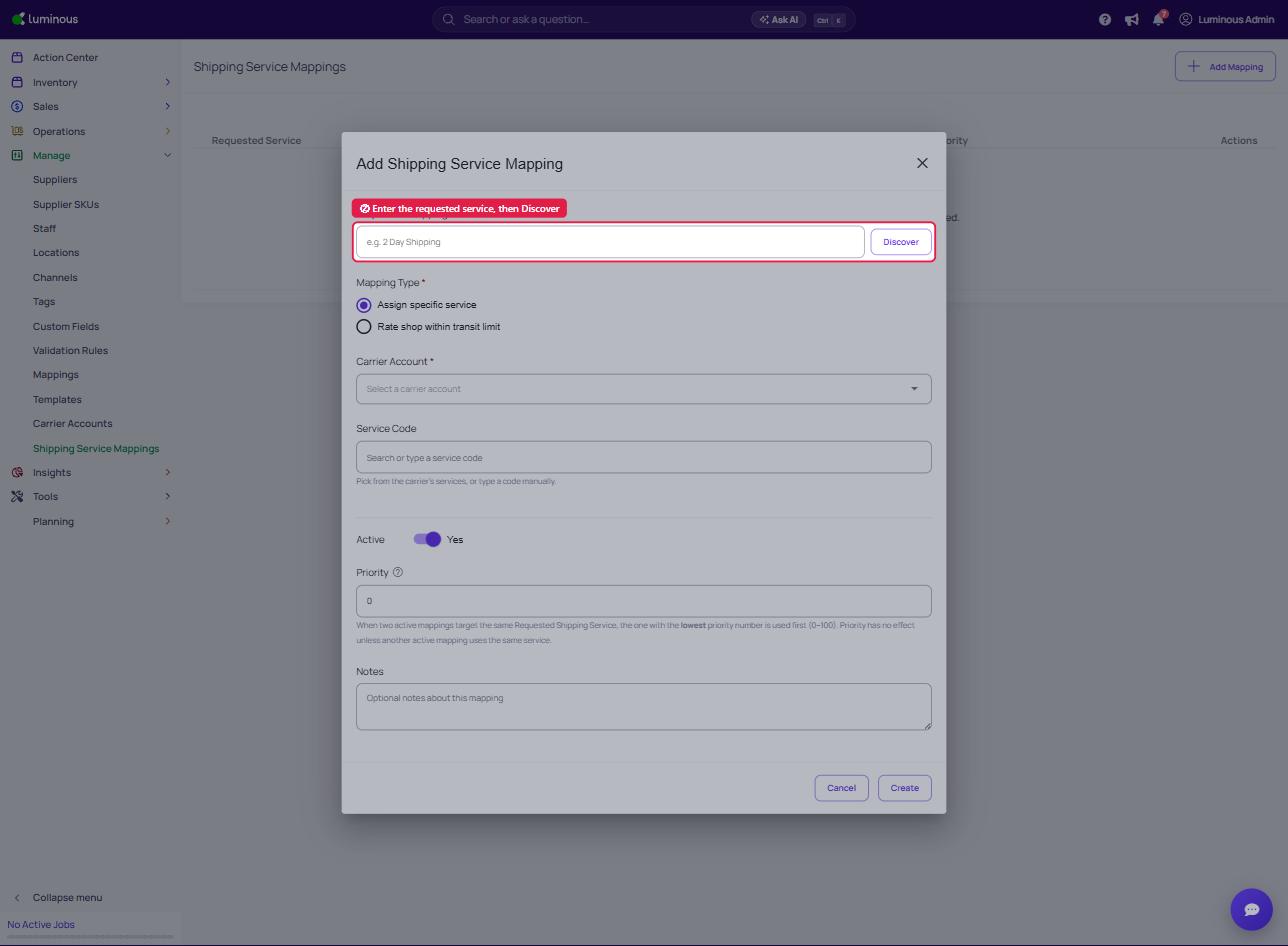
5. Map each requested shipping service (e.g., from Shopify) to a specific carrier service.
- Select Discover to see all shipping rate values Luminous has received for that service historically.
- Use this to decide which carrier service should represent standard options like "delivery within 3 days."
- Once finished filling out fields, click Create to complete.
Part 3: Print Labels from Fulfillment Orders
6. Go to Operations > Fulfillment Orders and select the Shipping tab (the page has Dispatch, Shipping and Queue tabs).
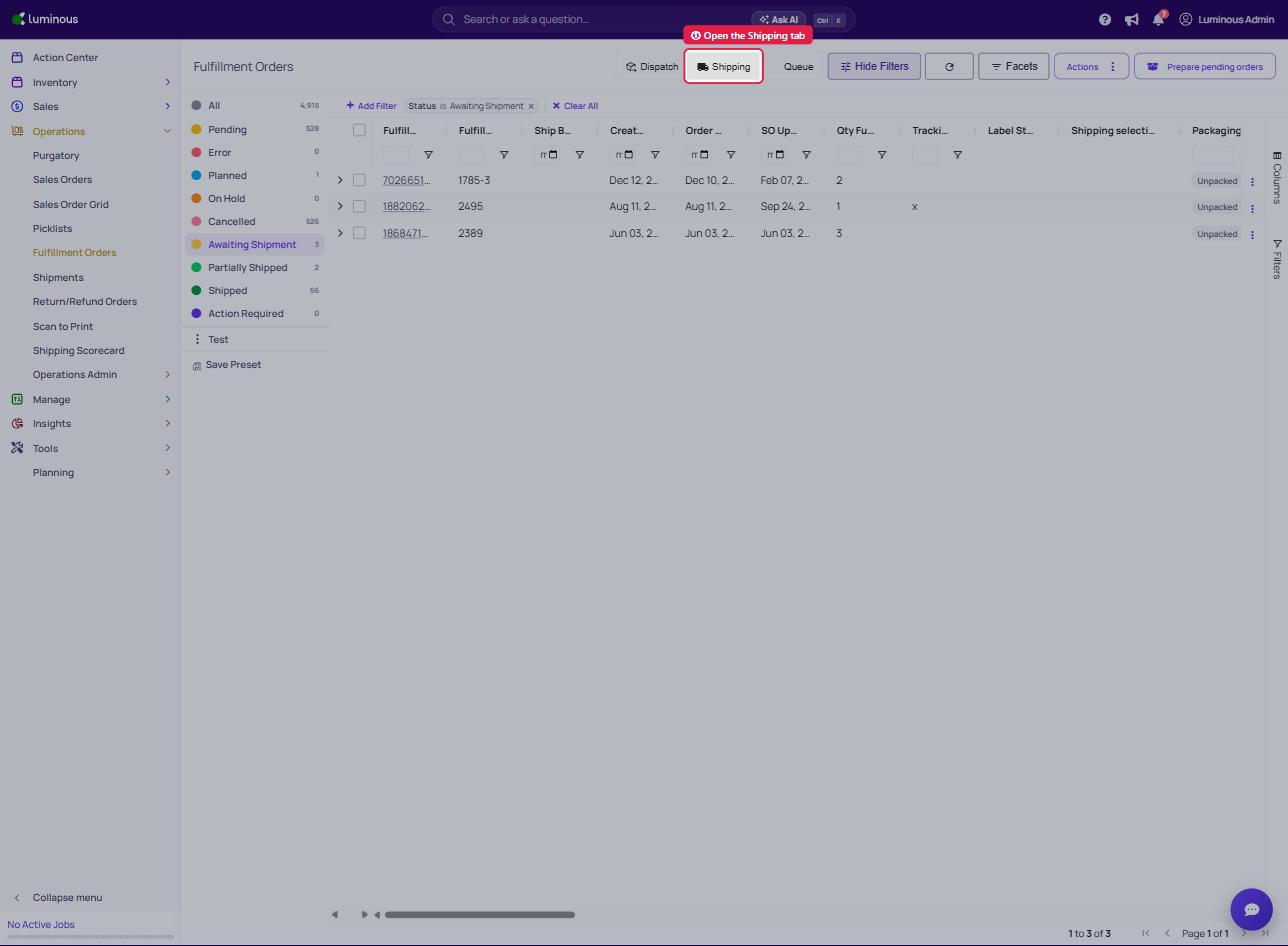
7. Bulk-select the orders you want to ship. Order weights load automatically when available; enter any missing weights in the Weight section of the Print Labels panel.
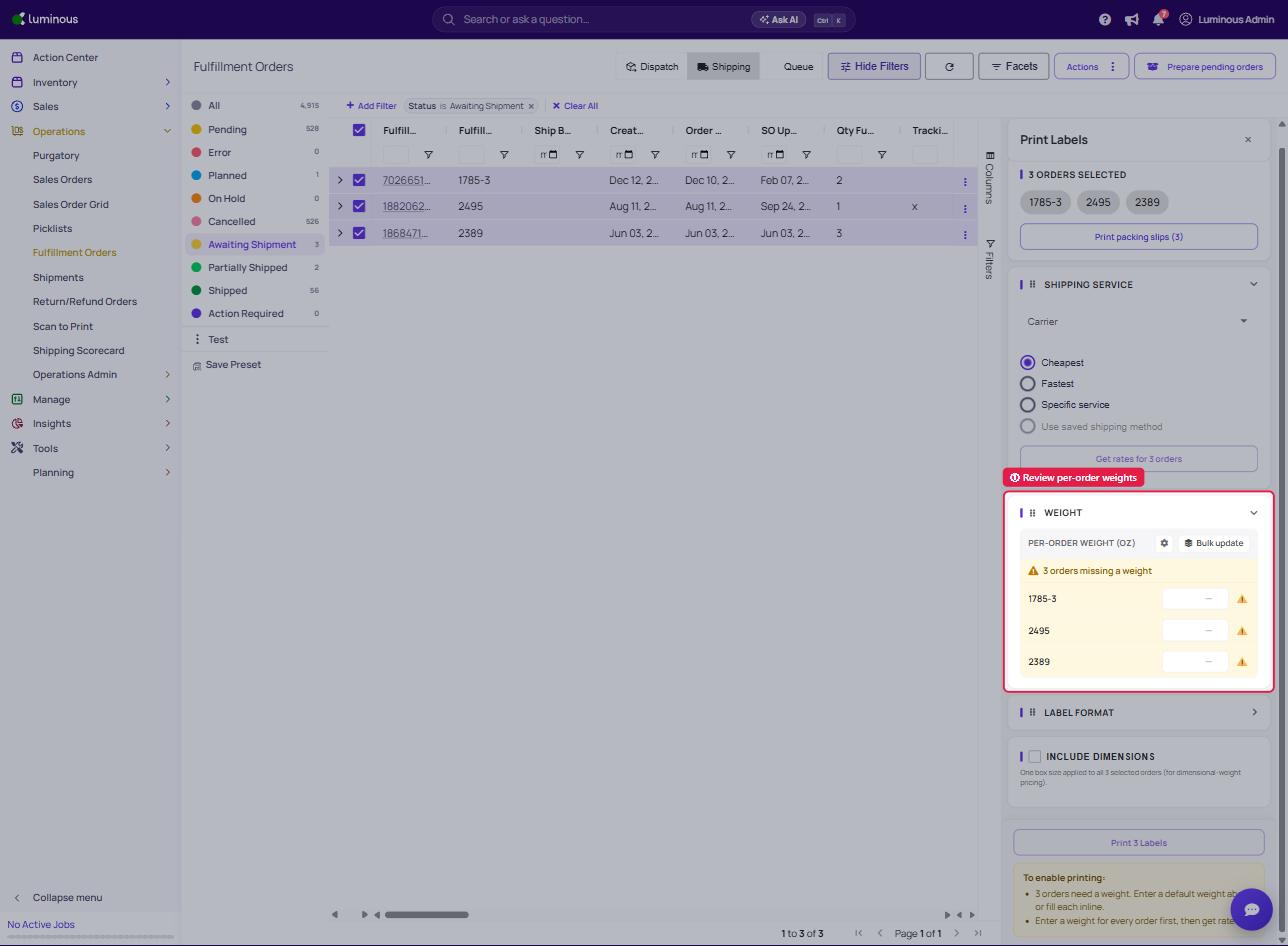
8. Choose a rate strategy: Cheapest or Fastest. (or a Specific service) in the Shipping Service section, then click Get rates. Luminous will load the lowest available rate for all selected orders based on your choice.
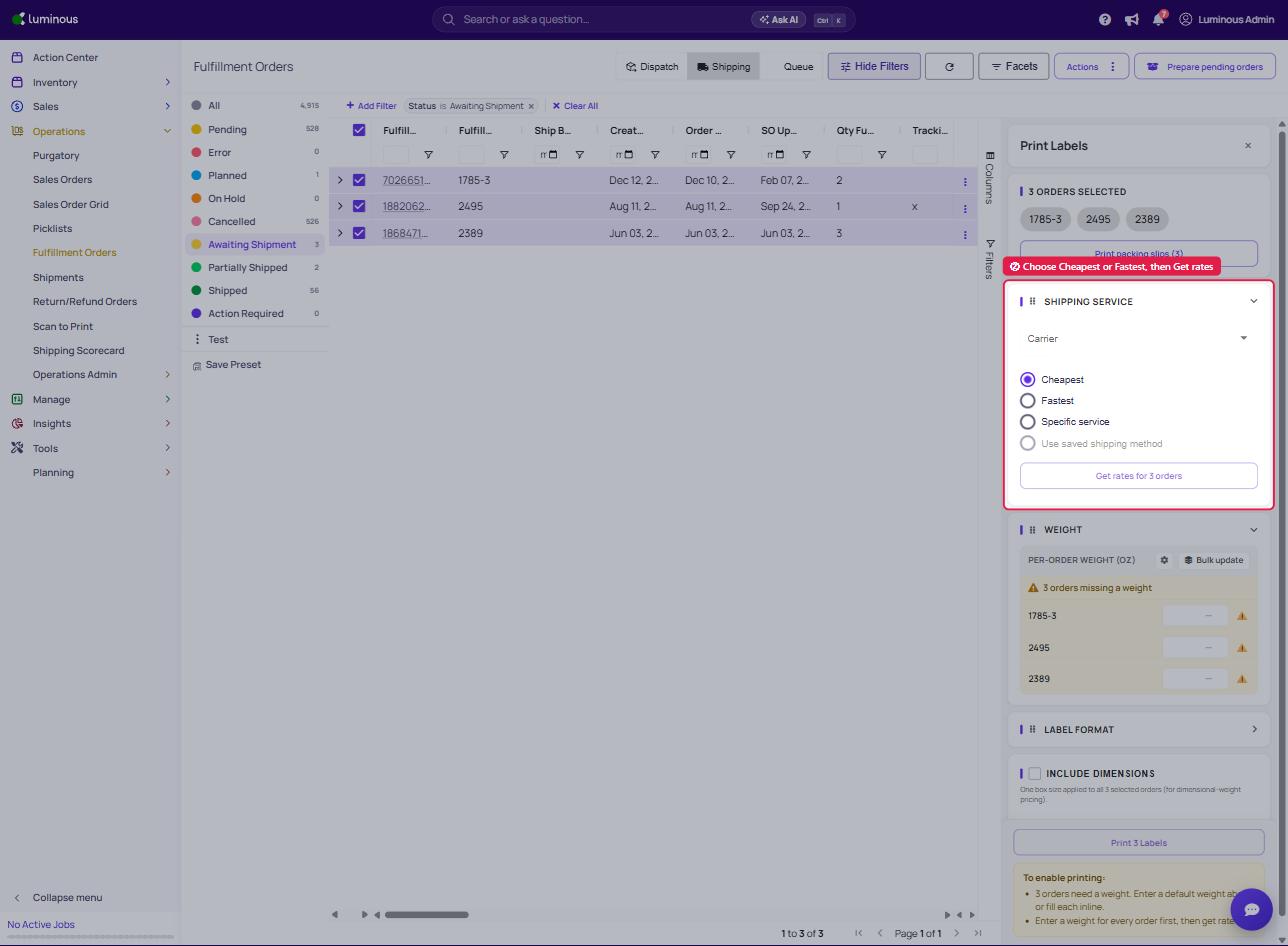
9. Adjust the rate on any individual order if needed by clicking the rate link.
10. Click Print N Labels to generate labels for all selected orders. This charges the card on file for your connected carrier account.
Part 4: Scan-to-Print (optional, for packing stations)
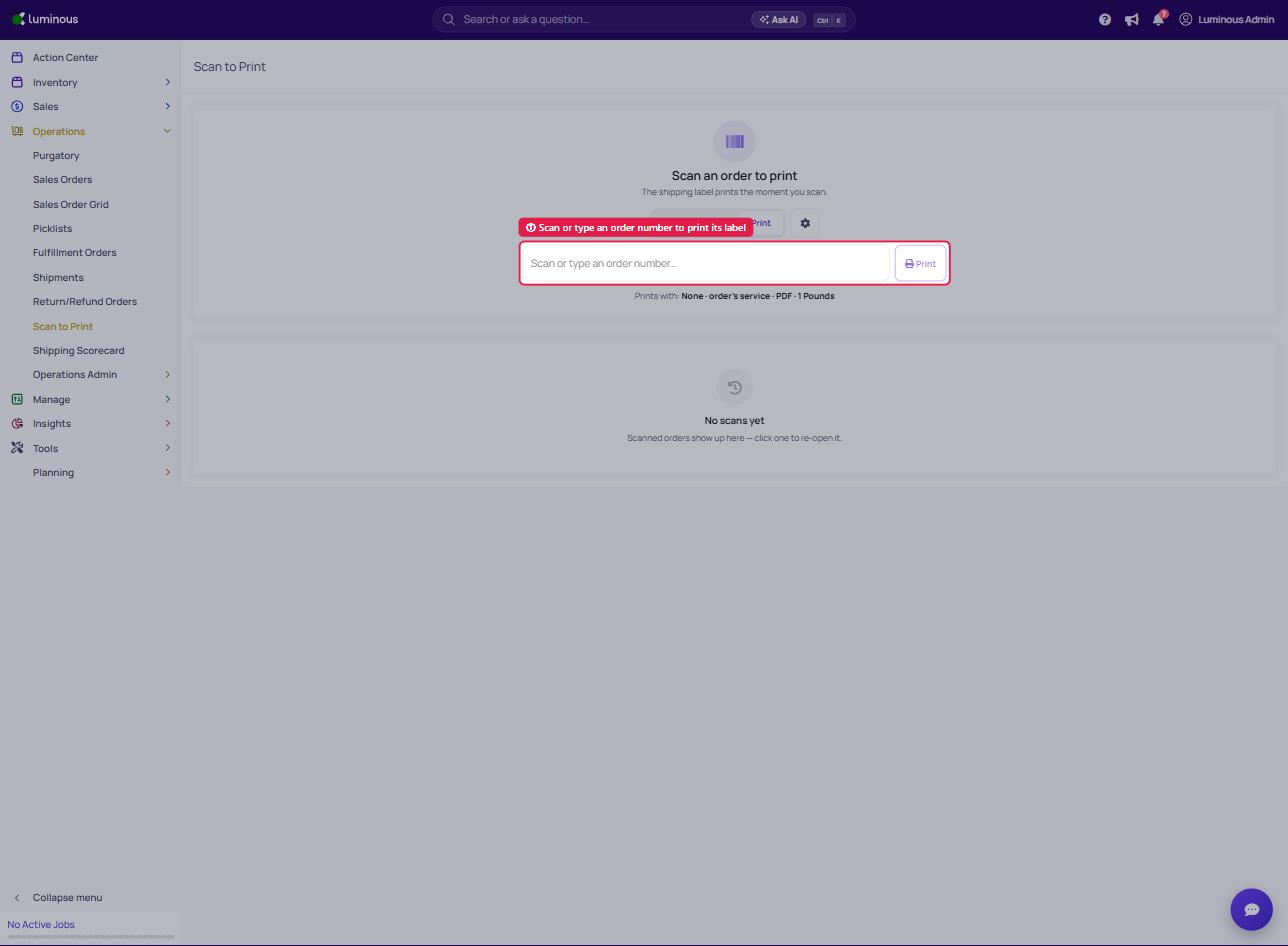
11. Navigate to Operations > Scan to Print.
12. Scan (or type) an order number — the shipping label prints the moment you scan.
Part 5: Monitor Shipments
13. Go to Operations > Shipping Scorecard to view all shipments and fulfillment speed metrics.
Key Features / Options
| Feature | Description |
|---|---|
| Shipping Scorecard | Dashboard showing all shipments and shipping speed performance. |
| Scan to Print | Auto-prints the shipping label the moment an order is scanned. |
| Carrier Accounts (EasyPost) | Native carrier account managed through Luminous's EasyPost account, with auto top-up billing. |
| Bring your own carrier account | Connect a carrier account you already hold directly instead of using EasyPost. |
| Shipping Service mapping | Maps a requested shipping service to a specific carrier rate/service. |
| Rate Discover | Shows historical rate values received for a shipping service. |
| Bulk label printing (Dispatch/Shipping tabs) | Select multiple Fulfillment Orders, choose Cheapest/Fastest, and print labels in bulk. |
| Address verification | Verifies residential vs. commercial address via EasyPost. |
| Label status | Shows the current status of a printed label. |
Additional note that may help: We've added a few columns on the Fulfillment Order page, including tracking number, label status (clickable — lets you check the label's status), and address verification via EasyPost. These should help with both filtering and checking status.
Tips and Best Practices
- Confirm your carrier account (EasyPost or your own) is fully connected and has valid payment details before attempting to bulk-print — a missing payment method will block printing.
- Set up Shipping Service mappings before going live so incoming orders (e.g., from Shopify) automatically resolve to the correct carrier rate instead of requiring manual selection.
- Use Discover when mapping a new shipping service to see real historical rate data rather than guessing which carrier service to map it to.
- If you print in bulk, double-check individual rates before confirming — Luminous auto-selects the cheapest/fastest option across all selected orders, which may not always be what you want for every order.
FAQs and Troubleshooting
Q: Will this replace my ShipStation integration?
No — Label Printing is a native alternative. You can continue using ShipStation, or use Luminous's built-in printing instead. Luminous also provided the ability to print packing slips, which you may use in conjunction with the shipping label printing feature.
Q: Who gets charged when a label prints?
The payment method on file for your connected carrier account (EasyPost or your own) is charged automatically at print time.
Q: What does "Address Verification" check?
It verifies whether an address is residential or commercial via EasyPost, which can affect delivery rates and options.
Q: Can I still change the rate after it loads for bulk-selected orders?
Yes — after Luminous loads the cheapest/fastest rate across your selection, you can adjust the rate for individual orders before printing.
Additional Help
If you run into issues connecting a carrier account, mapping shipping services, or printing labels, contact Luminous Support for assistance.