Inside the Luminous you can manually add or Edit SKU aside from using the template function by following the steps below:
Go to Inventory then SKUs, once you're inside the SKU tab, you will have an option to create new SKU, Edit or Bulk delete.
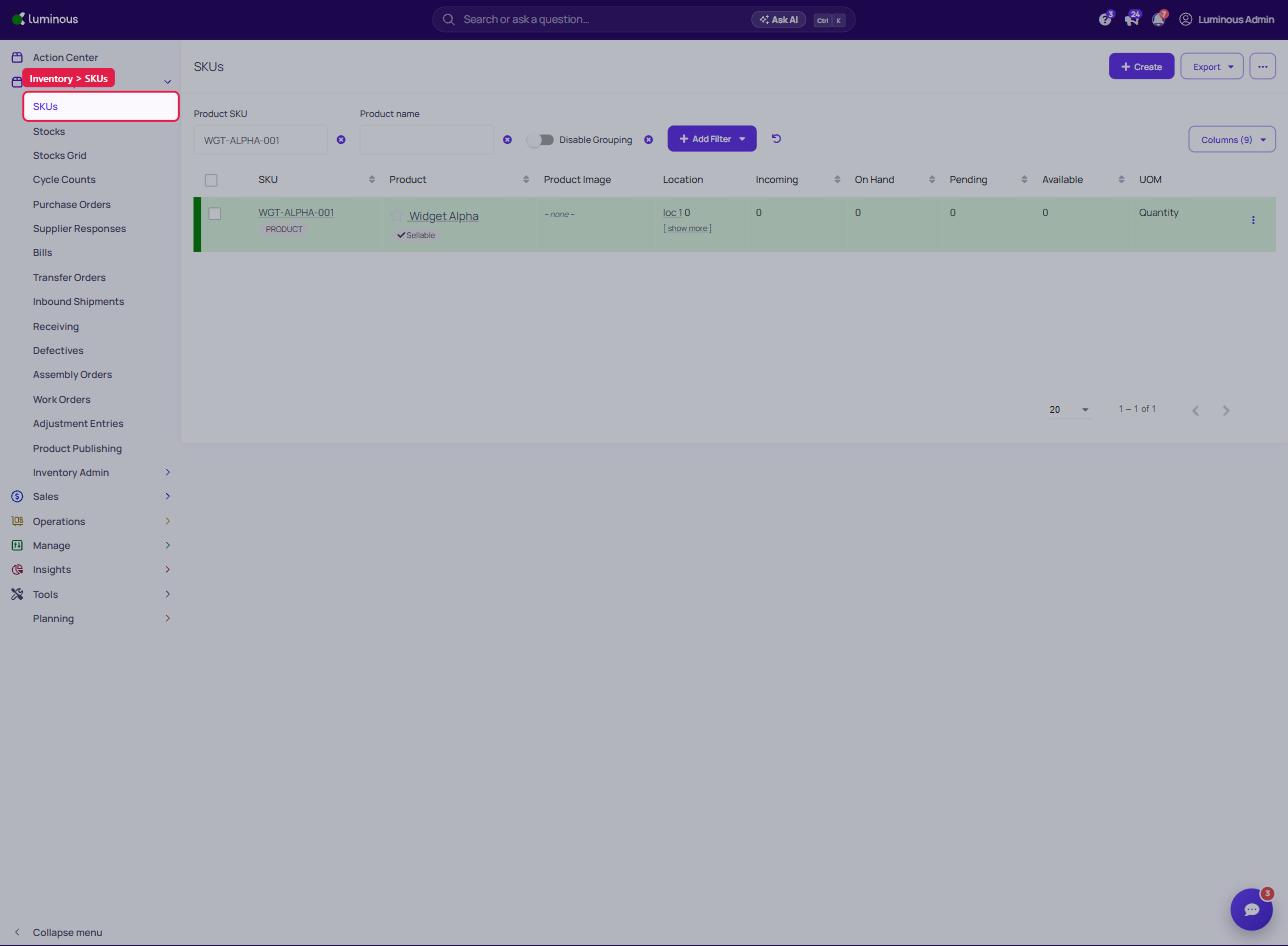
Manually Create SKU inside Luminous
-
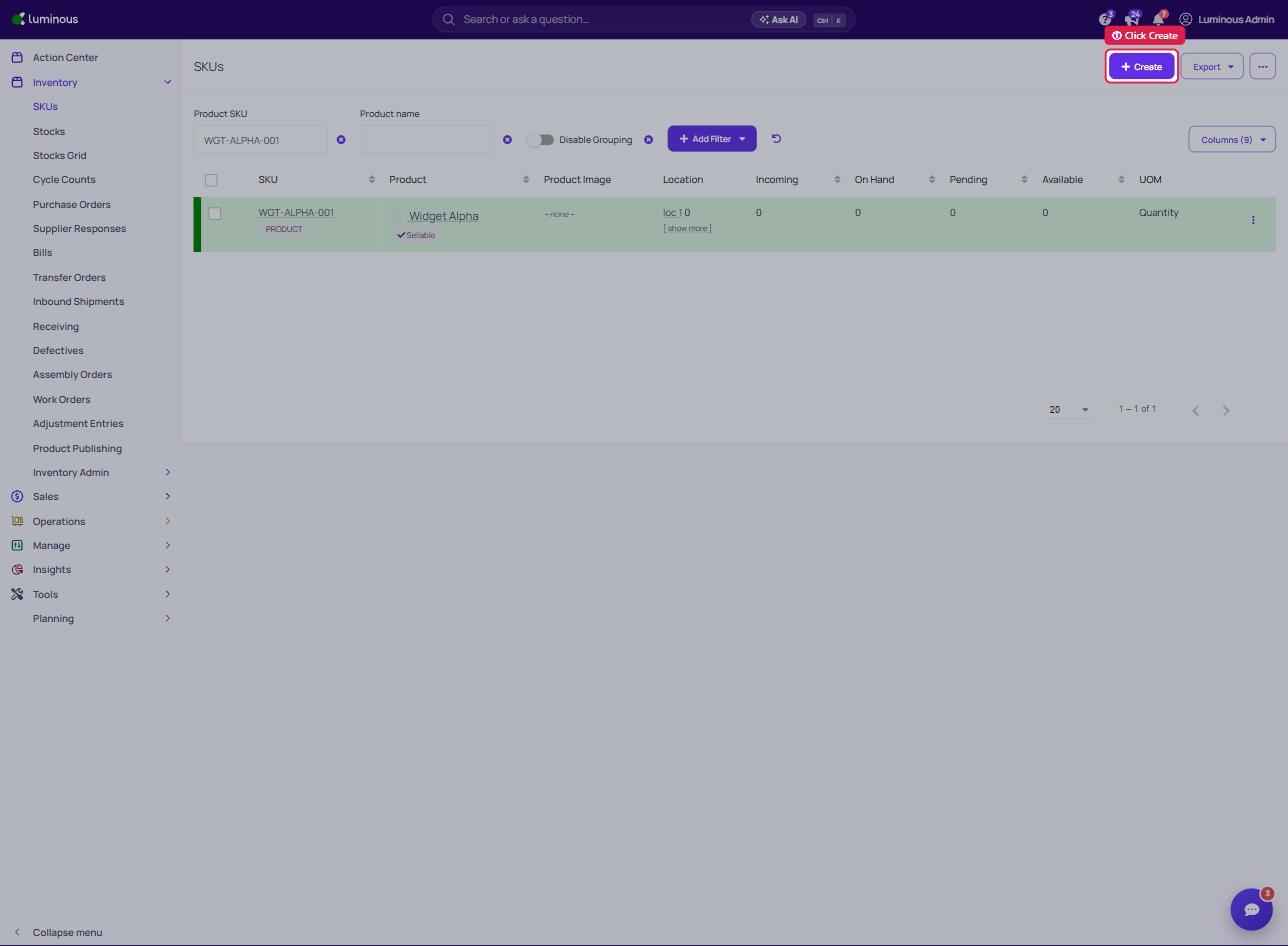
Inside the SKU tab, locate the "Create" button on the top right corner.
-
New window will show and will ask you information about the new SKU.
- Required Field:
- Product Name
- Internal SKU
- Product Category
- Unit Class
- Selling Unit
- Purchase Unit
- Select the Create new SKU once done completing all fields.
- Required Field:
Manually edit SKU inside Luminous
-
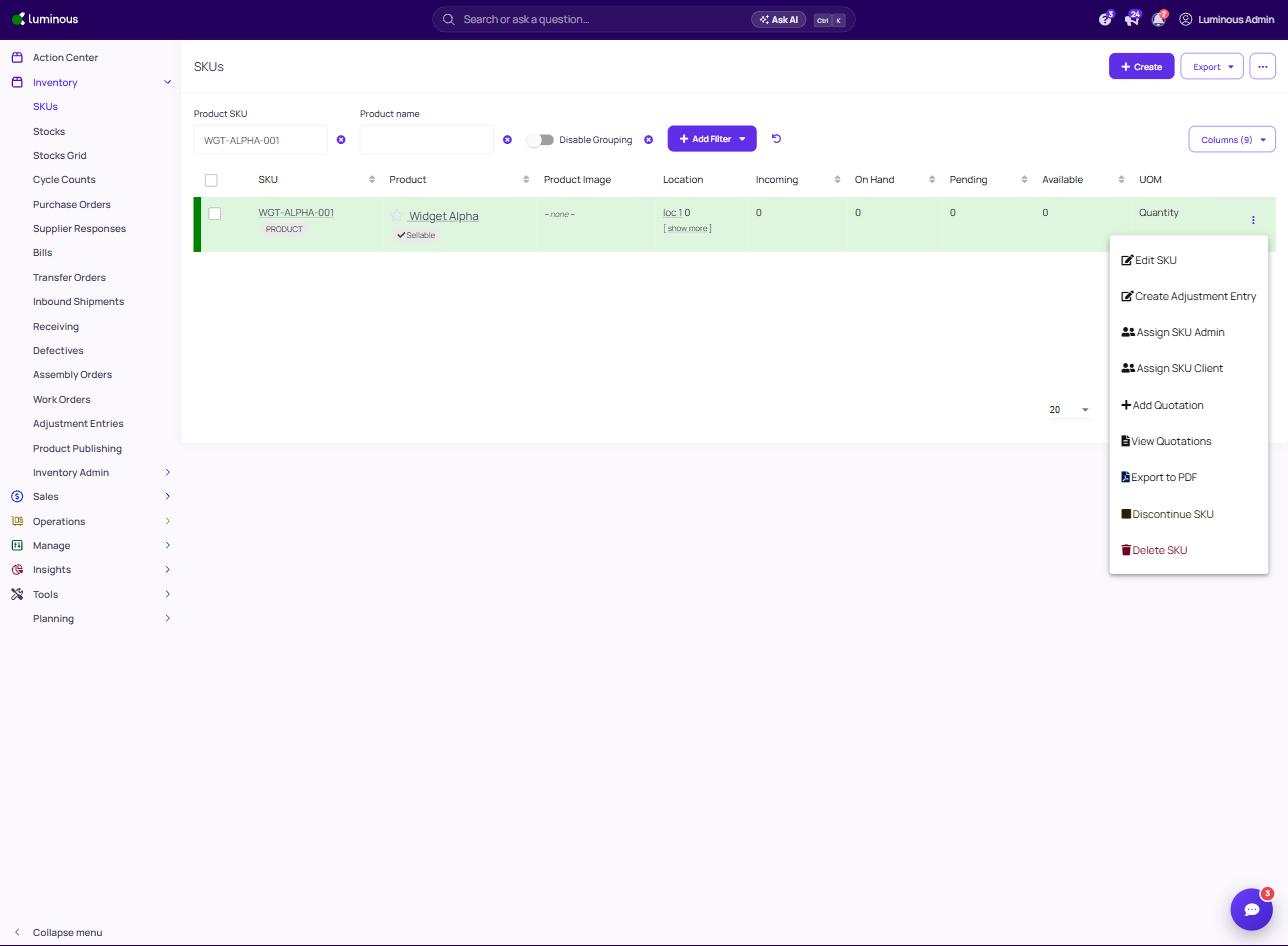
Inside the SKU tab, locate the SKU you wish to edit and click the three dots. Pop up window will appear, select your desired function.
-
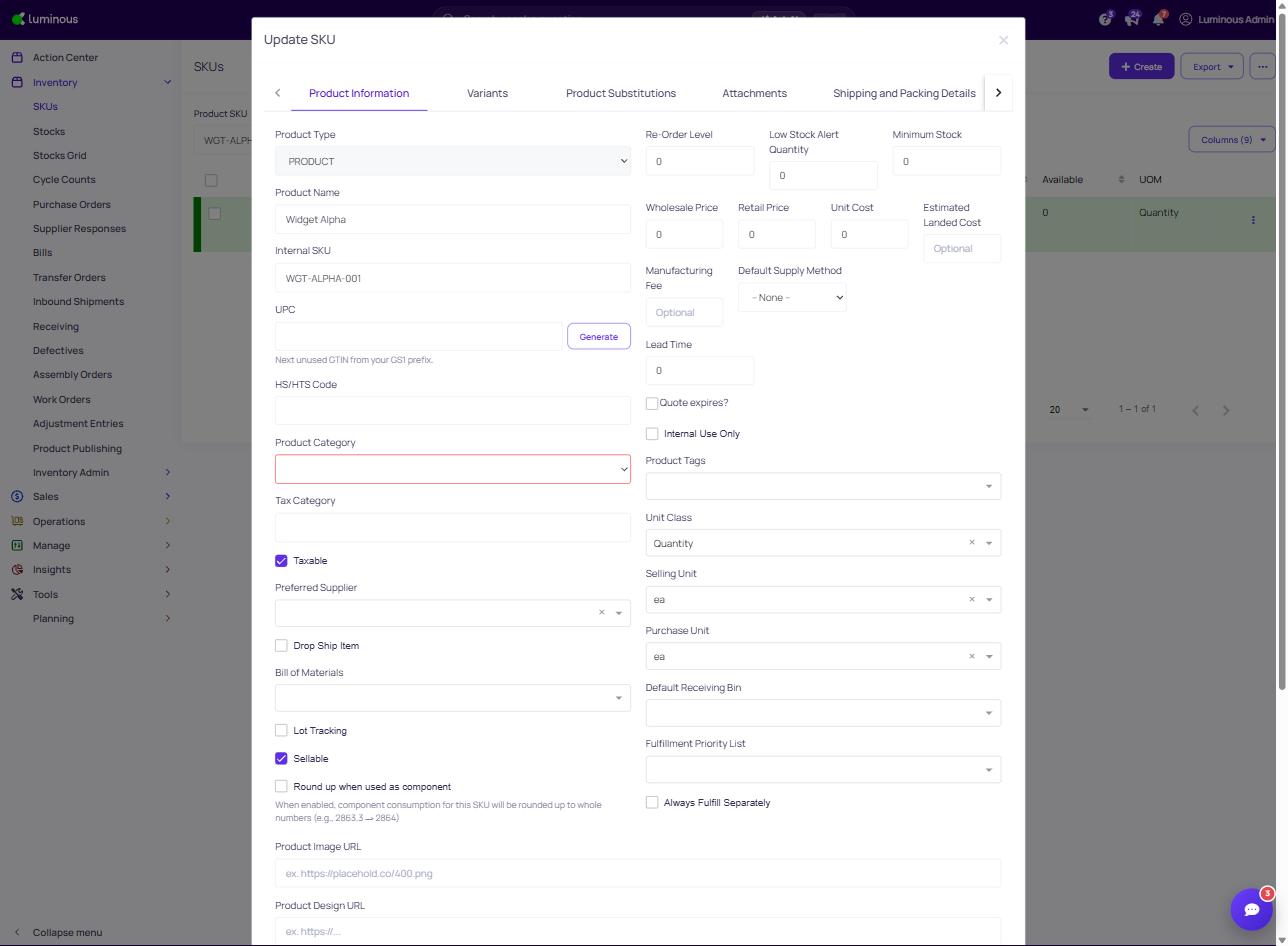
EDIT SKU - gives you the permission to edit your current SKU where you can update product information, product substitution, variants, attachment, shipping and packing information and custom fields.
-
SKU Admin - you can assign a team member for RFQ.

-
Assign SKU client
-
Add quotation
-
View quotation
-
Export PDF
-
Discontinue the SKU
Bulk Delete SKU inside Luminous
1. In order to delete multiple SKU at the same time, go to Inventory - SKU.
-
All your product will be shown, each product have box beside them
-
Tick the box of the SKU's you will delete
-
On the upper right, select the Selected SKUs dropdown.
-
Select delete
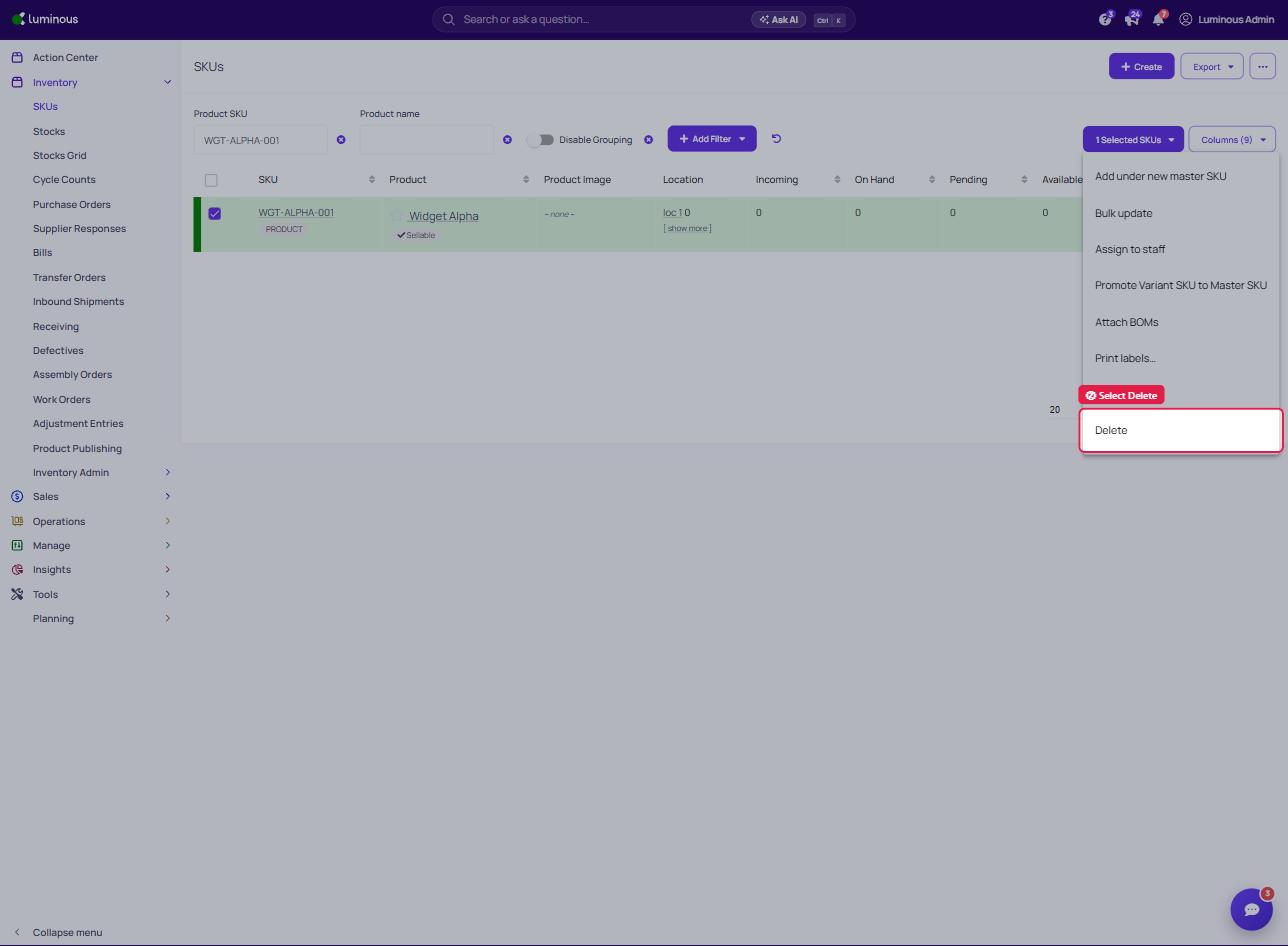
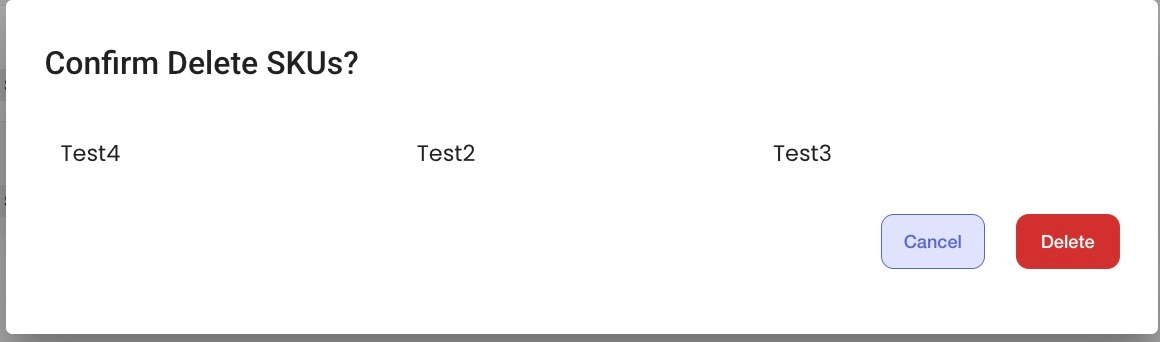
- System will ask if you are sure to delete selected SKU.
- Select delete.
-
Note: Discontinue and Delete are different function. When you delete a SKU, it will permanently removed the SKU in your account and cannot be recovered from your end.